flashhole
Addicted to ArboristSite
I had to go away on an extended business trip that delayed me getting to my Granberg Mill. Had the day off and spent a few hours with it. Here are some pics.
First thing after assembling the mill (other thread) was to build the runner assembly.
Granberg brackets - a bit disappointed with these for the amount of money they get, they could be 4" longer. Drilled 3/4" counter sink holes first then a 3/8" through hole. The counter sink only needs to be deep enough to get the self locking nut below the surface of the runner. The directions say at least 1/2". That's too much. My nut driver used to tighten the self locking nuts runs out of throw before it bottoms out and locks the bracket to the runner. Had to use washers to lift it. Not a big deal but they should be more descript in the instructions.
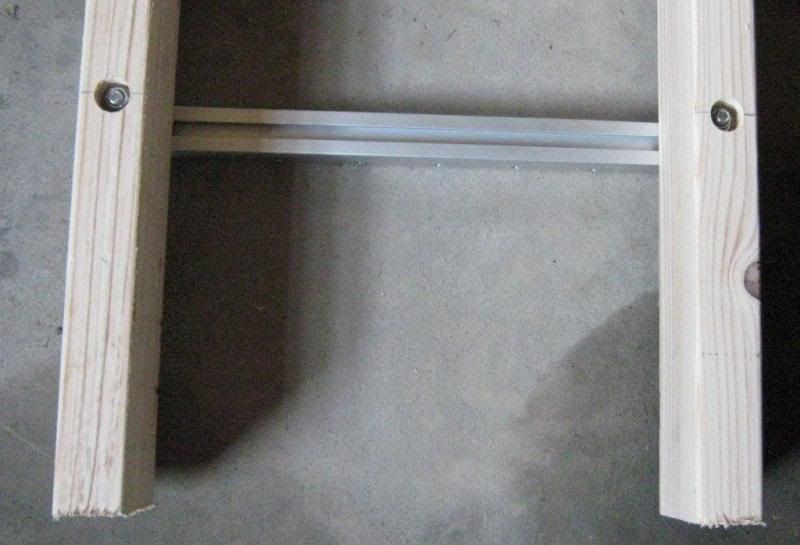
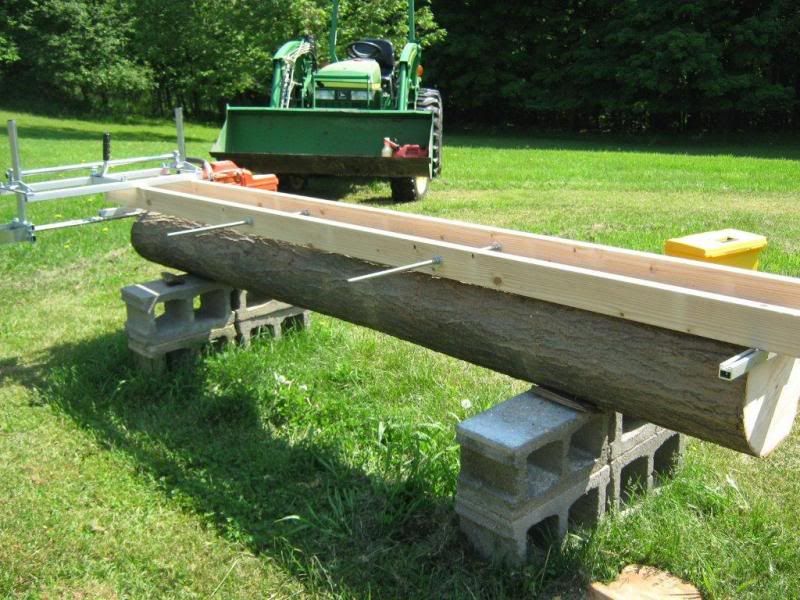
I opted to use 1/2" threaded rod as stabilizer bars on the rail assembly. This turned out to be a good decision. There is a lot of surface area on the washer/nut assembly and they only need to be finger tight. I will replace the hex nuts with wing nuts.

Here's the finished rail assembly. My bar is plenty long to clear the end of the threaded rod but I will likely cut them shorter because the Granberg brackets are so short. I have decided to dedicate this rail assembly to smaller logs and build my own end brackets from angle iron. There is lateral adjustment but no forward/back adjustment. This forces you to cut the logs to be milled to a specific length. I used 9'.
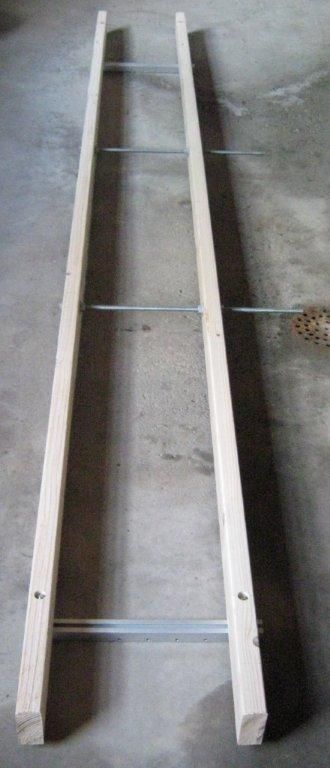
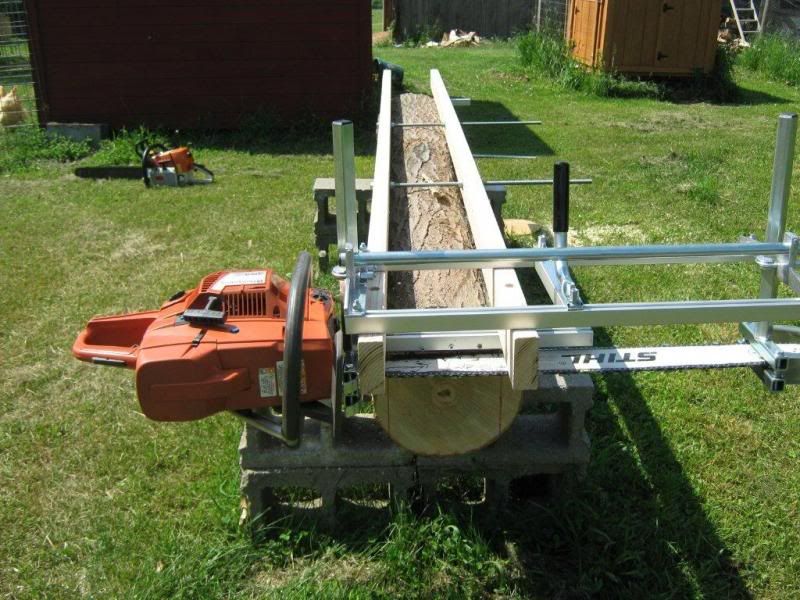
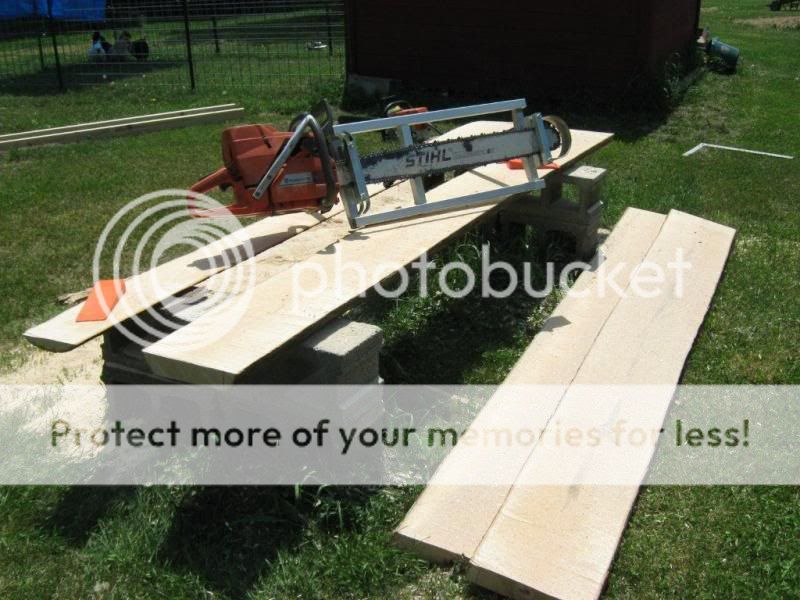
I extended the rails beyond the length of the log to accommodate the mill so I can get a flat entry into the log. Here's how the saw/mill fit on the rail assembly. You can see the chain is out board of the bracket that screws to the log and both mill bars rest on the runners.
First thing after assembling the mill (other thread) was to build the runner assembly.
Granberg brackets - a bit disappointed with these for the amount of money they get, they could be 4" longer. Drilled 3/4" counter sink holes first then a 3/8" through hole. The counter sink only needs to be deep enough to get the self locking nut below the surface of the runner. The directions say at least 1/2". That's too much. My nut driver used to tighten the self locking nuts runs out of throw before it bottoms out and locks the bracket to the runner. Had to use washers to lift it. Not a big deal but they should be more descript in the instructions.

I opted to use 1/2" threaded rod as stabilizer bars on the rail assembly. This turned out to be a good decision. There is a lot of surface area on the washer/nut assembly and they only need to be finger tight. I will replace the hex nuts with wing nuts.

Here's the finished rail assembly. My bar is plenty long to clear the end of the threaded rod but I will likely cut them shorter because the Granberg brackets are so short. I have decided to dedicate this rail assembly to smaller logs and build my own end brackets from angle iron. There is lateral adjustment but no forward/back adjustment. This forces you to cut the logs to be milled to a specific length. I used 9'.

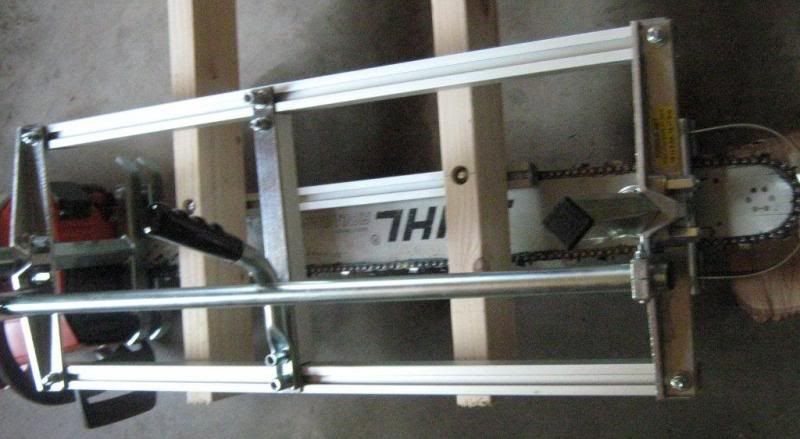
I extended the rails beyond the length of the log to accommodate the mill so I can get a flat entry into the log. Here's how the saw/mill fit on the rail assembly. You can see the chain is out board of the bracket that screws to the log and both mill bars rest on the runners.


