barn install question

Arborist Forum

Help Support Arborist Forum:

This site may earn a commission from merchant affiliate links, including eBay, Amazon, and others.

aaronmach1

ArboristSite Operative
Joined
Dec 21, 2011
Messages
496
Reaction score
44
Location
michigan, usa
The ceiling mount kit will do just fine on the more horizontal area of a gambrel roof. It will still need chimney from the ceiling mount to the minimum distance above the roof surface and stove pipe from the stove to the ceiling mount. Obviously you do not want to cut any ceiling joists or roof rafters so take that into account when deciding where to place the stove and where to route the flue. The kit is designed to support the chimney pipe and provide the minimum required clearance to combustibles, which includes your insulation.
 
The box part is what you frame into the ceiling and you run your pipe up to that then put the triple wall on top. That is what supports the upper part of the flue pipe. I'll get a photo of mine in a bit then you will understand.

JT
 
1st pic the box is the attic insulation shield. It ensures that you keep combustibles from touching the pipe. The "box" is just the spacer to hold insulation away. It is over height to allow for any thickness of insulation including blown in types. FYI, in the picture the "box" is upside down. The flange would sit on top of a 2x4 or 2x6 frame to support the weight of the chimney pipe.
The 2nd kit is for mounting out a side wall and not thru the roof.
TSC has pictures showing what the different pieces are for.
Little better picture of the install on this site.
http://www.catskillhouse.us/blog/installing-our-jotul-f100-woodstove/
 
thanks for that link, now i see the box and understand it.
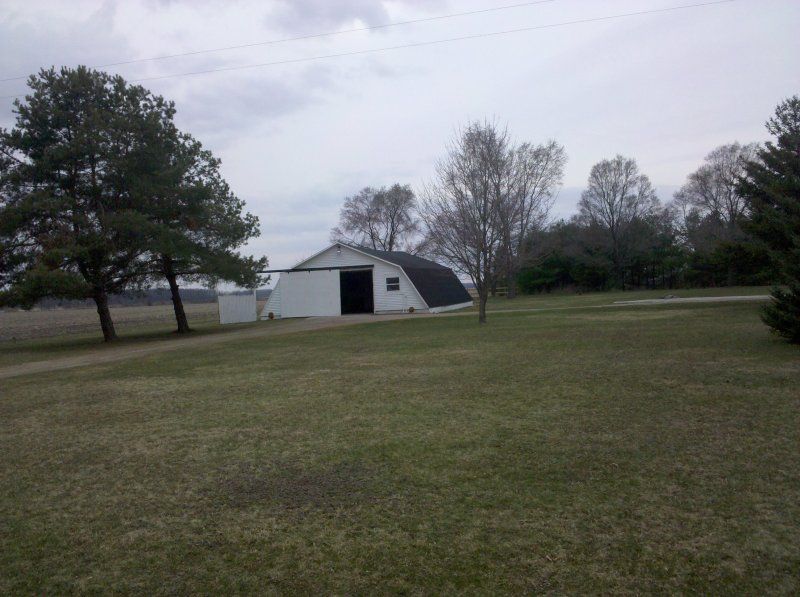
Still little unsure how im going to do this. Gambrel barn, only heating front half room (28ft x 26ft) old drywall and insulated. Metal Roof extends down to about 8 inches from the ground. So im thinking of exiting about head height out the "wall" or roof.
Im picturing i need to run stove pipe over to wall, then a section of double wall pipe threw the wall/roof, then 90deg bend and up about 6 feet with a rain cap on top. Maybe 2 support brackets outside to hold it all straight. And a type of rain boot where the pipe exits the roof.
heres barn:
 
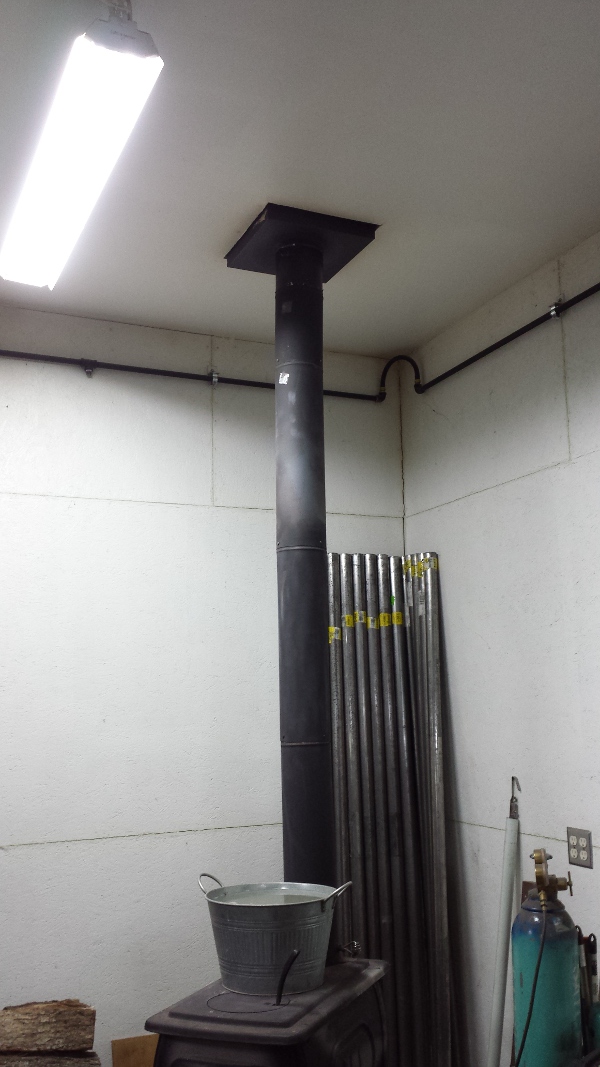
Here is my LogWood stove. You can see the square part is in the ceiling.
LogWood01s.jpg
 
very nice looking setup!
after review the last hour i beleive i will be going with the first kit including the box like you have. Thanks to everyone helping walk me through this!
 
also, is there any issue with me using a "T" out the back of the oven for the stove pipe instead of a 90deg? I would like to use a "T" with a cap on bottom, so clean out is easy.
 
In addition to the above question, can i use this for my chimney pipe? its says in specs, stove fuel: pellet. does that mean its only for pellet stoves?
http://www.tractorsupply.com/tsc/product/super-pro-stainless-steel-chimney-6-in-x-48-in?cm_vc=IOPDP1
When you choose your mounting kit you are basically choosing what to use for chimney. Every manufacturer makes the chimney a bit different, mostly in how pieces are joined, so once you have a brand you pretty much need to stay with it to get a good solid install.
If you anticipate going through a wall you want the other installation kit because it is not just a case of running through a wall. Wall penetrations require specific clearances that you will not meet just freehanding any double wall pipe. After your first penetration you are strictly using chimney components on any install, not any kind of stove pipe. If you penetrate in 2 places you need to maintain the minimum clearances specified by your chimney manufacturer for that roof penetration. Flashings are made for roof penetrations that are designed to fit well onto chimney and have a large enough flat base on them to hold the minimum clearance spacing for you at the penetration. When I did my 6 inch on a 4/12 roof the flashing looked enormous but it needed to be that big to hold the chimney away from combustibles far enough and still give me something to attach to the roof itself.
 
My WonderWood has a rear flue with a 90 and I've never had a problem cleaning out the pipe after brushing the chimney out. A Tee sounds like a mess waiting to happen when you take the cap off it will be full of stuff.

JT
 
thanks guys i will not use a "T". ill just have to pull the 90 off next to the stove when i sweep the chimney.
 
I always had a "T" in my stove pipe. Like you say it makes cleaning the pipe a lot easier. I screwed a 6" coffee can to the bottom of the "T" and any soot would collect there, drop the can off, dump soot, replace can. You can do it without putting the fire out.
If I were you I would go to the higher portion of the roof. Everything would be a straight shot without any elbows or 90's.
 
thanks for that link, now i see the box and understand it.
Still little unsure how im going to do this. Gambrel barn, only heating front half room (28ft x 26ft) old drywall and insulated. Metal Roof extends down to about 8 inches from the ground. So im thinking of exiting about head height out the "wall" or roof.
Im picturing i need to run stove pipe over to wall, then a section of double wall pipe threw the wall/roof, then 90deg bend and up about 6 feet with a rain cap on top. Maybe 2 support brackets outside to hold it all straight. And a type of rain boot where the pipe exits the roof.
heres barn:

nice setting! I just love barns! never seen one I din't like! is that a runway to the L of the barn in ur pix here? just wondering....
 
aaron, not sure of the wall sizing on the 48" pipe you show but here in Ontario we have to use a minimum 6-2 which means 6" inside pipe with 2" thick wall. I would bet that the 48" in your link is a 6-1" which here would be suitable for pellets or maybe oil but I'm not real sure. I have about 30' of the 1" and it's useless here.
This is the one I would use for solid wood I think, it doesn't list the thickness either but I think it is the 2".
http://www.tractorsupply.com/tsc/product/dura-vent-duraplus-stainless-steel-pipe-length-6-in-x-36-in
 
No runway, its a mile long field. Farm country around here. My house is about 40 yards to the right of the pic, big "U" shape driveway. that was 7 years ago when i first moved in.
I ended up getting this kit at my local ace hardware with 2 sections of 36 inch double wall pipe.
http://www.acehardware.com/product/index.jsp?productId=29729776

now im all done up to cutting through the metal roof tomorrow. YIKES! its the old corrugated metal roofing so im wondering how the heck to seal the flashing boot in the kit. Should i just cut the hole tight to the pipe and silicone around the pipe without a boot?
 
In principle the flashing is covered on the high side by the roofing and sits on top of the roofing below it. You end up with overlapping layers that each one sheds any water on top of the next one as you go down. Normally, with a shingle roof, that is easy because you just cut away all shingles that would contact the chimney then take the flashing and slide it under the uphill shingles and let it sit on top of the downhill shingles. Then you fasten the flashing in place and use high temperature silicone to seal everything so that nail holes and such do not become leakage paths. The storm collar over the flashing also requires high temperature silicone sealing. I am guessing here because I have never worked with a tin roof but it seems to me you need a new piece of roofing a couple of feet long that you can cut so that you can slip it under your existing roof and it can extend from below the cut in the existing roof down over the top of the flashing. Then the flashing would be placed over the downhill existing tin roof. What you would end up with is several overlapping layers near your flashing that each shed water on top of the roofing piece below them.
 
Back
Top