Porting the 361 Big Bore

Arborist Forum

Help Support Arborist Forum:

This site may earn a commission from merchant affiliate links, including eBay, Amazon, and others.
Joined
Nov 8, 2006
Messages
53,727
Reaction score
33,340
Location
Franklin, OH
Tonight I began the process of porting the 361BB prototype that I have. The P&C look as good as new upon disassembly. The goal of this saw is to be competetive at a GTG level. It will also be used as a firewood saw. I took measurements on the saw tonight and will post them here. I would appreciate any feedback you guys might have on what numbers I should go with. Here's where it stands right now.

  1. Squish = .017, no base gasket. That's how I've been running it.
  2. Compression was 185 cold after only a little run time. I forgot to check it tonight.
  3. Exhaust 105*
  4. Transfers 125*
  5. Intake 71*
  6. Blowdown 20*
  7. Exhaust width 1.00", can go to 1.25".
  8. Intake width 1.03", can go to 1.25".

The exhaust seems aweful low, but this saw 4-stroked out to15,800. If I went to 98*, I would have to raise the roof .075"! To get to 95* would require raising it .115"! I can't imagine taking that much out. What numbers would you go with?

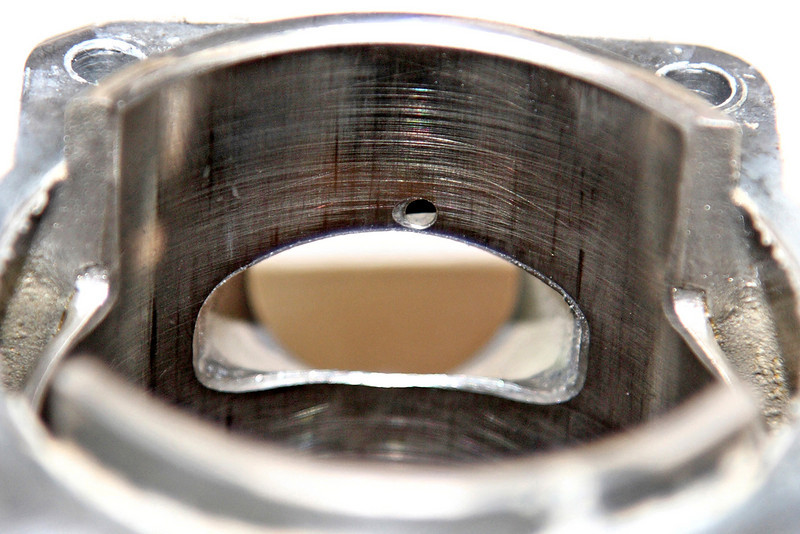
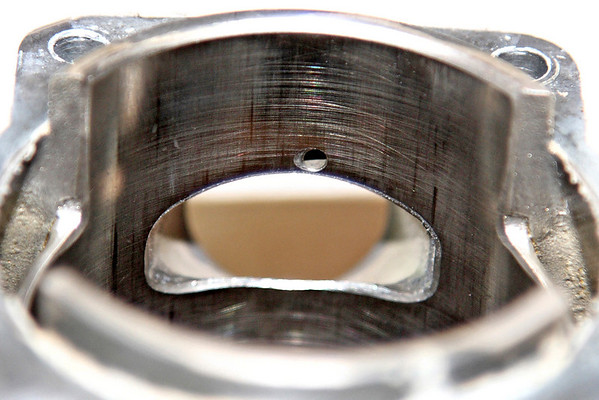
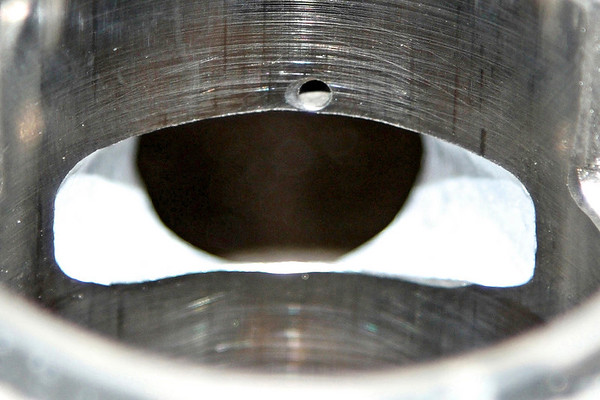
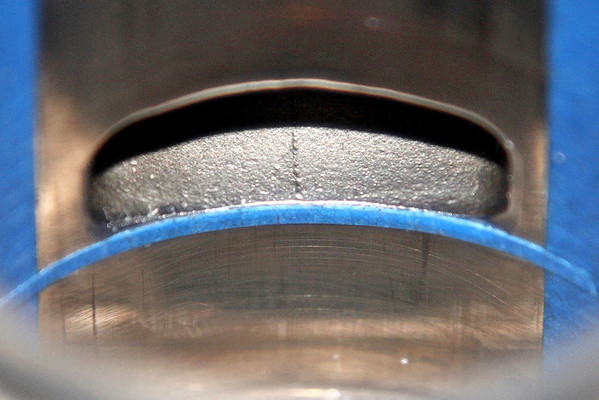
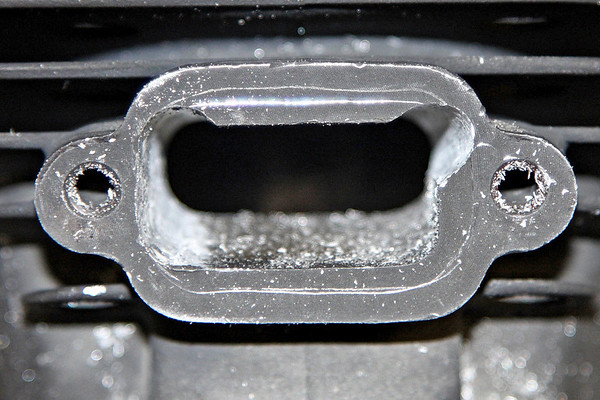
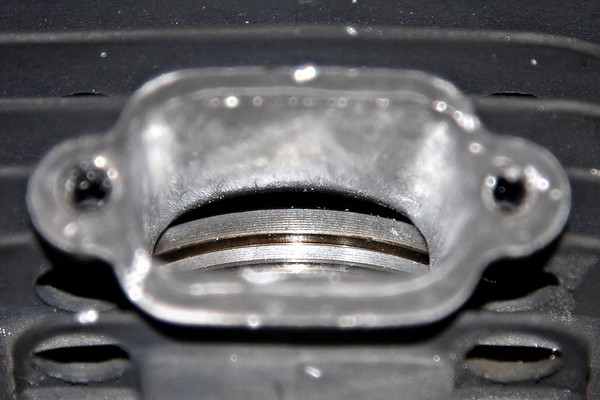
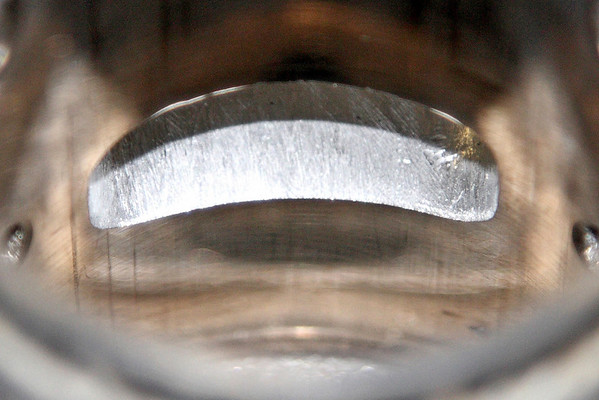
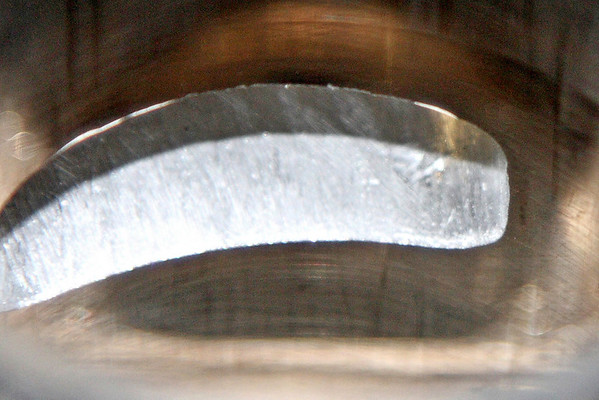
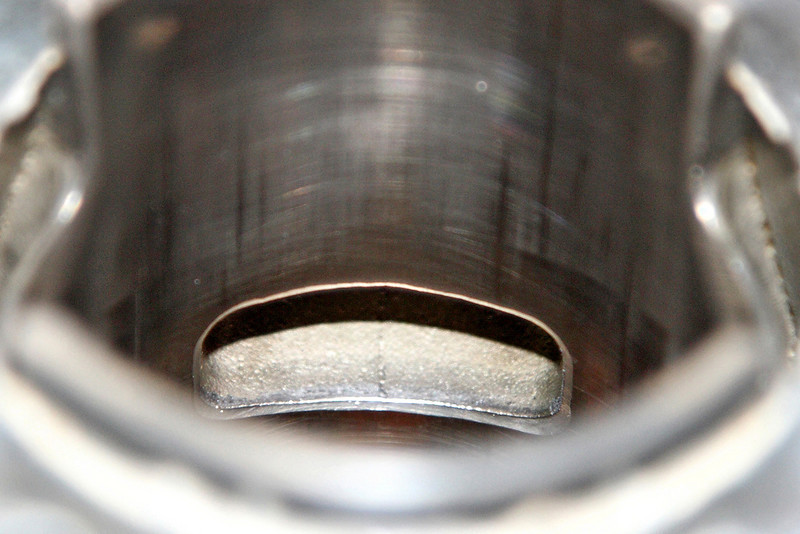
The exhaust port shape is pretty nice the way it is. The intake floor is very round. A lot of improvement to be made there. As you can see, I've got room to widen quite a bit, nearly .250" on both sides.

Whatcha think?

Exhaust Port
449724868_aWNYF-L.jpg
449724643_5dKrT-L.jpg


Intake Port
449724846_gtokJ-L.jpg
449724672_EK5RE-L.jpg


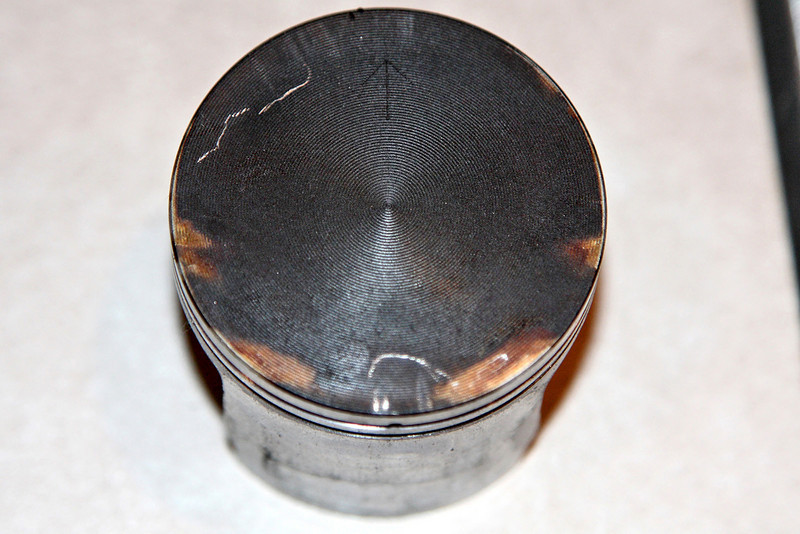
Crown after running 15,800.
449724657_YbTjH-L.jpg
 
How about these for numbers? Do these look good for a torqey GTG saw?

Exhaust 100* / Duration 160*
Transfers 120* / Duration 120*
Intake 75* / Duration 150*
Blowdown 20*

Or would you leave the tranfer timing alone for a longer blowdown of 25*?
 
Last edited:
Wasn't this thread in the Hot Saw section? Hopefully some of regular mod guys come and give you answers about the durations. You know most of the people here are in the dark when it comes to modding. Me included.
 
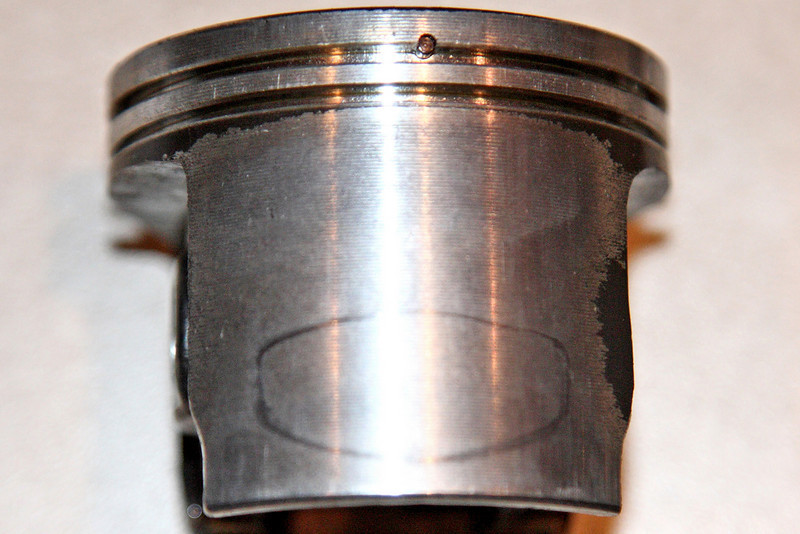
I have to assume that the coating is only for break-in. It wears off right away.


Why would you need a coating for "break-in"? The RVR of a modern cylinder is correct when made, and the piston isn't supposed to wear except over a long time. Only the rings bed slightly.

Moly-coating is supposed to prolong the life of the pistion... and stop the skirts skirts wearing. Is it advertised as moly-coated, or what do they call it?

Your pic of the intake port:
Is it just the pic or do you have a bunch of vertical wear lines? And.. that "crosshatch" looks "odd", almost like it was done with hand held hone, and not carefully. It is hard to get a decent pics of the crosshatch as the lighting tend to pic up on only a few surfaces, but compare it to your oem.
 
Last edited:
If the coating is a thou thick as soon as it's gone your already starting to eat away and having a nice tight fitting piston.

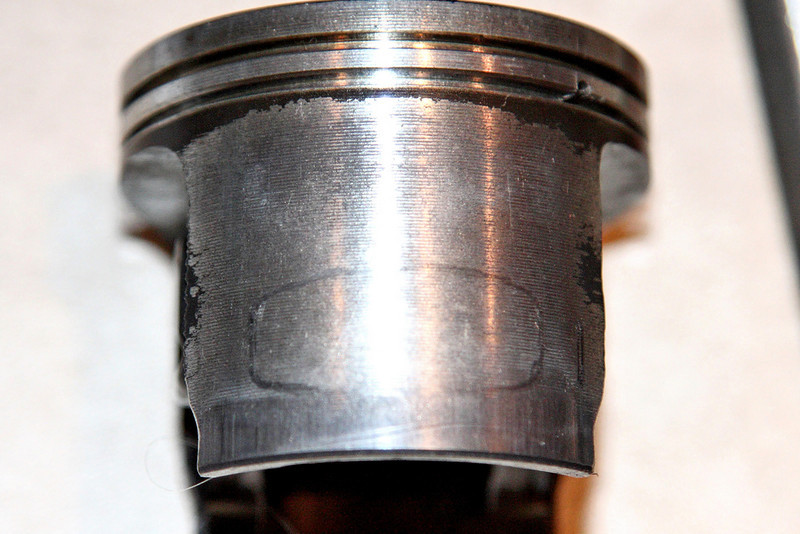
Skirts are showing quite a bit of wear low on the skirts both front and back. This is odd for a saw with little time on it.

The bore looks very rough and there is something odd about the placement of the pulse inlet.
 
Why would you need a coating for "break-in"? The RVR of a modern cylinder is correct when made, and the piston isn't supposed to wear except over a long time. Only the rings bed slightly.

Moly-coating is supposed to prolong the life of the pistion... and stop the skirts skirts wearing.

When you gonna try the prototype 441 BB kit for Baileys? I think you would be an excellent candidate to help get these kits perfect.:greenchainsaw: :givebeer:
 
If the coating is a thou thick as soon as it's gone your already starting to eat away and having a nice tight fitting piston.

Skirts are showing quite a bit of wear low on the skirts both front and back. This is odd for a saw with little time on it.

The bore looks very rough and there is something odd about the placement of the pulse inlet.

Do you have any suggestions on the port timings?
 
I need a new circlip to put this thing back together. Getting a OEM Stihl part would be fastest. What saw has an .432" wristpin and uses a .040" thick wire circlip? The OEM 361 circlip uses only .030" thick wire.

None that I'm aware of... My packets of clips around that size are all the same wire. Maybe Husky?
 
None that I'm aware of... My packets of clips around that size are all the same wire. Maybe Husky?


i spent tooo much time earlier looking for one of thoes stupid clips.


You know usually when you loose a snap ring or anything of the type, there is a little "tingg" when it lands. There was no sutch noise so i looked where ever there was soft material except my jacket which was at arms length. i figured that i went pretty far.

it was chillen on my jacket which i was just about to yank up and vacate due to anger. Lucky i saw it!
 
Exhaust 100* / Duration 160*
Transfers 120* / Duration 120*
Intake 75* / Duration 150*
Blowdown 20*

Well, these are the numbers I'm going, I mean have gone with, lol. The intake and exhaust are done. I still have to do the transfers and piston.

A lot of you guys have been asking about porting. I'm no expert, but here's what I do.

  1. Begin by measuring compression, squish, and port timing. That's a whole topic in itself that I'm a total rookie at. I can get the job done, but that's about it.
  2. .020" is the general rule of thumb for safe squish. The larger the saw, the greater the squish will need to be. For example my 260 is at .015" and my 084 at .021". No signs of detonation or errosion.
  3. I take both the intake and exhaust as wide as the piston skirts will let me. You have to watch out for ring end locations as well. There must by cylinder wall for the ring end to ride on as it goes past the port window.
  4. Port shape is very important. Make the sides of the intake and exhaust straight. Make the roof of the exhaust and floor of the intake "flattish", but make sure there's a slight radius so that the ring is tucked back in gently and dooesn't snag. Put the piston in the cylinder and check your work. The port should close from the sides to the center. The floor of the exhaust and roof ot the intake are not that critical since that's not where flow initiates.
  5. I angle the back of the rear transfers back towards the intake side and clean them up in general.
  6. Most Pro Stihls have a lower transfer intake that I taper all the way to the bottom of the jug. The 361 doesn't have those so you won't be seeing them here.
  7. Put a radius bevel on the edge of all ports. This is critical so as to not catch a ring and destroy your work.
  8. Port and flow the windows in the piston. Create angles that promote flow from the inside of the piston to the outside. A lot of material can be removed, but take care not to hurt the structural integrity of the piston.
  9. Port match the exhaust gasket, heat shield, and muffler inlet.
  10. Mod the muffler such that total exhaust oulets is between 125%-150% of the area of the exhaust port at the cylinder wall.

I'm sure I'm missing some stuff here, but you should get the general idea.

Here's some pics of the 361BB in progress.

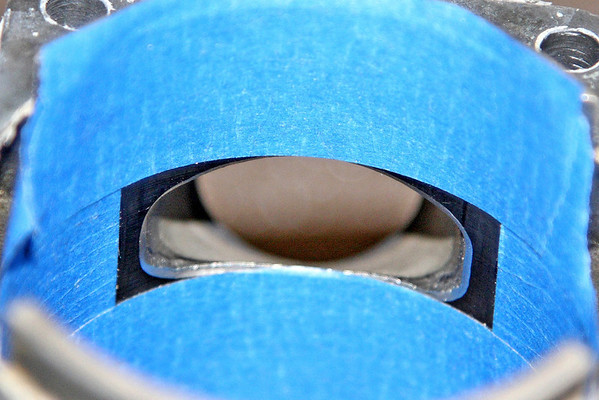
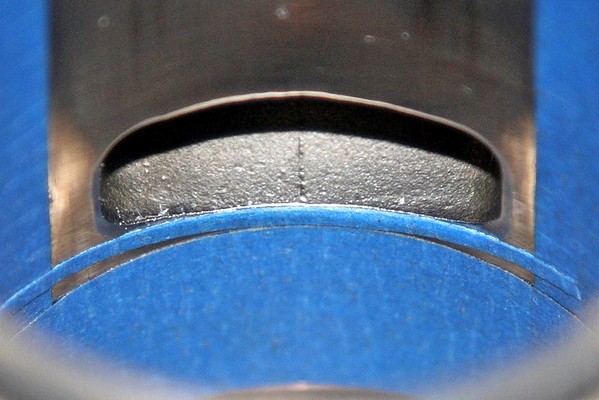
Intake Before and after. Notice that I use tape as the guide for where I will port to.
449724846_gtokJ-M.jpg
450318998_gux24-M.jpg


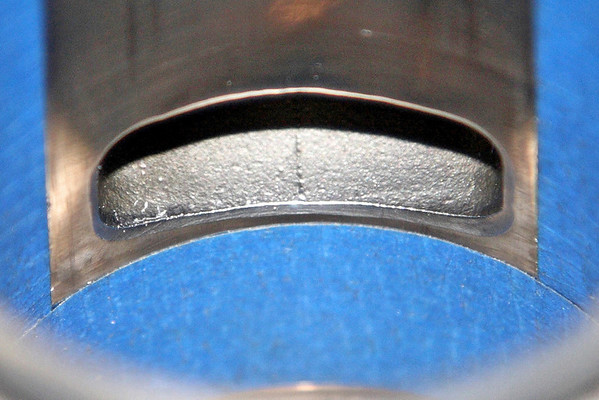
Port finished but not beveled.
450318956_JyLKP-M.jpg


I wanted to raise the exhaust port .055" for a 5* change. I cut tape that wide and laid it along the port edge.
450319175_RZjrq-M.jpg
450319187_YwnSh-M.jpg


I laid another piece under it that I used as a porting guide. You may notice that I took more off one side than the other. That was by design to leave plenty of room for the ring end to ride on.
450319204_y3rG7-M.jpg


Here's a shot to give you an idea how much material I removed at the flange. Notice that I did not lower the floor at all. The scribed line is from my previously modded heat shield.
450319388_HE8QA-M.jpg


Exhaust port finished and the piston installed to check for a slight radius as it closes.
450319355_km9pJ-M.jpg
 
Last edited:
Awesome work, thanks for all the great tips. I was trying to figure out a way to check skirt clearance, never thought to mark on the piston itself..nice!

Also wasn't sure on the best way to guide/mark inside the cylinder, I tried a pencil, but that wasn't very precise, tape is a good idea too.

I also didn't think about the ring gap.

Any tips on or pics of the cutting tools you're using, looks like some sort of die grinder followed up with some needle files/hand work for smoothing?

Good stuff..:clap: :cheers:
 
Back
Top