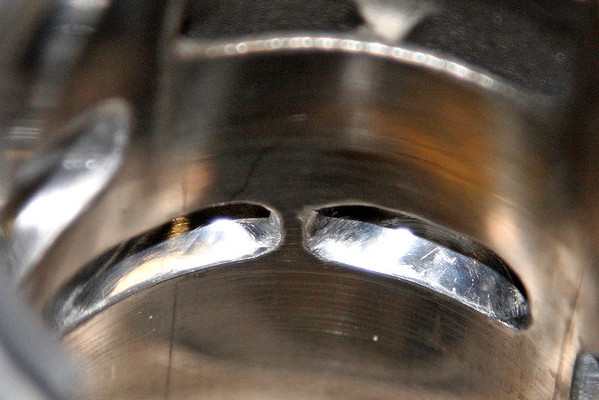
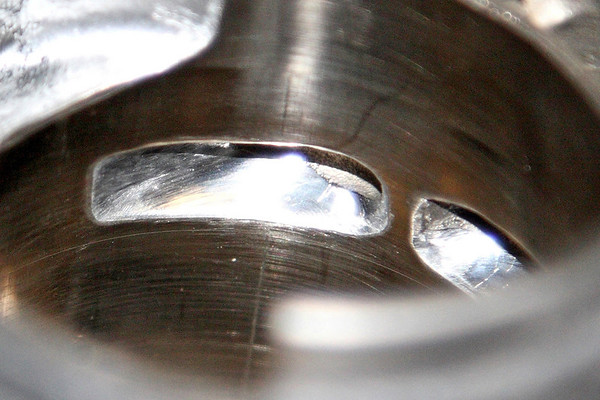
Ports look good.
That's good to hear considering it was the first time I really hacked on some transfers.
"Oh where oh where can my circlips be, oh where oh where can they be...."

Ports look good.
beautiful portwork by the way, that cant be easy, i have a hard enough time with intake port of a small block ford....
then both vertical and horizontal vibes go down a bit.


Awesome work, thanks for all the great tips. I was trying to figure out a way to check skirt clearance, never thought to mark on the piston itself..nice!
Also wasn't sure on the best way to guide/mark inside the cylinder, I tried a pencil, but that wasn't very precise, tape is a good idea too.
I also didn't think about the ring gap.
Any tips on or pics of the cutting tools you're using, looks like some sort of die grinder followed up with some needle files/hand work for smoothing?
Good stuff..

Have you made up a port map? Thats about the easiest way to keep track of port heights.
As far as getting the height, I like to cut a notch in the center of the port to the height I want then work out to the sides. A stack of used rings can be pushed in with piston to give a reference line also.
I thought this was a neat idea posted by Timberwolf using a stack of piston rings pushed in with the piston
How do you get the photo's to work out so good?The cylinder is done. This is the first time I did much work to the transfers. I hesitate to even show them. I don't really have the proper tools. I do not have a right-angle grinder. Instead, I had to use a cutoff wheel and a round semi-soft wheel about 1/4" thick. They're not pretty, but it's better than I was afraid they might be. I think they'll flow fine. Notice how I brought the rear transfer back towards the intake more.


I am using a little pocket camera fuji 340, I found my manual so now I know how to turn the flash off as all the little syboils on the camera are worn off. I had wanted to show how easy the transfers were to get at on this saw, it's the same as my 2159.I was able to take pics of things that were dull in colour but taking pics of metallic shiny objects were impossibleI'm using a DSLR. Try backing up a little so that it can focus.
I am using a little pocket camera fuji 340, I found my manual so now I know how to turn the flash off as all the little syboils on the camera are worn off. I had wanted to show how easy the transfers were to get at on this saw, it's the same as my 2159.I was able to take pics of things that were dull in colour but taking pics of metallic shiny objects were impossible
Yeah, uou just need to stick some sort of bright light to light everything up consistently. It's dynamic range that you're fighting. A camera can only capture something on the order of 5 stops worth of dynamic range, when the visible eye can see up to 12 stops worth (completely black to white). This is why people use flash in bright outdoor conditions, it's to fill in the dark spots the camera has trouble capturing.
In the case of macro or close up type shot. Shiny objects are always tricky, but even more of a problem is the flash. Most cameras struggle metering flash appropriately for anything closer than a few feet away, and shiny objects are just simply hard to avoid overexposure on with flash.
A DSLR and using a raw program to correct for overexposure can usually help with this. It gives you about a 1 stop cushion to capture information either way that would otherwise be lost.
Anyhow good stuff here on the porting, some great general guidlines.
I would so love to have a ring flash!!!!!!!!!!!!!!!
How do you get the photo's to work out so good?
I have been up all night working on my 2152 and took some pic's and all I get is a silver blurI have two 100 watt light bulbs above my work bench plus the garage lights. But cant seem to figure out how to turn my flash off unless I go out during daylight I tried the macro setting as well.
Saw is all together but as luck would have it I am out of Oxygen for the torch so the Muffler will have to wait till Monday night.
Enter your email address to join: