.
In the past few days there have been a number of posts about port timing. I would guess the most popular method to measure port timing is with a degree wheel. I thought I would do a how to on setting up a degree wheel, as once this is done the rest is easy.
The earlier questions were posted in this
thread, and this
thread.
First, strip the saw to the point that allows access to the flywheel and the spark plug hole.
I then thread the Stihl flywheel puller into the flywheel.
<a href="http://www.flickr.com/photos/41385771@N03/4450698248/" title="puller by zweitakt250, on Flickr"><img src="http://farm5.static.flickr.com/4021/4450698248_4b95b6526e_b.jpg" width="750" height="500" alt="puller" /></a>
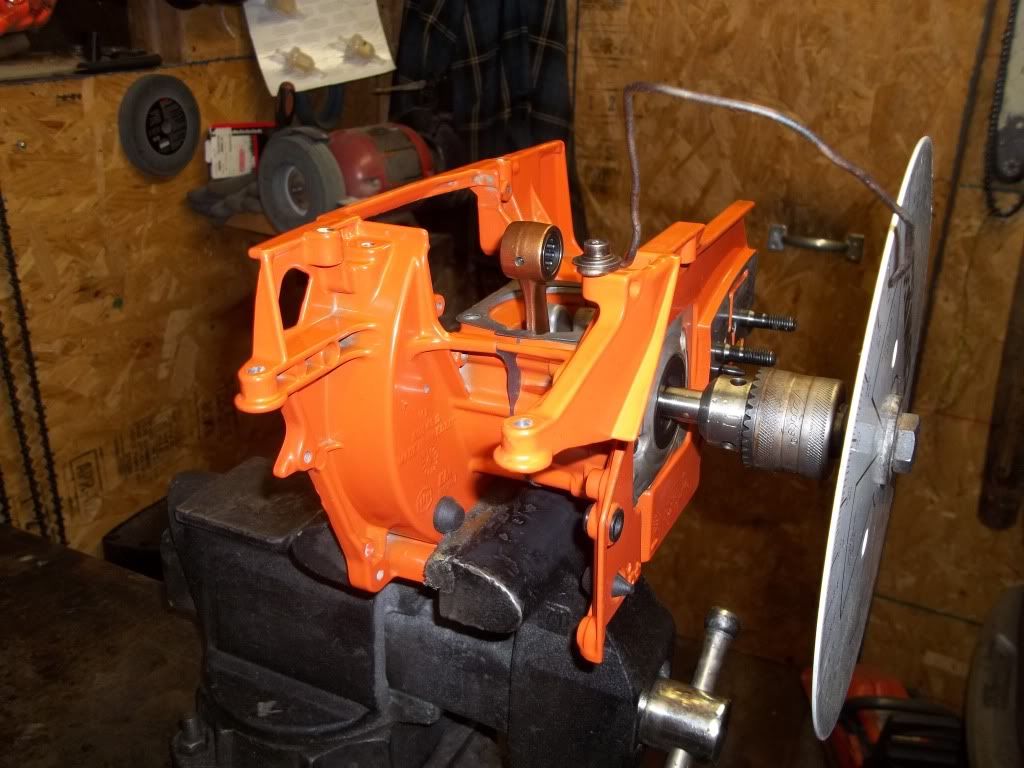
Second, attach a pointer wire to a solid mount on the cases. you don't want this to easily move.
<a href="http://www.flickr.com/photos/41385771@N03/4450699664/" title="wire by zweitakt250, on Flickr"><img src="http://farm3.static.flickr.com/2664/4450699664_57dc04ccc1_b.jpg" width="750" height="500" alt="wire" /></a>
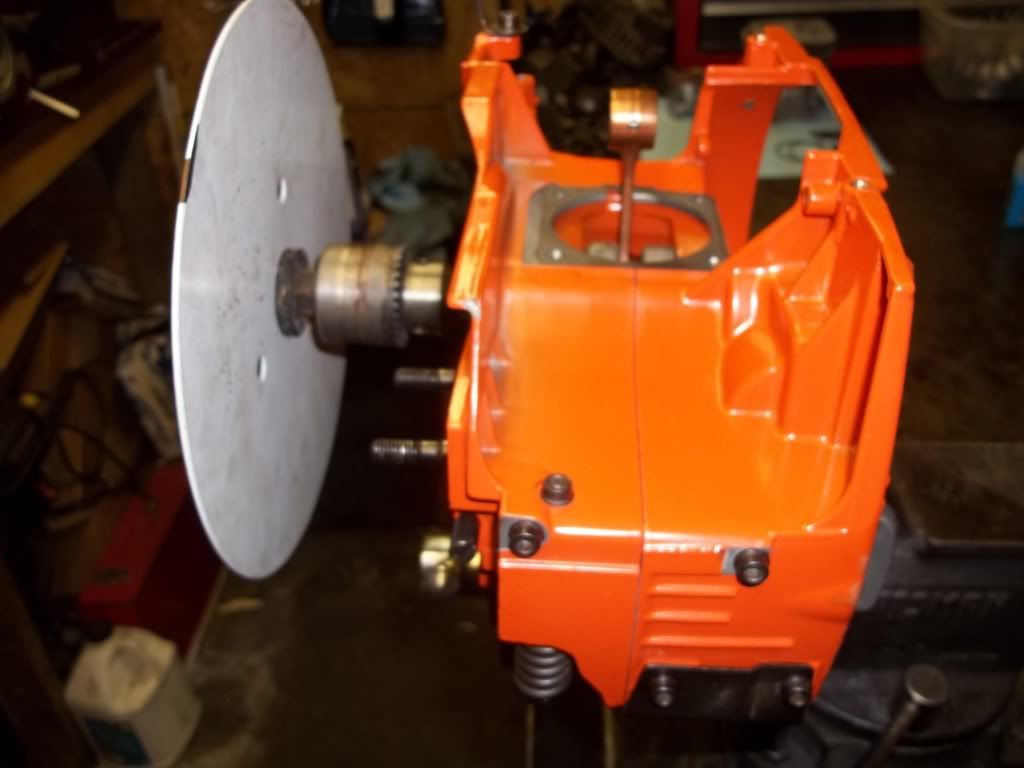
Third, attach the degree wheel to the puller(pic3). Look through the plug hole and put the piston at approximately Top Dead Center, position the wheel near 0°(pic4), then lightly snug the clamp bolt. I use a large degree wheel as it allows a higher level of precision than a small wheel. A 4.8" wheel made from a CD has about .04" between degrees. The 10.8" wheel shown allows .095" between marks. This same concept is why you will see auto racing engine builders use 36" wheels.
<a href="http://www.flickr.com/photos/41385771@N03/4450701184/" title="wheel by zweitakt250, on Flickr"><img src="http://farm3.static.flickr.com/2772/4450701184_144d0146a5_b.jpg" width="750" height="500" alt="wheel" /></a>
<a href="http://www.flickr.com/photos/41385771@N03/4450701820/" title="near top by zweitakt250, on Flickr"><img src="http://farm5.static.flickr.com/4009/4450701820_7842eac6b3_b.jpg" width="750" height="500" alt="near top" /></a>
Fourth, rotate the crank slightly ATDC and insert a piston stop. The stop is necessary to find TDC. After the stop is in place rotate the crank back toward TDC until the piston rests against the stop.
<a href="http://www.flickr.com/photos/41385771@N03/4449929671/" title="stop by zweitakt250, on Flickr"><img src="http://farm5.static.flickr.com/4042/4449929671_d1a05b5065_b.jpg" width="750" height="500" alt="stop" /></a>
Fifth, Read the figure on the degree wheel and make a note of it, some math skills will be required. You will notice that I have sharpened the pointer so that a more precise measurment may be made.
54° here.
<a href="http://www.flickr.com/photos/41385771@N03/4450703316/" title="stop2 by zweitakt250, on Flickr"><img src="http://farm5.static.flickr.com/4038/4450703316_405e5d2f45_b.jpg" width="750" height="500" alt="stop2" /></a>
Sixth, rotate the crank around until the piston rests against the stop at BTDC. make a note of this reading.
52° here.
<a href="http://www.flickr.com/photos/41385771@N03/4450704000/" title="stop3 by zweitakt250, on Flickr"><img src="http://farm5.static.flickr.com/4005/4450704000_7f8da0f6f6_b.jpg" width="750" height="500" alt="stop3" /></a>
Seventh, here is where the math skills are needed. Add the two recorded figures together, then divide by two. The result is the point at which this particular piston stop holds the engine before or after TDC.
(54+52)/2=53°
You can see that it was close to begin with. If the original locations had been 66° and 40° the result would be the same.
(66+40)/2=53°
Eighth, while holding the flywheel still with the piston against the stop, rotate the lightly snugged degree wheel until the pointer is on the number that you obtained. Tighten the clamp bolt.
Rotate the crank on around until the piston is against the stop. It should read the same BTDC as it did at ATDC. If it does then the wheel is indexed correctly. If not, then repeat the procedure.
Now when you place the wheel on zero the piston will be at TDC and port timing measurements can be made.
<a href="http://www.flickr.com/photos/41385771@N03/4450704714/" title="TDC by zweitakt250, on Flickr"><img src="http://farm3.static.flickr.com/2781/4450704714_04462a18b4_b.jpg" width="750" height="500" alt="TDC" /></a>
I hope this helps.
.


