milling in a walnut orchard

Arborist Forum

Help Support Arborist Forum:

This site may earn a commission from merchant affiliate links, including eBay, Amazon, and others.
man i wish i could drive (only 12) but yer only a drive away for me (live in sf area) man i wish i could get a chance to go milling this (darn rain) :bang:

You get a a parent to bring you down and I'll take you out to mill in the orchard. If you are interested PM me for more info.
 
The local walnut orchards are all in the flood plains around here. They seem to like the loose gravel for sending there roods down to water. Stock up while you can there is some nice wood in your stacks.

You are up where black line disease is common. one of the things that many growers do to combat it is to use paradox walnut for the root stock. around here that became common in the early 1950's. pardox walnut is lesser known but to many it is more highly valued that even claro walnut. This dates the orchad Iv'e been milling in to pre-1950. Aropund here not long after the introduction of paradox root stock the grafting techniqe changed from multiple branch grafts at the top of the bole to a single graft in the middle of the trunk.

Paradox walnut is sometimes called bastagone walnut and is a natural cross between an english grafted onto claro root stock which is open pollentated with a natural claro, and not all nuts pollenated this way will become paradox. In color it is between english and claro which is whant you would expect, the paradox is that it is harder than either parent.

I never thought to use pear for smoking meat, Ill have to give it a try. lately Ive been hooked on using olive.
 
I hope you guys aren't getting bored seeing so much walnut. With yesterdays haul the total is now 109 slabs, most 2" with a few 4". I have mentioned how these trees are claro with english grafted at the top of the bole. Here is a great shot showing two graft lines.
PICT0008.jpg


This log was one of the only ones that had a crotch in the claro so I milled it for the crotch figure. What showed up even more spectaculerly was this burl at the base.
PICT0016.jpg


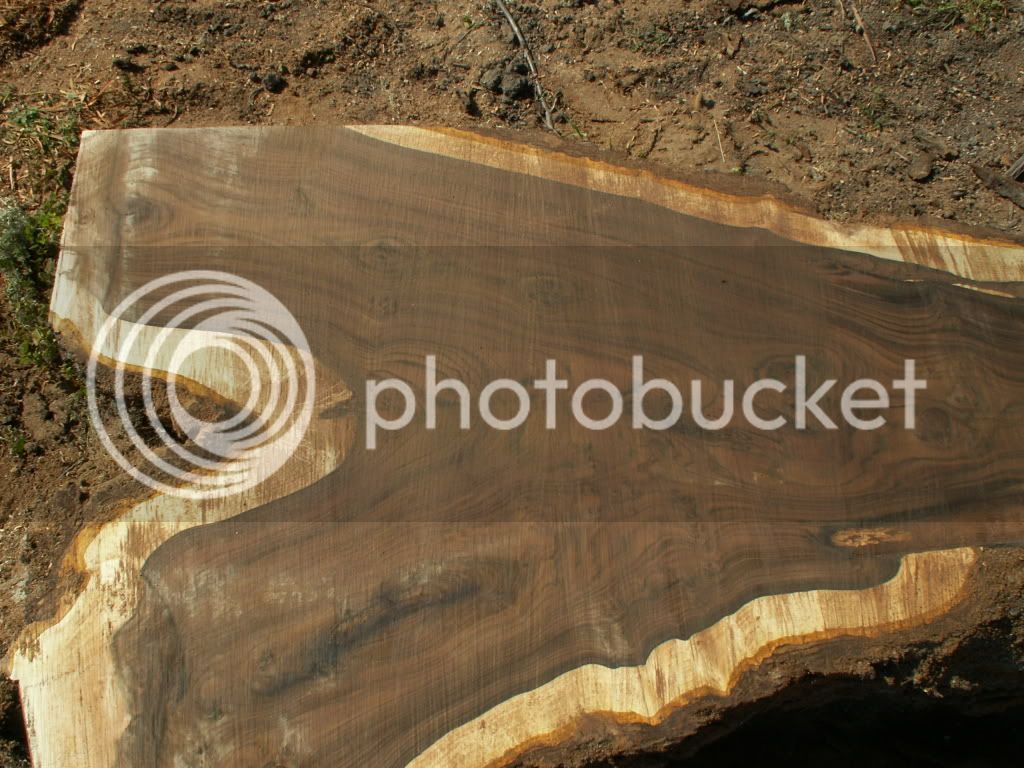
Here is a shot of the crotch figure. Looks like there might be a rifle stock in there for the Rossi M92 puma I just picked up. At the widest point of the crotch I had to trim it to 36" wide to fit my bar/mill.
PICT0022.jpg


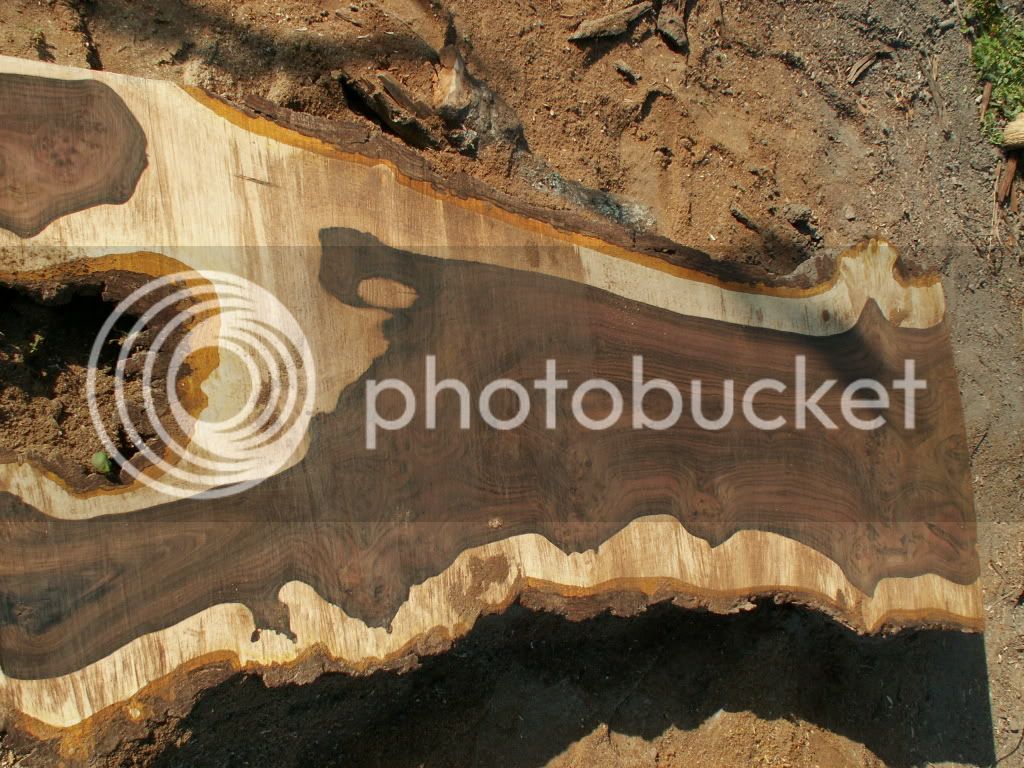
This is that same log as I got to the last slab. normaly I might leave something like this or take a 1" board off to use as stickers. I liked the stricking pattern created by the heartwood/sapwood contrast, plus there was another burl at the base so I took one more 2" slab. With all the sap wood this one will be unlikely to dry as a usable slab but it only cost me a half a tank of gas for the saw.
PICT0029-1.jpg
 
Last edited:
AWESOME! Bastogne reputedly grows faster than other species of walnut, and is often used in high grade gunstocks. I have a blank or two with graft lines in them.

I just love fiddleback, so have several Claro blanks. I might also have an English or two, Oregon black, and ?? I had a rifle made for my father a few years back. He's left handed, so the basis(his choice) was a Reminton 700, and the roughest finished one that I had ever seen, but was a raffle prize. I hand polished the barreled action(after shooting to make sure it was worthwhile), sourced a steel magazine and floorplate, scope bases and rings, etc. It was engraved by a former Colt Custom Shop engraver(Ken Hurst), most blued, but the floorplate and grip cap were coin finished. The stockwork was done by a local guy here in Pa from a Turkish walnut blank, with ebony forend, and flush sling swivels. Checkering was 26 lpi in a ribbon pattern. I don't have pictures of it at the moment, but it is a gorgeous piece. I had a singleshot rifle stocked to my own specs (LOP, drop, and castoff)from fiddleback Claro. The forend has an ebony cap in Ballard style, and the buttplare is horn. This was one of the stockmaker's examples to get into the gunmaker's guild.

Enough off topic(sort of)....I wish I had a grove of walnut like that to mill.:cheers:
 
Really nice slabs.
I like the contrast of the dark lines in the wood. I think thats way prettier stuff than my American black walnut that I've been milling.

Don't be shy with the pics-we all love 'em.

Andy
 
That stuff is fantastic! I met a guy at a woodshow from southern Oregon a while back and he told me about the walnut groves coming down. Hes been chainsaw milling for years but simply didn't have the equipment set up to take advantage of all that he was being offered. ( All free, - going to slash otherwise. )

If I was an unemployed logger from the Northwest right now I'd be there in a heartbeat. Fire up the biggest saw I could find and start stockpiling.

I have a lot of great wood here, but you certainly made me jealous!:clap::clap:
 
Beautiful wood BlueRider! What a sweet deal. It's good to see that you're able to take advantage of that resource so well. I'm lucky to find 4 hours a month for milling--an opportunity like that and I'd die.


Under that log photo that looks like a lot of sawdust, what sort of chain are you running?

Bob, I got a huge grin on my face when I read this. You know this CSM stuff almost too well--almost!

J. D.
 
I hope you guys aren't getting bored seeing so much walnut. With yesterdays haul the total is now 109 slabs, most 2" with a few 4". I have mentioned how these trees are claro with english grafted at the top of the bole. Here is a great shot showing two graft lines.
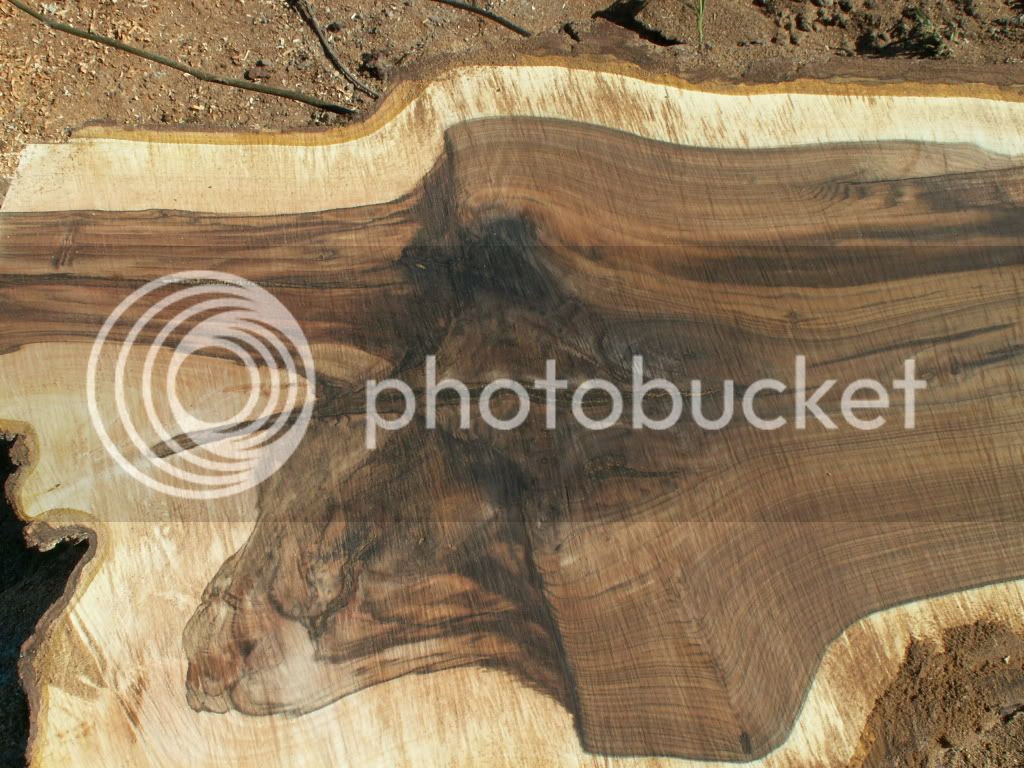
PICT0008.jpg


This log was one of the only ones that had a crotch in the claro so I milled it for the crotch figure. What showed up even more spectaculerly was this burl at the base.
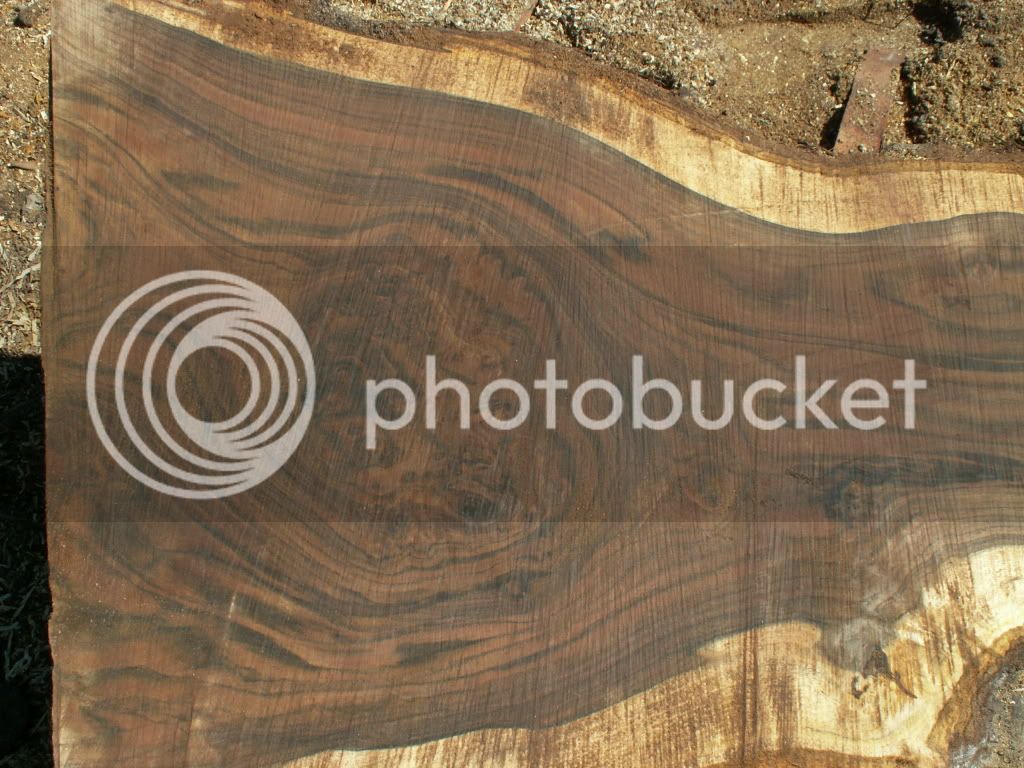
PICT0016.jpg


Here is a shot of the crotch figure. Looks like there might be a rifle stock in there for the Rossi M92 puma I just picked up. At the widest point of the crotch I had to trim it to 36" wide to fit my bar/mill.
PICT0022.jpg


This is that same log as I got to the last slab. normaly I might leave something like this or take a 1" board off to use as stickers. I liked the stricking pattern created by the heartwood/sapwood contrast, plus there was another burl at the base so I took one more 2" slab. With all the sap wood this one will be unlikely to dry as a usable slab but it only cost me a half a tank of gas for the saw.
PICT0029-1.jpg


Robin, this walnut is way cool looking. I'm jealous!!!!

jerry-
 
Thanks for posting the great pics BlueRider. It's good to see that a bunch of the wood will get milled. That some really great looking stuff. We're all just drooling and wishing we could get our hands on some logs like that. (pssst buddy, I might be able to get some chinese elm if you find yourself with any extra material or cants)

Please keep the pics coming they're great ! About how long is it taking to cut one of those slabls? Hope your weather holds up and that you continue to get access to those.

Old Blue
Over regulated and under represented in
Kali-bone-ya
 
Beautiful wood. It would be a shame if you didn't use some of it for a gun stock. I'd certainly love to come across some for pistol grips and such. I also have an old rifle (Mauser) that is needing restocked. Nice find. Claro and Bastogne tend to make the prettiest stocks.
 
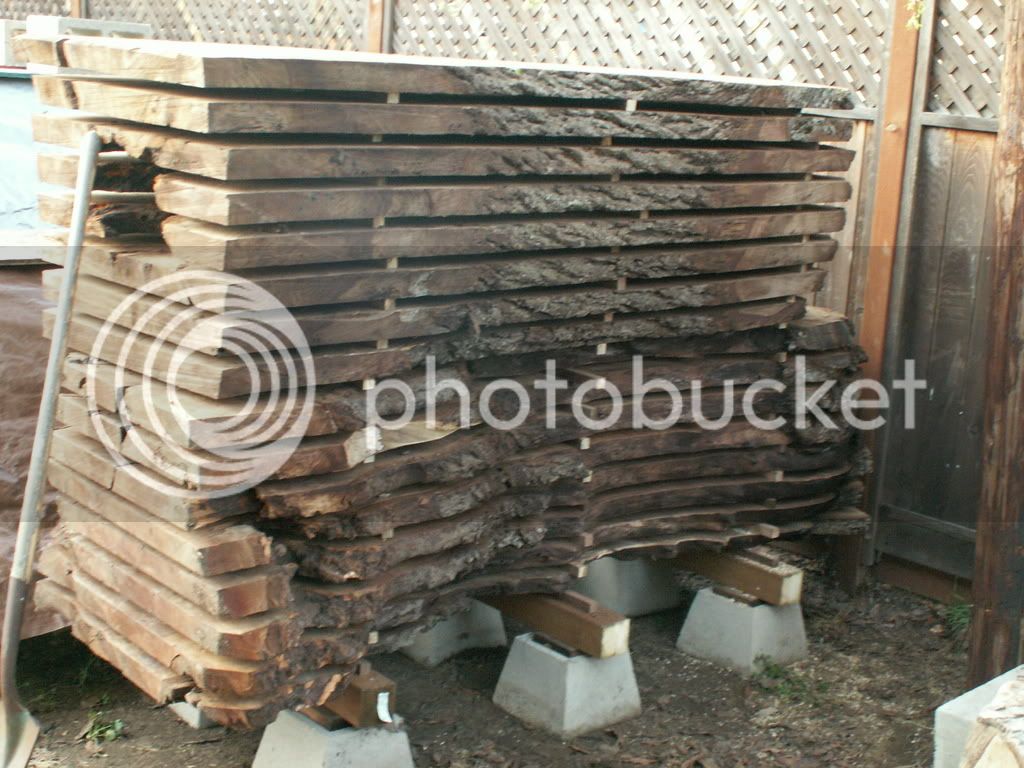
With all the rain we have been having I have not gotten out to the walnut orchard to mill as much as I would like. It takes 2-3 days after a rain before the ground is firm enough to drive out into the orchard. On the plus side I have had plenty of time to get the 075 back up and running along with fixing the starter on my 038. Here is a pic of the first two logs, some milled on my first trip and the rest milled a week ago.
PICT0029.jpg


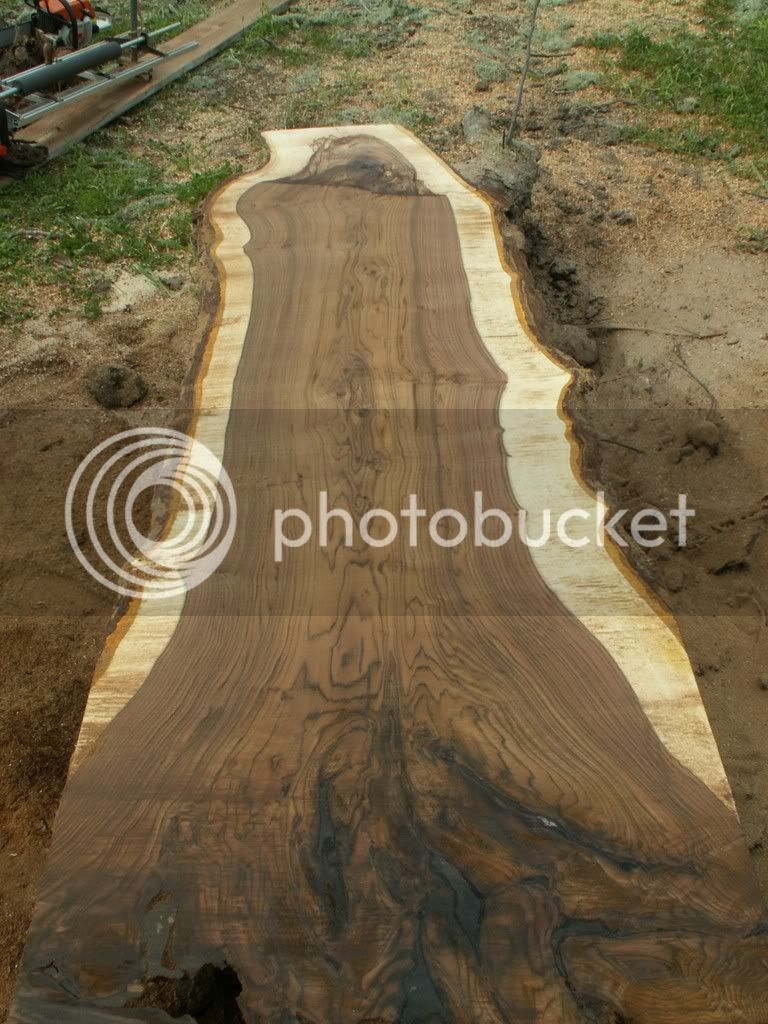
Here are pics of 2 of the six slabs I milled this past Saturday. You can see a fair amount of occluded dirt near the root end of each slab. As bad as this sounds it really wasn't as hard on the chain as you would think. The small bit of limestone on the left side of the bottom pic however was a bit more of a problem. I milled 3 slabs before I had to resharpen and then it only required 4 file strokes on each tooth.
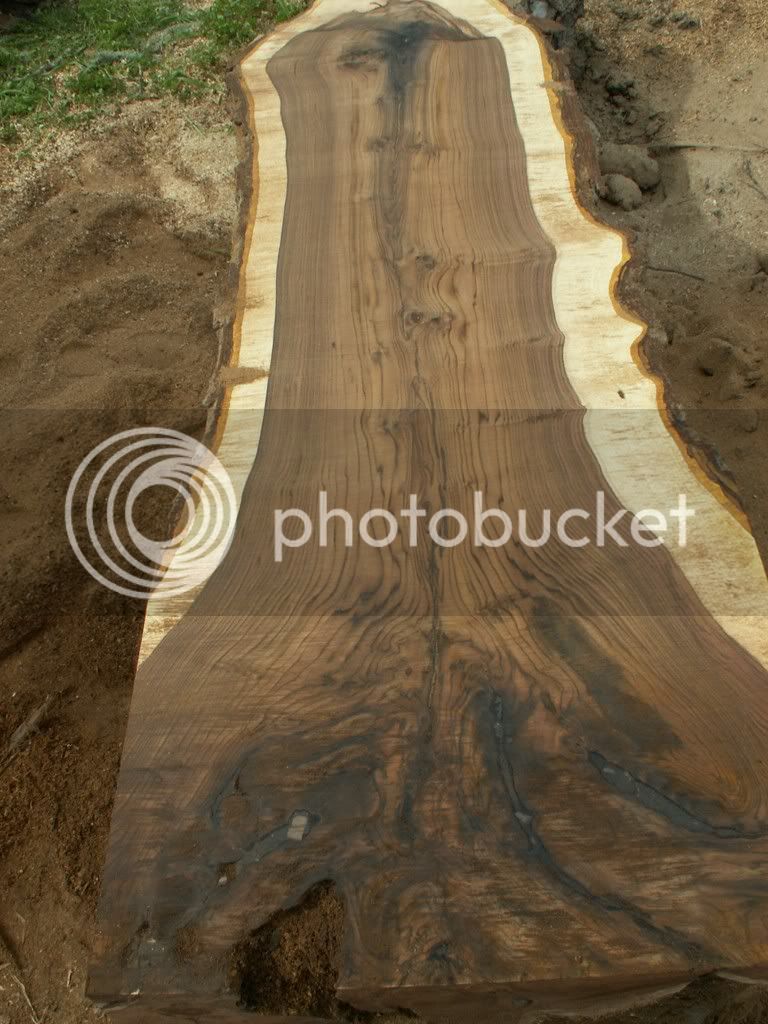
PCWL3-2-29-08-2.jpg

PCWL3-2-29-08-3.jpg


It rained yesterday and it's raining today with rain forcast through Friday so I'm not sure when I will get back out to get more wood.
That is some really nice looking wood but I would really recomend using more than 3 stickers per stack. Wild grained wood likes to be wild. I like to space the stickers about 18" apart. It is a pain in the *** but it is even worse when you finaly go to work with the wood that you have been waiting for 2 years to dry and it is twisted like a potato chip. That is just what I have learned through my own mistakes.
 
I just noticed that a few people posted on this thead lately and I thought I would point out that I originaly posted the thread back in the spring of 2009. Part of my agreement with the manager of the property was that some of the wood be given to the land owner. Last week a guy that will be making a table for the land owner came over to pick up a few slabs. The wood is dry and ready to use and as flat and beautiful as when it was stickered, f course it takes a practices eye to see the color and figure before the wood is surfaced. I will be bringing some slabs into the shop for some projects in the early spring and I will post a follow up here with pics.

Some one expressed concern about how far apart my stickers are, In general I agree with what was suggested. but over the last 15 years I have gotten good resuts with 24" spacing between stickers and 6-12" from the ends on slabs 2" or more in thickness. If I were milling 1" thick boards I would likely space my stickers tighter.

Blue: I might take you up on a swap for some chinese elm, let me know if you ever get north of LA.
 
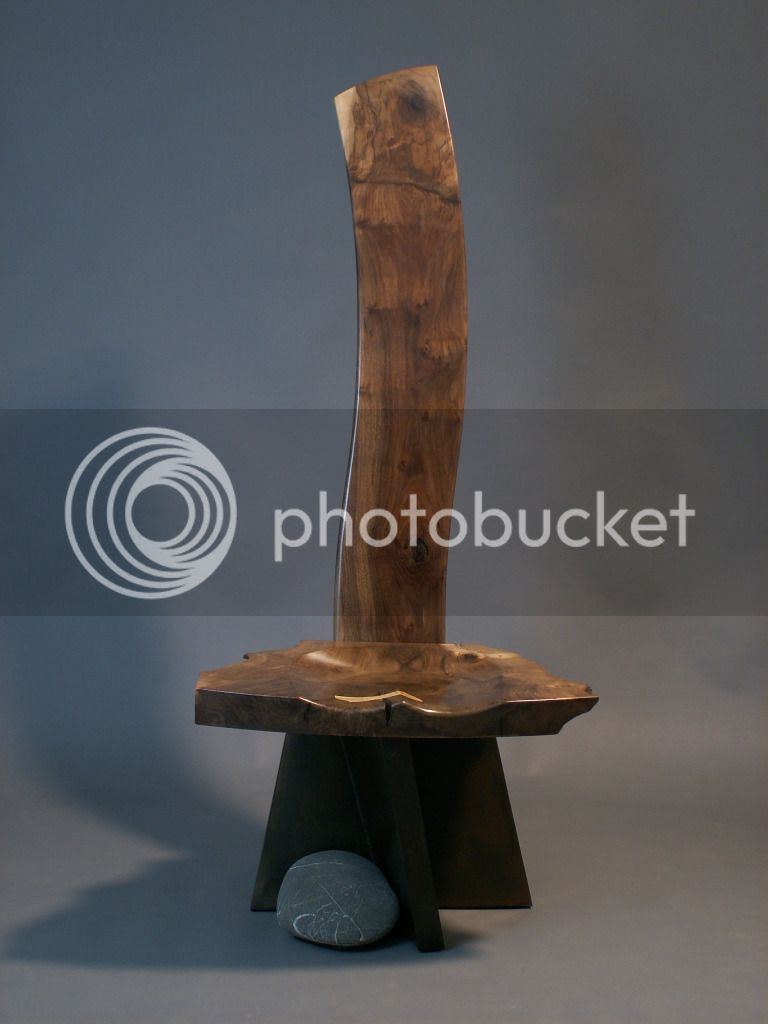
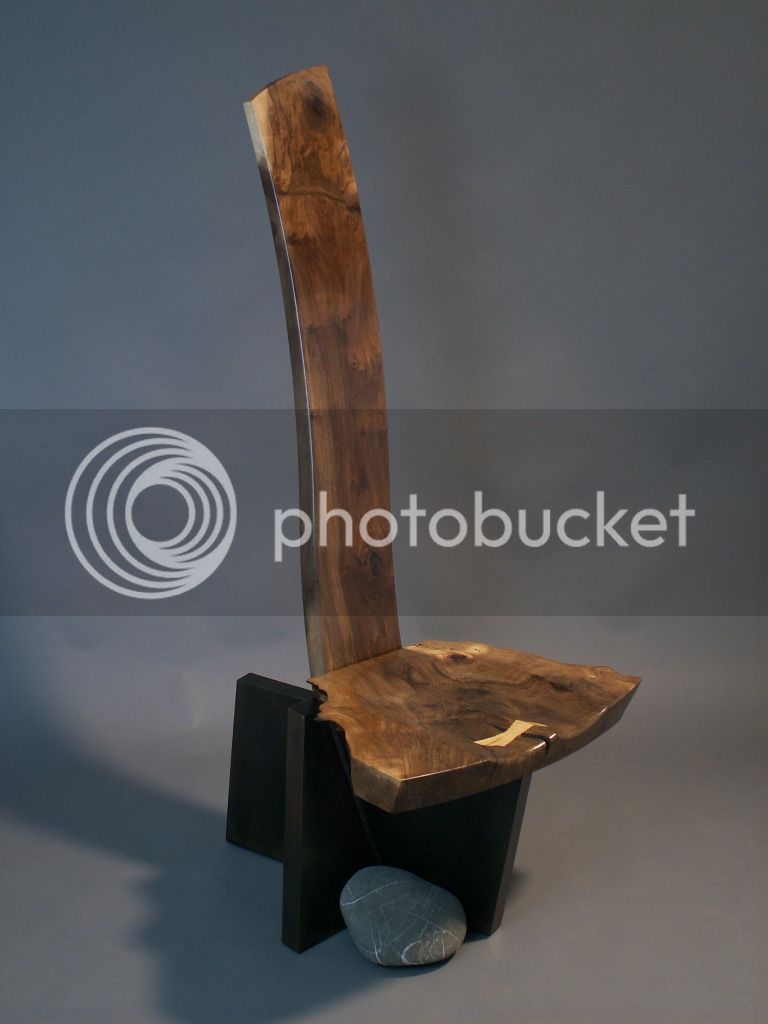
Pictures of a chair using the orchard walnut wood

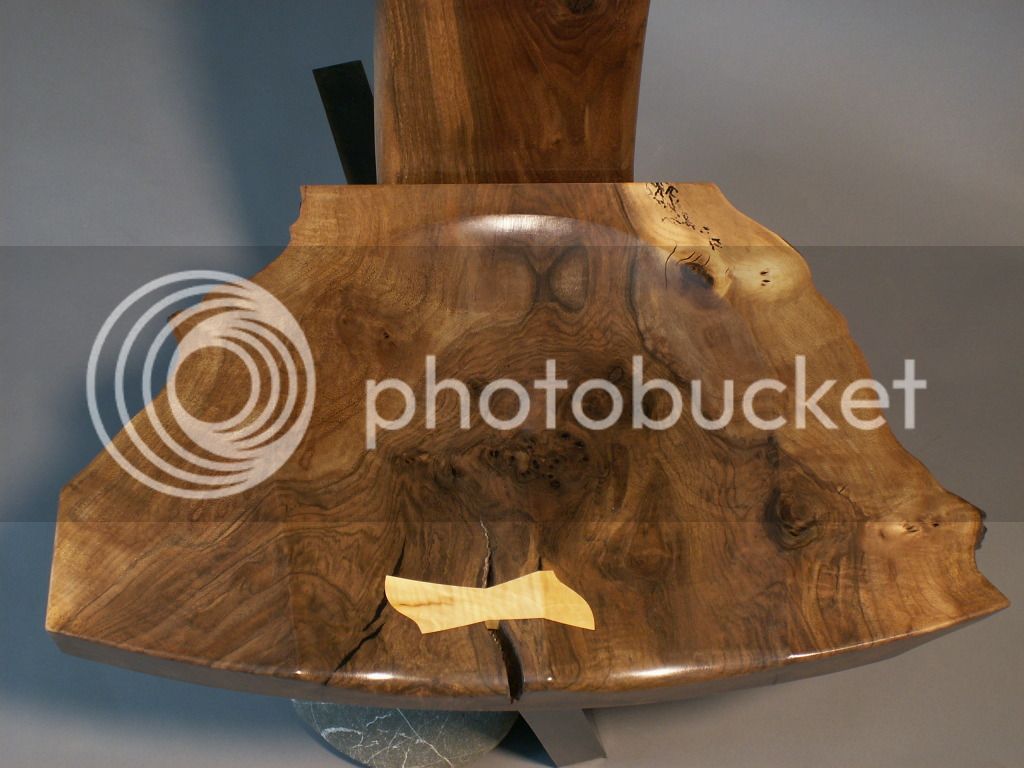
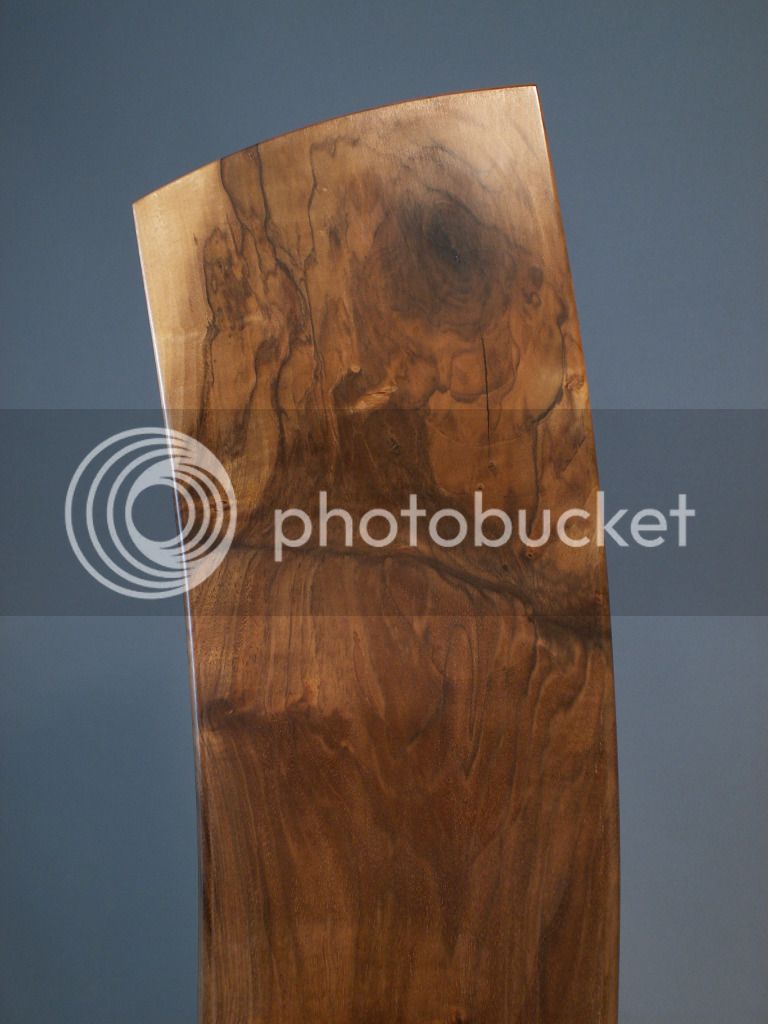
Well I finaly got around to using some of this walnut. Here are a few pictures of a chair I made with a welded steel base. The wood is from two different slabs, the seat is from a slab that had a larger root ball with a bit of burl in it and the back is from one of the smaller slabs.

The finish is a hybred I have been using for about 4 years. I apply a coat of Jasco tung oil and then clean up. I thn imidiately follow with a coat of General's HP Poly. The General's is a water based finish and I usually end up applying 3-4 thin coats with a brush. The key to good adhesion is to apply the Generals before the tung oil dries, yes I wrote that correctly BEFORE the tung oil dries. If you wait till after it dries it needs to be sanded to get good adhesion and you will need to do campatability tests for any other brands than the two I listed. I should also add that Jasco brand tung oil is no longer being made and I am almost out of my stash so I will be doing a search and some testing to come up with a replacement.

I will be taking This chair along with a bunch of other furniture to the American Craft Council Show in San Francisco this comming weekend, August 3,4,5. among the 300 exhibiters there will be about 8-10 furniture makers and a half dozen wood turners, if anyone is in the area it makes for a good afternoon. the show is at Fort Mason and there is free parking at the marina green lot with a free shuttle, both a rarity in SF, but the show does charge $10 admission.

SundayAfternoonattheBeachwithGeorge-front.jpg


SundayAfternoonattheBeachwithGeorge-sideview.jpg


SundayAfternoonattheBeachwithGeorge-seatdetail.jpg


PICT0148.jpg
 
Back
Top