MS290 porting/saw assembly questions

Arborist Forum

Help Support Arborist Forum:

This site may earn a commission from merchant affiliate links, including eBay, Amazon, and others.
Joined
Apr 25, 2009
Messages
1,078
Reaction score
780
Location
Illinois
Almost ready to put my MS290-to-390 together again. Simple upgrade has turned into months of...yeah

Got new Stihl main bearings and crank seals. Saw really needed both of them. Thanks for the suggestion guys.

Porting Critique

Ported the exhaust and intake ports with a stone and carbide with a Dremel.

There will be pictures tomorrow of ported cylinder vs the Stihl one.

I read for several days, dozens of threads on porting. The threads are kind of scattered and for me very frustrating to read. Sorry if my questions are covered there, its hard to re-find or review something brilliant and helpful in the midst of all... That.

I felt that there wasn't much to improve as far as casting imperfections... I decided to just widen the ports a bit while maintaining a curvature of the port opening to keep stock port timing. The only issue is my port chamfer is just not as good either the chinese or the Stihl originally had. While trying to get better camfer on the intake port from the outside in, I opened the top of the intake port a good amount, which probably messed the timing not a lot but some.

Also managed to slip with the tool and nick the cylinder wall on top of the exhaust port which I haven't been able to photograph. It's probably fatal, but I'd like a second opinion. Again pics later, the ones I have suck.

The bottom of the intake port also has a ridge there that may be the end of where the piston skirt goes to, so it shouldn't be removed.? The Chinese casting was poor on this area, and it has a giant sign that says remove me on it...

Port Chamfer

So far my best tool for chamfer is the fine wire brush on the Dremel, which I'm not sure if it even works. What do you use for port chamfer (so rings don't catch)?

Cylinder Installation

Any tips for installation of the piston into the cylinder without a ring compressor?

Muffler Mod Critique

Read for days on this as well. this is a hybrid between ArodinackStihl's mod and the ones I saw on YouTube. Minimal porting in the divot area to preserve sound levels, with heavy material removed from the outer cover. IMG_20181231_182153265.jpg IMG_20181231_182212705.jpg IMG_20181231_182230536.jpg
And a better pic of the Farmertec spikes.

IMG_20181231_182052381.jpg
 
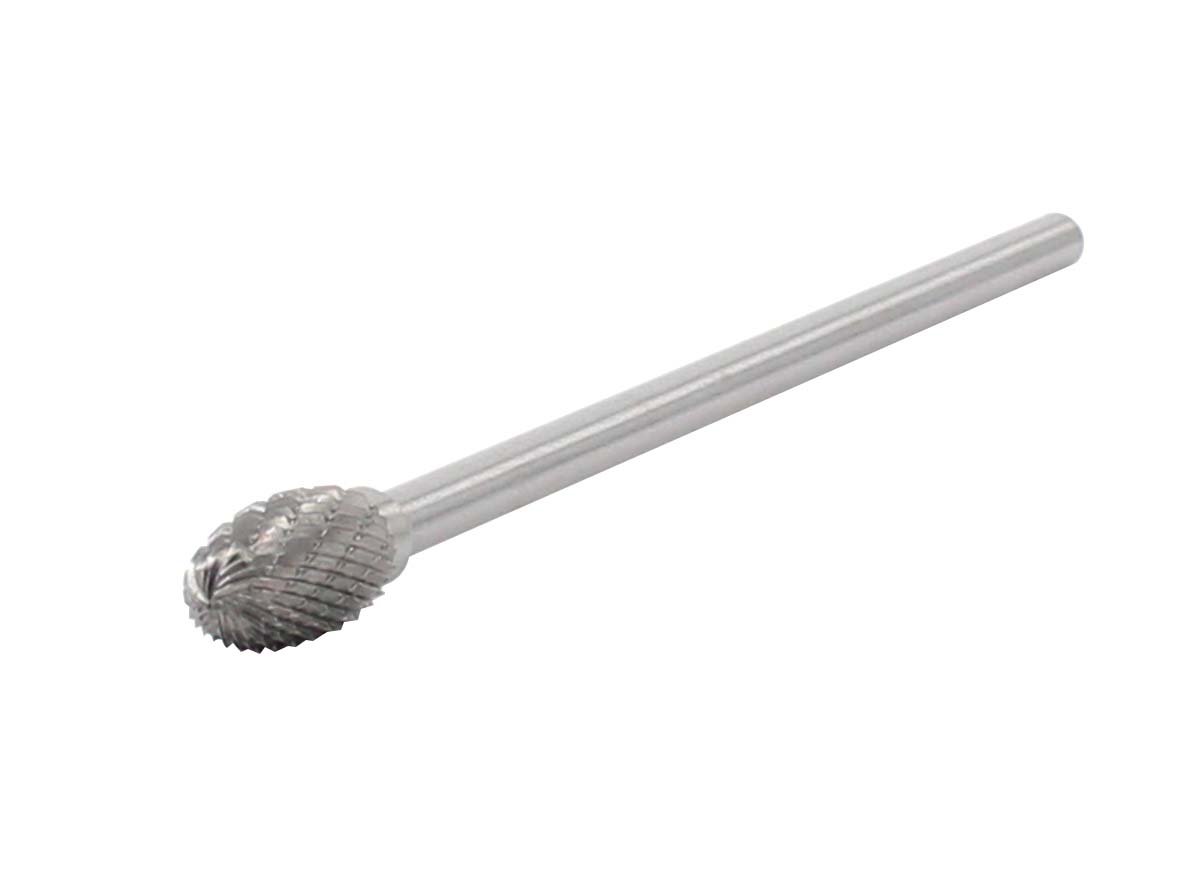
A ball burr or stone will make a good chamfer if applied lightly.

41e1f5RWOZL._SL1200_.jpg
Ball-Shape-Car-Engine-Cylinder-Head-Porting-Tool.jpg
images
 
Buy some diamond balls on eBay. Get both the larger ones, like 10-12mm and the smaller finer 4-6mm ones.

Hit ports all the way around with the larger and then the smaller balls. Hand sand last (320 grit) and then do scotchbrite on a drill through entire jug with some WD40 on it as a final prep.

When done, wash jug and wipe with WD40. Put a ring in with the gap set in correct position so that you can hook and remove it later. Put piston in, close eyes, and slowly push ring to the top of the cylinder slowly. If you don’t feel in grab anywhere, you are likely good.

Remove ring. Put piston in without ring and apply slight pressure towards the intake side and then the ex side while pushing the slug in and pity 10 times each. Examine skirt after. If there are no scratches, you are likely good.

Raising the intake roof doesn’t affect timing, but it can cause you to catch a ring. Assemble the clam together with the piston and look at what happens at BDC. If you can see the bottom ring pin, it’s trouble. You’ll have to run the top ring only-which is totally fine BTW. If you can see both, you ruined the cylinder. Thank god its chinesium.
 
Pioneerguy, didn't have any of those. Just a stone and some straight cut square and cone carbides. :( I can't get the appropriate angle to chamfer. Don't have a flexible head extension either.

DRF, awesome post thanks for taking time to read this and and to reply.

Yes chinesium... The exact reason I said to myself, might as well port it even if I have no idea what I'm doing.

The one quick question I have is, when you install the ring with the gap set in the correct position so you can hook and remove it later, I'm assuming that you mean pushing the ring into the cylinder not on the piston, and following the same path as the dowel pins in the ring gap on the piston suggest, and then pulling it out with a pick? Or... Installing the ring on the piston and pushing the piston itself in and pulling the piston itself out? I have visions of an irremovable jammed piston ring. I don't know the appropriate ring gap assuming chinesium would be gapped?

I do have diamond balls, didn't even think to use. Pics soon of my damages
 
The diamond balls helped bit (have a huge set of them, they work great for this, have had them for 20 years and never found a use until now!) the only thing I could get to work for the chamfer without doing more damage was scotch Brite pads.

With the piston test, I don't have scratching per se, but I have audible friction sounds on the machine horizontal machine marks on the piston skirts across the ports and slight marring on the skirt that's only visible in a reflection. I did have to clean up the intake a couple times to get it to where it still made the noise but didn't have additional marring.

Below is at the bottom of the stroke in the intake port. Cylinder junk? Thanks for the input guys...

IMG_20190113_212430010.jpg
 
Looks pretty good. Is that a nick in the ex port roof?

Can we see your ex port after your chamfers? Maybe what I see is a reflection.

You exercised restraint which is good. You didn’t make the ports huge, which is a common newbie mistake that I did as well when I started.

The rings at BDC look OK to me. The bottom ring pin appears to be tucked, it’s usually on the PTO side on Stihls. The top ring is staying tucked. Contrary to older thinking, this bottom ring goes into intake ports often in modern saws. Older models, like the 028 and 034 has a ring retaining “tit” dropping down off of the intake roof to keep the rings tucked.
 
DRF,

Most of that the nick went away when I tried to chamfer with the balls. My Dremel is variable speed but it's not quite slow enough or new enough (tools have slight axial movement from bearings or chuck issues) to go in and feather it completely, but man did it help get that edge down so the scotch Brite could finish it up.

Thanks for the blessing on the port size. I think I'll go over the chamfer a bit more with scotch Brite on both ports, then assemble the saw.:muscle:
 
Thanks for the props! Got it assembled.

The Chinaman impulse line nipple pulled out of the engine case during assembly. Siliconed it and stuffed it back in.

The Chinese clutch drum with the rim sprocket splines has a completely different center bore than the Stihl one, so I'm forced to use the worn out Stihl one, with the worn out bar and scrummy chain. Did have a .63 gauge .325 chain on a Tsumara bar and an 8 pin rim instead of a 7 read to go on it...

Got it to stop leaking gasoline with a different tank o-ring. Ran it.

No catastrophic failure yet... Lol. Flooded it out trying to get it as rich as possible and still run.

Cut a couple logs... need some time with it, but I'm not really impressed so far...
 
DRF,

Most of that the nick went away when I tried to chamfer with the balls. My Dremel is variable speed but it's not quite slow enough or new enough (tools have slight axial movement from bearings or chuck issues) to go in and feather it completely, but man did it help get that edge down so the scotch Brite could finish it up.

Thanks for the blessing on the port size. I think I'll go over the chamfer a bit more with scotch Brite on both ports, then assemble the saw.:muscle:
I use 320 grit machine paper to polish the edges of the chamfers, Scotchbrite has little effect on cylinder plating. On my own saws I only make a .010 chamfer and polish it to prevent scratching the piston.
 
Pioneerguy, I couldn't seem to get enough grip with my fingertips to push a little square of sandpaper across the edge. But I only had 220 grit. Very coarse scotch brite, the kind that looks like steel wool and half an hour or so around the edges per port is the only thing that worked. I did use the cutting disc attachment to make an impromptu flapper wheel out of 1.5" by .75" pieces of paper that helped polish the ports, didn't work to chamfer

Montana Resident, just one tank through rich and fat on the adjustment with an extra splash of oil in the tank... is probably a bad way to pass judgment, saw was still 4 stroking in the cuts a bit but I wanted it to break it in easy. It just guzzled a tank of fuel like it was nothing, but it burned it. Next tank I'll try to get the rpms up on straight mix and fine tuning. I just expected a bit more I guess...
 
Bill did just that! Put the saw and my body through the paces today. 6 tanks of fuel helping do land clearing. After one tank fat and happy I dialed in the fuel more and more.

Once leaned out, the saw was more impressive but not really much different than what I remembered. Still does not have the torque of the 460 Rancher in the cut, but I'm also working with a pretty marginal but sharp non chisel chain and there's a bit more carb tuning to do.

Happy my work survived a very intense day of cutting.
 
Good to hear -- better then yesterday and with more improvements to come. I once had a 460 Rancher and it pulled a 24" B&C easily. I won't even bother moving my 24" setup from my 461 on to the 290. I just know it would be a disappointment.

If I remember, you put the big bore into this 290. I expect most of your gains would be from that. Porting has a bit of promise, but in a 2-Stroke engine and its the scavenging operation, it has to be done just right to make much improvement. Fun to explore, but would have to keep expectations in check.

Bill did just that! Put the saw and my body through the paces today. 6 tanks of fuel helping do land clearing. After one tank fat and happy I dialed in the fuel more and more.

Once leaned out, the saw was more impressive but not really much different than what I remembered. Still does not have the torque of the 460 Rancher in the cut, but I'm also working with a pretty marginal but sharp non chisel chain and there's a bit more carb tuning to do.

Happy my work survived a very intense day of cutting.
The factory cylinders have a hidden fineness to them over their AM counter parts. There is a lot of work that goes into any cylinder casting, and the OEM simply will outshine any AM example.

My bet is that the smaller OEM 290 cylinder will likely outcut your larger AM 390 cylinder. My bet is that your squish is loose and your port timing is all over the place.

Not trying to come off as a ****, I’ve just been there and done that. Played with Ms250’s at first. Shortly came to realize that the PRO style saws were better to modify, etc...

As long as you are happy and the saw is cutting wood, I’d say it’s a win/win. Once CAD fully sets in, and you start playing with an all OEM 044 (or even and 036). You’ll be amazed at the power difference.
 
DRF, I knew that this was a crapshoot. You aren't being unreasonable. Read for 3-4 days on porting and I knew my limitations on tools and ability or desire to mess with squish and port timing.

I run an MS460 and 066 saws with the tree service I help at, and before I lost my job and ended up where I'm at, I was going to buy a new 441 or 661 (most likely a 661). My complaint is that the 290 weighs like a 440 and cuts like a saw that should weigh half as much... Just hoped to make a good machine and make it worth the effort to tote around and maybe give the 460 Rancher a run for it's money with around 5cc more and a little love. Then at this point because I have no real job, sell it.

The unforseen circumstances of whatever I did was that the saw starts just beautifully. A hard day out in the woods has the chinesium bucking spikes all bent up though.

Last night I took a good look at the chain and the guides have never been touched and it's missing a tooth on the side opposite of the double cutters. That side has 1-2 filings left. The side with more teeth has essentially 3 more teeth and 5-6 filings left on it. Plus it's non chisel. Did my best to massage the chain for continued use. Will have to figure out how to get the Chinese clutch drum to work or get a Stihl one. Want my new bar and chain not this crap!
 
Spent tanks seven and eight doing brush clearing by the barn. The easy starting and aggressive cut speed are nice for this.IMG_20190120_110444263_HDR.jpg

Boy is this thing thirsty. Like, voraciously thirsty. I could probably fill the oil tank once per two tanks of fuel. Probably needs to be leaned out a little more.

Broke down and got a Stihl clutch drum kit with rim sprocket. The aftermarket one didn't fit as the bearing needed to be larger in diameter. Stihl rim sprockets didn't fit the AM drum either. Saw still doesn't seem to have the torque I'd hope, so I'm glad it came with a 7 pin rim. IMG_20190121_194335800.jpg

I was only able to cut grapefruit sized wood with the old bar before, it hooked no matter how I sharpened it. spread pretty bad wider than .63" in places, .58 in others, so with the new .325 chain and bar cuts straight and hard now. Only made a couple quick cuts in the firewood pile. Pic of the bent spikes lol.IMG_20190121_150840195.jpg IMG_20190121_150847200.jpg

Land clearing with the production crew tomorrow. Will see if I can impress anyone with it...
 
Back
Top