My Central Boiler CL6048 OWB Installation Thread!

Arborist Forum

Help Support Arborist Forum:

This site may earn a commission from merchant affiliate links, including eBay, Amazon, and others.
Okay, so I took some pics of my plumbing. Now keep in mind I'm 24 years old, know a little about electrical and plumbing, but am in no way an expert in any of them. So be kind in your criticism. :msp_wink: Also want to add that in the future, I plan on installing bypass lines and 3-way valves in so I can bypass heat exchangers in the event of a leak or need to remove it, also for summer operation where I only want flow through my brazed plate hx for my domestic hot water heat.

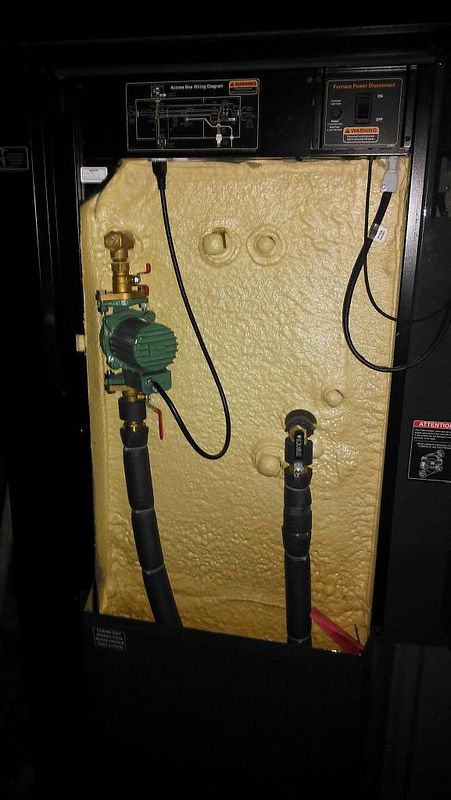
Boiler hookups. The pump is flanged with valves so if it goes bad I can easily shut off the water and remove it if needed. The return side has a union and valve.
IMAG0389.jpg


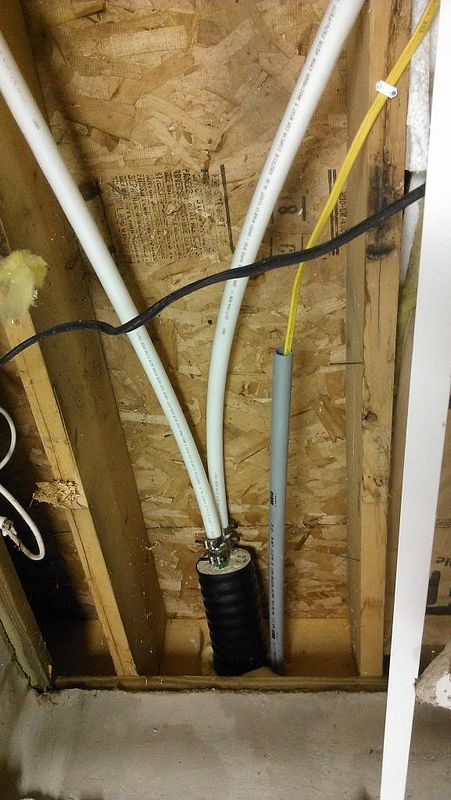
Here's where the ThermoPEX enters the house with the 120v supply for boiler operation.
IMAG0380.jpg


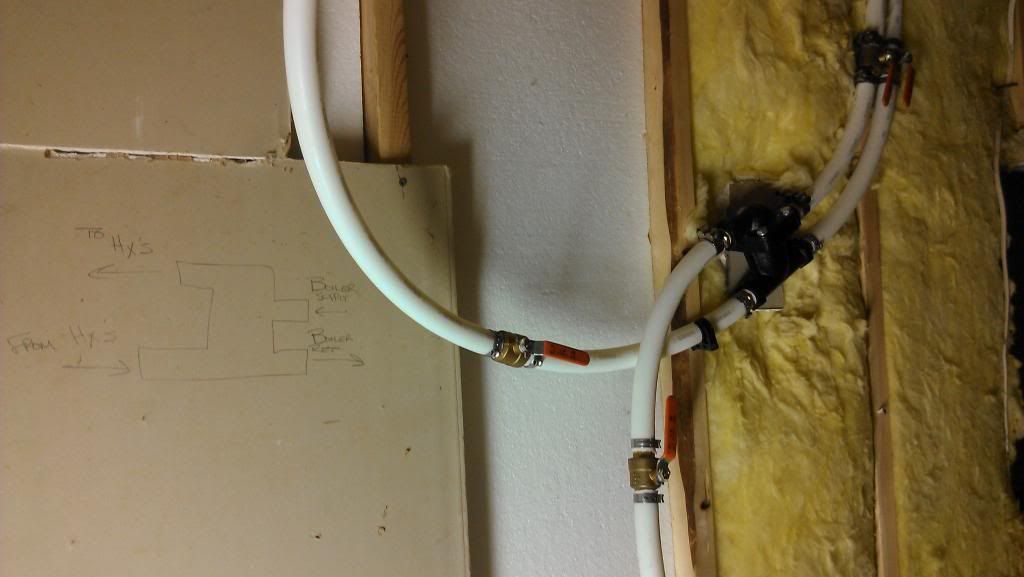
Then it goes to my Thermostatic Valve. Notice my little drawing on the wall for hookup reference.
IMAG0385.jpg


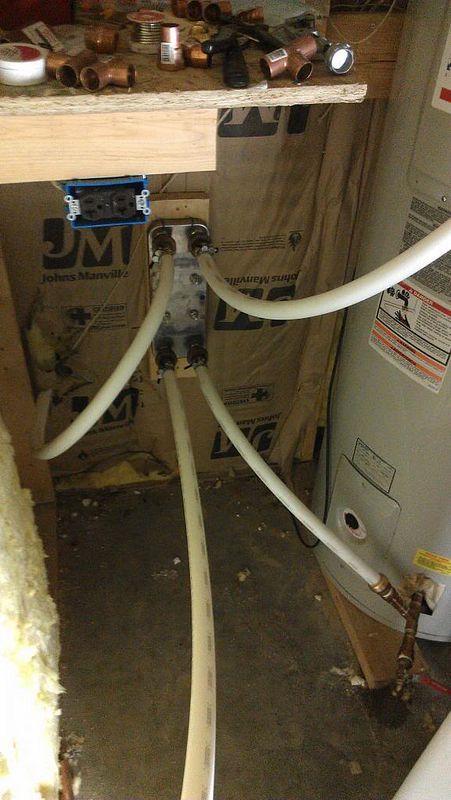
Brazed plate HX for domestic hot water. Hot boiler water enters bottom left, exits top left and heads to air handler hx. The basement staircase is behind the wall that the hx is mounted on so the boiler water doesn't travel far to get to the air handler. Right side hookups are plumbed directly to hot water tank. Convection has the cooler water entering at the bottom right, and rises to the top of the hot water tank at the top right. I tried not to use Sharkbite push lock fittings but for time constraint reasons that only made Sharkbite fitting available at that time, I used some. But only where they were easily accessible. I didn't use them if a ladder or ceiling panel removal was needed to access them.
IMAG0382.jpg


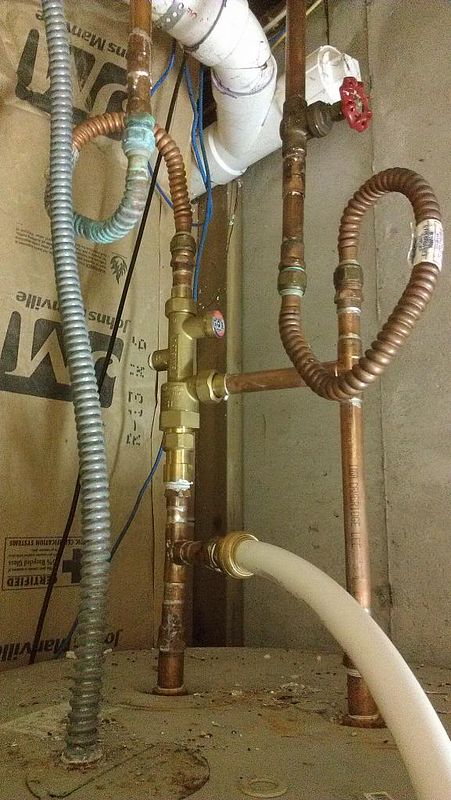
At the top of the hot water tank is a thermostatic mixing valve that mixes cold water with the 190ish degree water inside the hot water tank. The left side is hot water and the right side is cold water. That's why the plumbing forms an "H" which is where the cold water supply enters the mixing valve so it can be mixed with the hot water. Obviously you do not want 190 degree water coming out of your faucets or shower head, so the thermostatic mixing valve's job is to maintain about 115 degree water MAX coming from the hot water heater. It is adjustable so you can adjust the temp level. I believe code says 120 is max.
IMAG0381.jpg


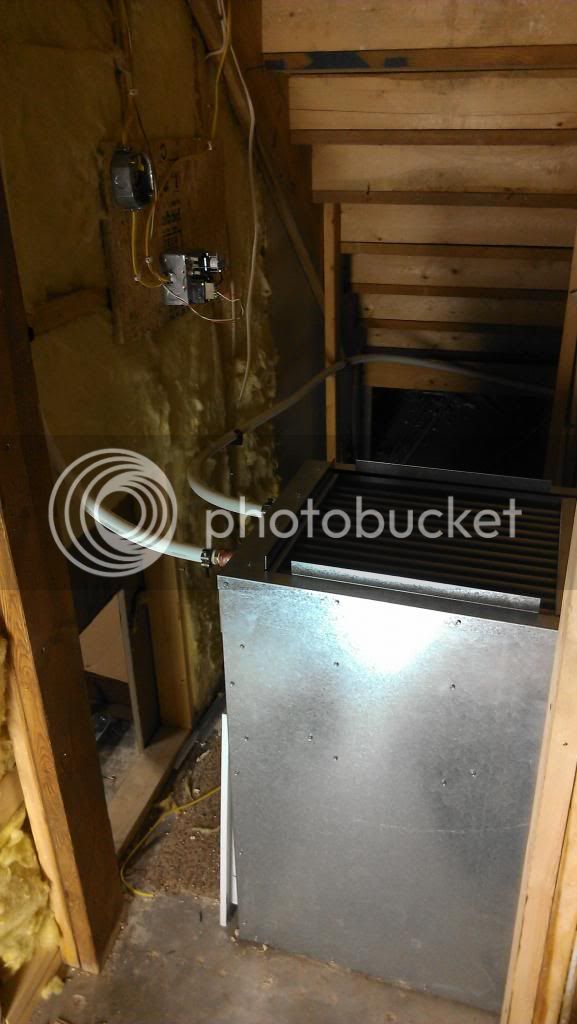
Now the boiler hot water comes underneath the staircase where my first air handler hx is awaiting hot water.
IMAG0379.jpg


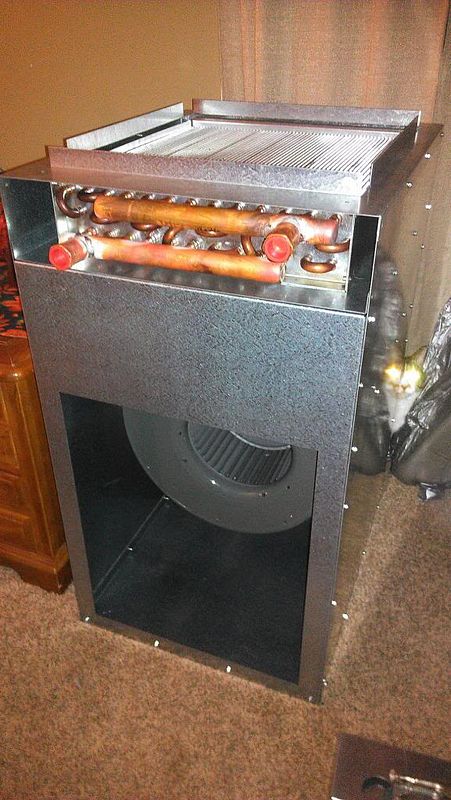
My other air handler awaiting install in the attic.
IMAG0377.jpg
 
Last edited:
It looks like you are well on your way to being happy with your set-up. Your work looks professional compared to what I had to work with. Of course, my house wouldn't be considered worth much....if you saw it you would understand.:msp_biggrin: The mixing valves and hot water would be nice but we use so little of it I didn't want to deal with it. Great looking work so far.

Shea
 
Thank you! My house wasn't much to look at on the inside when we bought it. It was a foreclosure and in rough shape inside.

Anyways, the next project is running ductwork off the air handlers. Should be interesting.
 
OH_, thanks for posting the pictures, I like checking out stuff like that. Im still a ways off from my installation as my building doesn't have a roof yet and it is snowing.

It looks like you depend on a thermosyphon through your brazed plate heat exchanger and I was wondering how well that worked? From looking at images on various sites I was thinking that fluid needed to be pumped through both sides of these.
 
Let's see if I can post photos...

Here's the incoming/outgoing point. I went through the block wall, coming out ~18 inches below ground (electrical code says bury line that deep).

View attachment 262118

Thermostatic valve, attached to the floor joists.

(Remote file is too large, it says. Making smaller no workie)

I used a "sidearm" exchanger for domestic hot water. This is the first exchanger in the series.

View attachment 262120

(And, yes, that's a Dillon 550B reloading press on the bench)

Furnace plenum exchanger (poor photo).

View attachment 262121

Garage space heater - the last in the series.

View attachment 262122

I probably spent lots more on fittings but I think it turned out well. The 'shark bite' things are nice but way too 'spensive for my taste. I bought the indoor PEX in 10-foot 'sticks', as the rolled stuff is nearly impossible for one person to unroll and install. I used lots of elbows and couplers.

Jon
 
Last edited:
OH_, thanks for posting the pictures, I like checking out stuff like that. Im still a ways off from my installation as my building doesn't have a roof yet and it is snowing.

It looks like you depend on a thermosyphon through your brazed plate heat exchanger and I was wondering how well that worked? From looking at images on various sites I was thinking that fluid needed to be pumped through both sides of these.

I like pics too. :D Yes, I am using the brazed plate hx and am depending on thermosyphon to do the work on the domestic hot water side. I was also under the assumption that a circulation pump was needed on the domestic hot water side. But I talked it over with my Central Boiler dealer and they said it's not needed, and they were correct as I've not ran out of hot water. My hot water heater tank is 82 gallons, so it's quite large and that may contribute to not running out of hot water.

The side-arm domestic hot water heat exchangers work well, but I'm told brazed plate exchangers do a more efficient job of transferring heat.

Let's see if I can post photos...

Here's the incoming/outgoing point. I went through the block wall, coming out ~18 inches below ground (electrical code says bury line that deep).

View attachment 262118

Thermostatic valve, attached to the floor joists.

(Remote file is too large, it says. Making smaller no workie)

I used a "sidearm" exchanger for domestic hot water. This is the first exchanger in the series.

View attachment 262120

(And, yes, that's a Dillon 550B reloading press on the bench)

Furnace plenum exchanger (poor photo).

View attachment 262121

Garage space heater - the last in the series.

View attachment 262122

I probably spent lots more on fittings but I think it turned out well. The 'shark bite' things are nice but way too 'spensive for my taste. I bought the indoor PEX in 10-foot 'sticks', as the rolled stuff is nearly impossible for one person to unroll and install. I used lots of elbows and couplers.

Jon

Nice Jon! Very nice and neat plumbing!

I bought my PEX in 100' rolls and although it's a PAIN IN THE RUMP to handle, once I figured out how to handle it it went pretty well. I was trying to use as few elbows (I used zero) and couplers (I used 3) as possible. With my high head application I wanted very few flow restrictions to help the pump out in any way possible.

The Sharkbite fittings I bought were nearly $15 a piece. :msp_scared:
 
Nope you should never run out of hot water with the plate. I just have a 40 gal tank, and you can run it until the owb is out of wood and will stay hot.

Did you buy or make the housing for your squirrel cage fan under the stairs?


Look good. :)
 
Let's see if I can post photos...

Here's the incoming/outgoing point. I went through the block wall, coming out ~18 inches below ground (electrical code says bury line that deep).

View attachment 262118

Thermostatic valve, attached to the floor joists.

(Remote file is too large, it says. Making smaller no workie)

I used a "sidearm" exchanger for domestic hot water. This is the first exchanger in the series.

View attachment 262120

(And, yes, that's a Dillon 550B reloading press on the bench)

Furnace plenum exchanger (poor photo).

View attachment 262121

Garage space heater - the last in the series.

View attachment 262122

I probably spent lots more on fittings but I think it turned out well. The 'shark bite' things are nice but way too 'spensive for my taste. I bought the indoor PEX in 10-foot 'sticks', as the rolled stuff is nearly impossible for one person to unroll and install. I used lots of elbows and couplers.

Jon

I have a setup similar to what you show in your third pic, is it possible to add cetral air to this setup?
 
I have a setup similar to what you show in your third pic, is it possible to add cetral air to this setup?

Yup. There's an A-coil for central air in the plenum, too. In fact, I had to have a new plenum made to raise the A-coil enough to fit the heat exchanger below it. The A-coil has to be above, or you run the chance of freezing the exchanger when the AC is running.

Jon
 
My heat exchanger is directly on top of my A coil. I have not had any problems with it.
 

Latest posts

Back
Top