My little Bucker

Arborist Forum

Help Support Arborist Forum:

This site may earn a commission from merchant affiliate links, including eBay, Amazon, and others.

Foxfire

ArboristSite Operative
Joined
Dec 19, 2012
Messages
288
Reaction score
42
Location
Southampton, nj but i'm PA all the way.
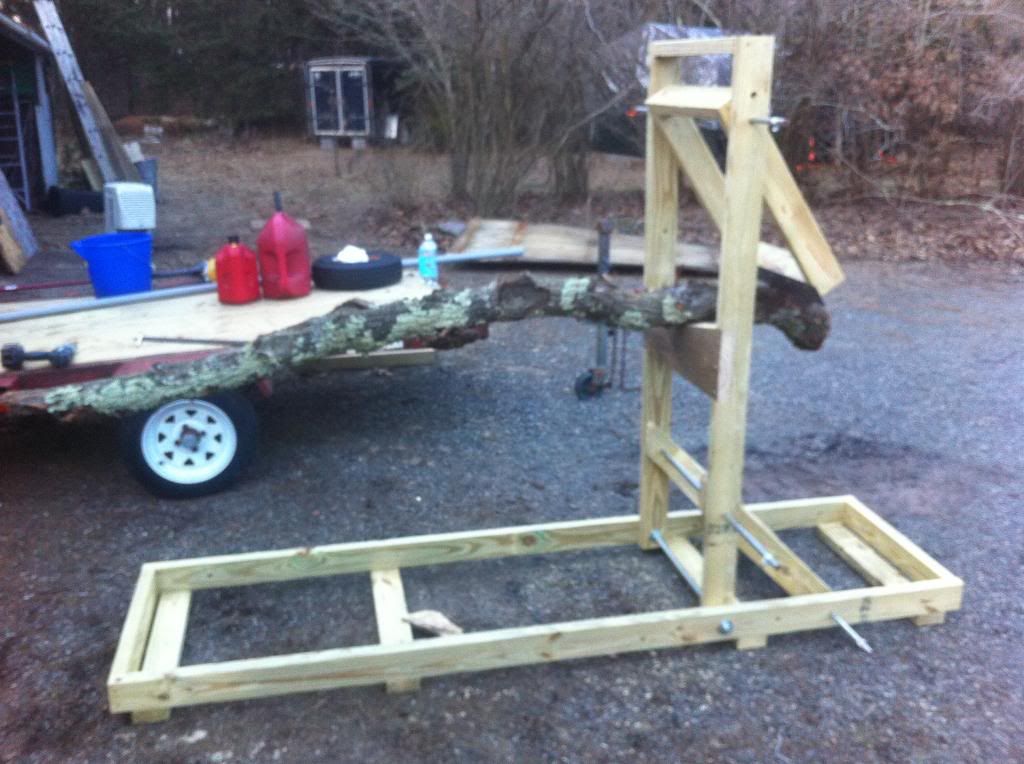
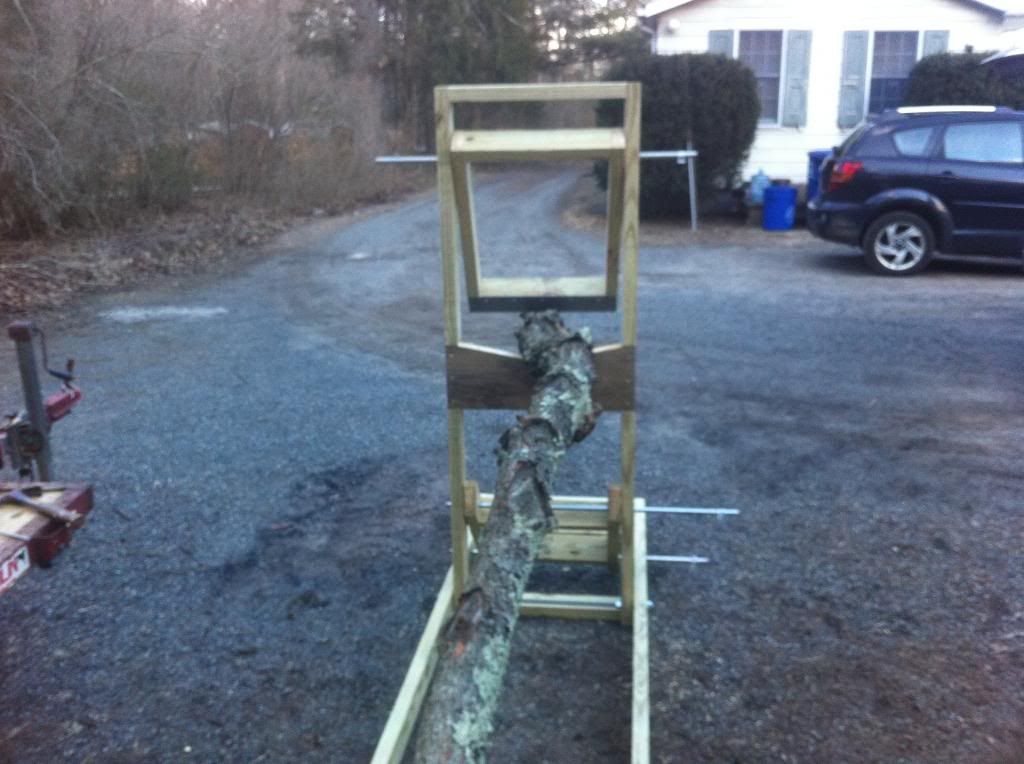
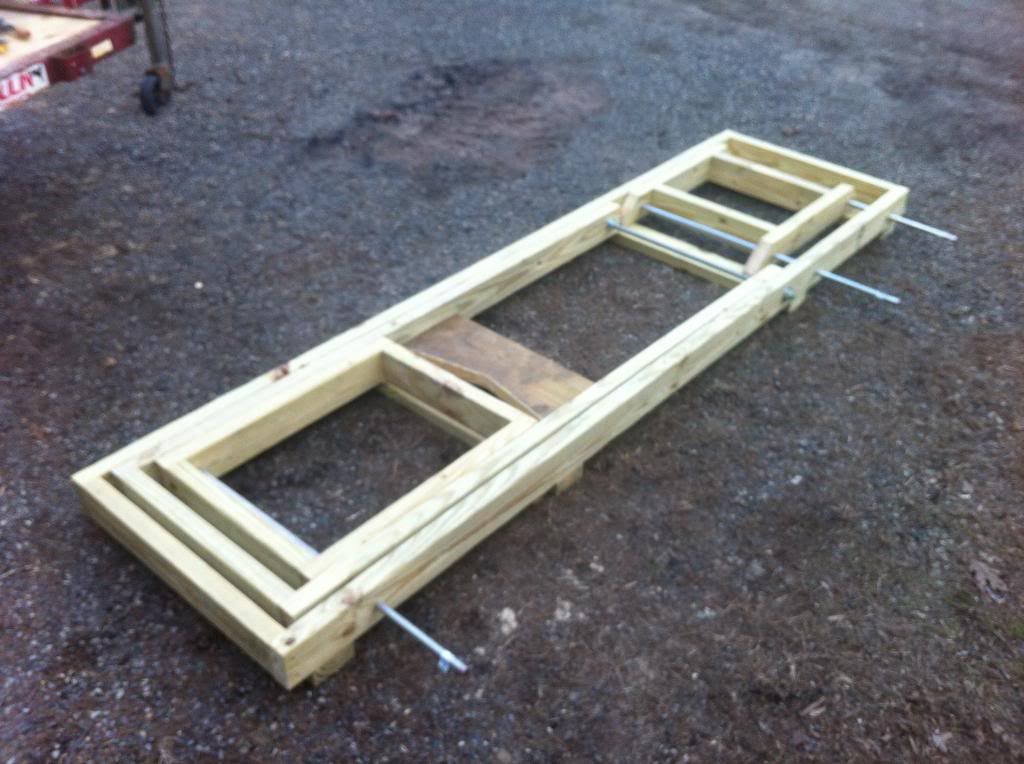
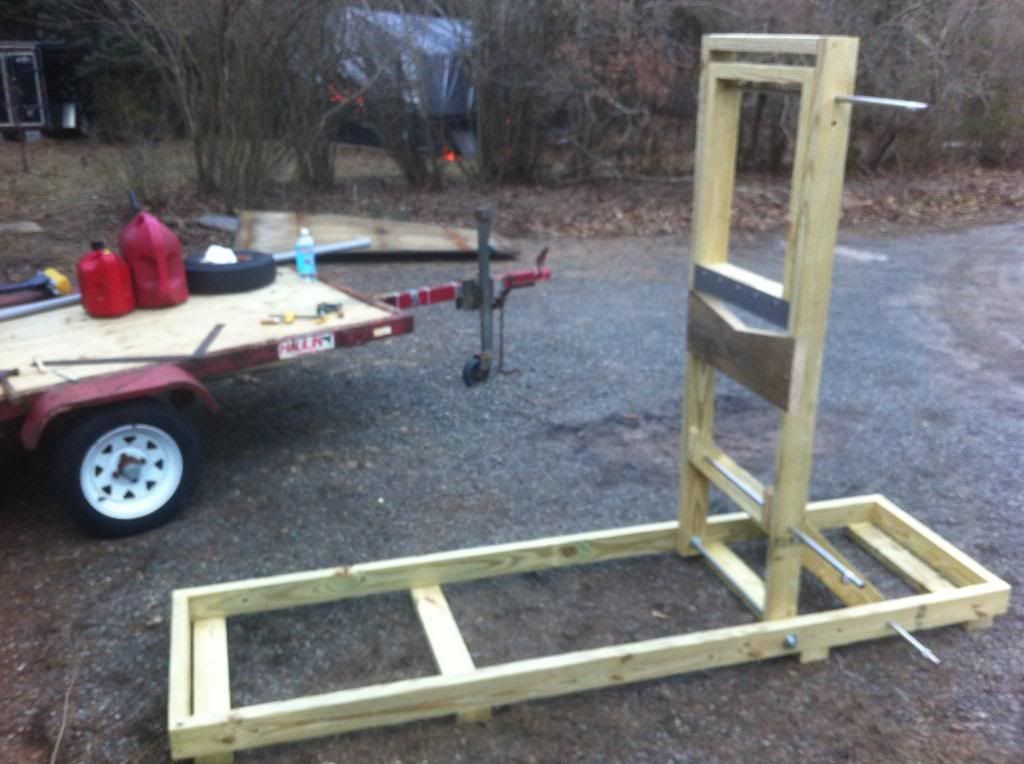
Thanks to BlueRidgeMarks thread and ETpilots posting of his bucking stand I built this...I was able to meet most all of my goals without having to make too many compromises. It's not totally done yet. To fold it up I have to pull all (but the standing frames pivot) the rods which is a slight pain so I may go back and put some metal sleeves in the holes to make it easier. I also haven't decided how to deal with the rods either. I plan on just putting a 90º bend on one end so they won't fall through when it's stored on it's side, but I may have a better idea. I haven't made any cuts on it yet but I'm pretty sure it'll work. Anyway here it is. The pics are kind of crummy, probably should've cleaned the lens.
BuckerFolded.jpg


BuckerUp.jpg


BuckerWithWood1.jpg


BuckerWithWood2.jpg
 
Last edited:
Could ya use lynch pins in place of the rods? They might be too short.
 
First, it look great. Congrats and thanks for sharing! (Rep sent).

Second, what did you use for the 'teeth' on the swinging part that bites into the wood?

I'd also be curious to know the overall size of your device - it looks larger than the ones in that other thread.


As far as the bars go, I guess I don't understand why you are using those instead of bolts.

- On the top pivot, you could use hex bolts and washers threaded from the inside out, terminating in 'T'-nuts that should still let this part fold flat into the frame.

- On the bottom of the diagonal braces, you could just use bolts, washers, and a nut, along with a wooden or plastic spacer.

- Where the diagonal spacers attach to the uprights, I would use bolts, washers, and large wing nuts to make set up and take down quick and easy.

Maybe add a strap or two to keep it all together when folded.

Philbert
 
Seems a bit complicated for the task... but I might be missing something.

John


I had the same thought. I suppose if all you are cutting is small wood such as what is pictured then it would be helpful. Otherwise, it seems a bit over complicated for me.

Not trying to take anything away from you. It looks nice and well built. Rep sent!
 
I had the same thought. I suppose if all you are cutting is small wood such as what is pictured then it would be helpful. Otherwise, it seems a bit over complicated for me.

Not trying to take anything away from you. It looks nice and well built. Rep sent!

I agree, nicely done. I would have thought some kind of carrier with some verticals that you could toss in a 1/2 dozen limbs and cut them all at once would be effective.

John
 
It's definitely is more complicated than it needs to be, but that's my M.O. I wanted to be able to fold it up nicely so that there would be half a chance that I would actually put it up when I'm not gonna be using it in the foreseeable future. I used the rods because I felt they would be stronger than individual bolts in that they tie things together better. Also I didn't want to have to use any tools to set it up/take it down. The rods both keep it standing and folded up flat so no extra parts or straps. Once I get the little bugs worked out and the lumber dries out I think it'll take maybe 20-30 seconds to setup, and I'll be able to carry it with one hand.

This is for logs/branches that can be easily lifted and bunched together. Maybe 8" and smaller. The stuff I normally don't feel like dealing with or rocking a chain for. I put a 3" piece of steel across the bottom of the swing arm that hangs down 1 1/2". I ground an edge on the steel bar to help it bite in to the logs and "V'd" the saddle to help things stay put. I may end up cutting teeth in to the steel bar if it proves to need it.

When it's folded up it measures 26" x 5" x 8'. The standing frame is 66" tall, and the top of the saddle is around 34" from the ground. No more bending over to cut. It measures 19" between the uprights. It's plenty wide enough to be stable and get more than enough wood in there.

Oh and no worries about hurting my feelings or nothing. I'm happy with how it came out so the worse case would be that a better design comes out of it...Thanks for liking it and thanks for taking the time to make suggestions.
 
Last edited:
I like it. Well thought out. Fix what bugs you and you'll be good to go.
 
Oh and no worries about hurting my feelings or nothing. I'm happy with how it came out so the worse case would be that a better design comes out of it...Thanks for liking it and thanks for taking the time to make suggestions.

I hope that you did not take my comments as critical - I think that you did a great job. I would be very proud if I made one that nice. Was just trying to understand your thought/design process with the rods versus the bolts.

I have a few saw buck that I made, but I think that this design offers advantages for certain types of cutting. Thanks for sharing the dimensions too.

Philbert

Like I said no worries, but no I didn't take them as anything but curiosity. I was in such a rush to post the pics that I did less than a good job in my OP of explaining what my goals were and how I met them.

Thanks for posting the links from the other thread...
 
Looks good

I usually find something where I'm cutting, forks, limbs, or stumps, to do the job of holding limbs for cutting. I am a minimalist, less is more kind of person.

If I were to offer a suggestion, the brace could be toward the cutting side, making the last couple of feet of the base unnecessary. I also think about knee high would be a good height for the poles to be held for cutting. Covering the lower part of the swing arm with plywood could make it easier to bump it back with the log when putting a new one in.

It's a neat piece of work but I'll never get around to making one. I might use the log holder idea in a stand up shaving horse i've been thinking about.
 
Last edited:
Perhaps this might serve the same purpose without having to lift the log.

[video=youtube;y0XCyku7mr4]http://www.youtube.com/watch?feature=player_embedded&v=y0XCyku7mr4[/video]
 
Yup, your right about moving the braces to the cutting side. I put them to the back to keep them out of harms way, but in hindsight they probably could've been low enough to not be anywhere near the path of the saw.

Years ago I started a shaving horse, but I wanted to do it so "traditionally" that I over thought myself right out of getting anywhere on it. Hopefully I'll come back to it when I'm a little older and wiser.
 
I love the design but I generally don't keep any extra lumber around that I could use to duplicate it. The piles of lumber I do have are for my ongoing remodeling project.

Usually all I do with branches of any sise is take a few large diameter ones and lay them out about 16 to 18 inches from each other. Then lay out a handful of 3 or 4 foot bungees n pile as many branches as I can crosways trying to keep one edge relatively even. Then fasten all the bungees and mark it like I would a log for the right lengths I need n have at it with the chainsaw. It works great n keeps the cutters out of the dirt.

When I'm all done with my remodel, if I have any left over lumber, I may have to give your design a shot!
 
Yup, your right about moving the braces to the cutting side. I put them to the back to keep them out of harms way, but in hindsight they probably could've been low enough to not be anywhere near the path of the saw.

I like the braces on the 'back side' - it means that they are less likely to get ht by falling chunks. You still need a 'tail' out the back for balancing long wood, but the exact dimensions can always be tweaked for the needs of the specific user.

What I like about this design, versus a more traditional saw buck is that most of the wood falls clear - you don't have to reach between legs, etc., for the chunks/rounds. And as noted in the other thread, you can load up a limb with branches still attached! If I had an arm full of small branches to cut, I think that a conventional saw buck (or one of the cradle designs - see links below) might hold those better.

http://www.arboristsite.com/firewood-heating-wood-burning-equipment/87226.htm

http://www.arboristsite.com/firewood-heating-wood-burning-equipment/186935.htm

Good to have options. Good to have simple designs that are easy to make, modify, etc.

Philbert
 
You can back a wagon or small trailer

under the limbs and let the cutoff drop in. No picking up to haul to stack.
 
Back
Top