my OWB build

Arborist Forum

Help Support Arborist Forum:

This site may earn a commission from merchant affiliate links, including eBay, Amazon, and others.
a update with no pictures. After many attempts, I could not get the bottom to seal. The unit is now on its back in my garage waiting on some free time for me to weld it again. It isn't one leak, it's multiple small leaks. I know the cause, I just couldn't get good penetration welding from the bottom.

overhead welding is very difficult. you said the unit is on its back. i'm guessing you mean the end opposite the door? if you could roll the boiler around the shop and only weld in position with the gun pointed straight down it might work a lot better. and it would be easier for sure. that's how I built mine. hope this helps. :msp_smile:
 
overhead welding is very difficult. you said the unit is on its back. i'm guessing you mean the end opposite the door? if you could roll the boiler around the shop and only weld in position with the gun pointed straight down it might work a lot better. and it would be easier for sure. that's how I built mine. hope this helps. :msp_smile:


I should have said it is on its top. I rolled it 180*. I have tried grinding what I can and re-welding the complete area and it still leaks. I've gotten frustrated. I'm not giving up, but maybe I should take a break. I'm just not sure what to do. I don't want to keep globbing weld on there. I really would like to heat with it this year though...
 
I should have said it is on its top. I rolled it 180*. I have tried grinding what I can and re-welding the complete area and it still leaks. I've gotten frustrated. I'm not giving up, but maybe I should take a break. I'm just not sure what to do. I don't want to keep globbing weld on there. I really would like to heat with it this year though...

If they are just pin hole leaks pick up some liquid glass from an auto parts store and it should seal it up, one member on here had done that with his owb said it worked great for the past 7 or so years if I recall right.
 
I should have said it is on its top. I rolled it 180*. I have tried grinding what I can and re-welding the complete area and it still leaks. I've gotten frustrated. I'm not giving up, but maybe I should take a break. I'm just not sure what to do. I don't want to keep globbing weld on there. I really would like to heat with it this year though...
Don't give up! I had to chase pinhole leaks multiple times. Started with 100, then 50, then 25, then 15, then 10, then 10, then 10... anyway the last 10 took awhile to get. A few of the pros on here could probably do it in one pass - I'm just a hack who can stick 2 pieces of metal together. One tip that I got was to weld uphill so I turned the tank over so the leak I was working on was at the 2 o'clock position and started just below the hole. Preparation is another key to make sure you're not getting contaminants in the weld. A few of the guys here can give you much better advice on heat ranges, techniques, and so forth, but that seemed to work best for me with my old Lincoln arc welder.

If you haven't figured it out already, 5-10 psi is plenty to pressurize the tank. Use a little soapy water to find the bubbles and mark them. If you need a break there are other things to prep - plumbing, furnace, thermostat, and you can always fall back on cutting more firewood. Good luck.
 
Another update with no pictures, but I did get all of the leaks sealed. I walked away from it for a week and came back with a new attitude. The welds are ugly but they hold!

Sent from my DROID BIONIC using Tapatalk 4
 
I welded in a drain and outlet yesterday then flipped it back over and filled it with water. 24 hours and no leaks. The level was exactly where I left it

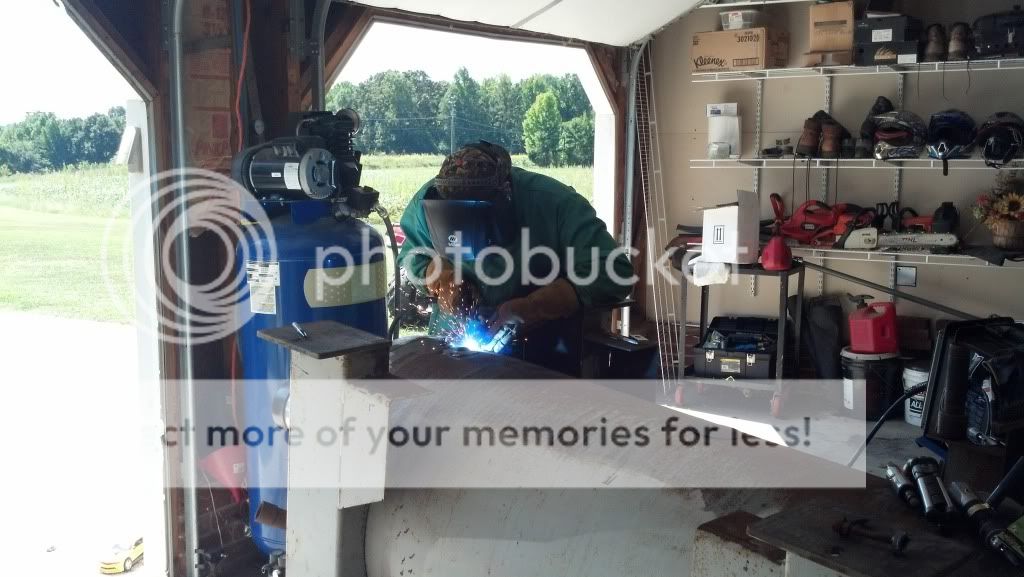
action shot welding in the drain


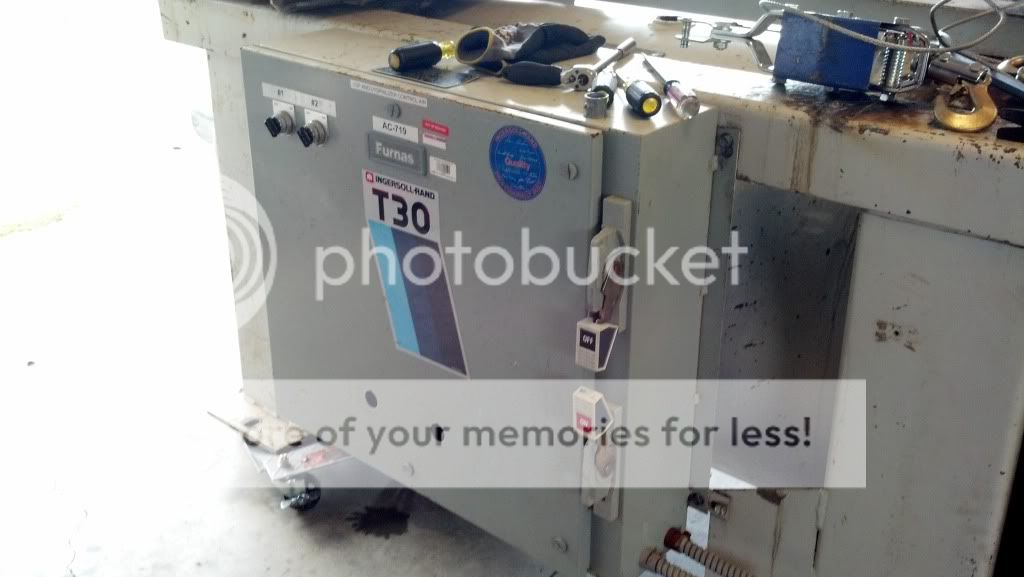
I got it back in the shop and put the cabinet back on.


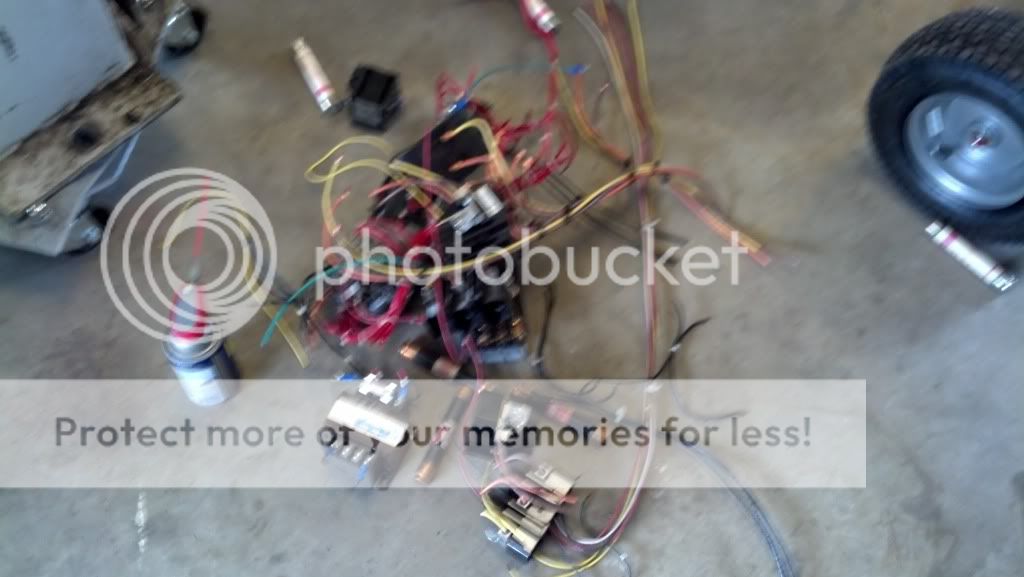
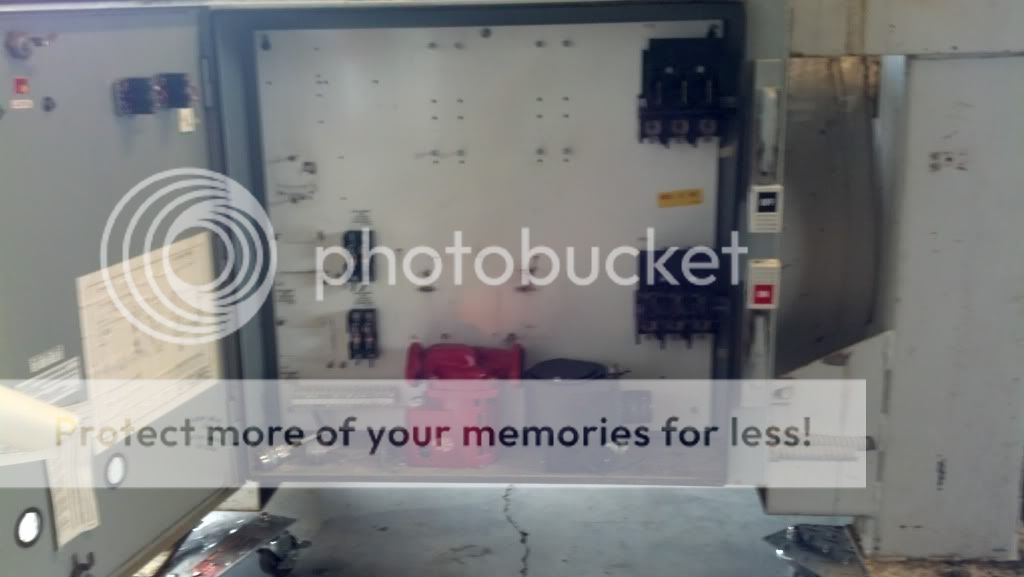
The transformers, heaters, contactors, and fuses from the cabinet.


My pump and fan just fit, but it will work.

 
I cut these pieces to mount my gasket too. I cut them in thirds to save on material. Six pieces total


<a href="http://s281.photobucket.com/user/cuda_1970/media/welding%20projects/IMG_20130919_202731_530_zps28b14e42.jpg.html" target="_blank"><img src="http://i281.photobucket.com/albums/kk240/cuda_1970/welding%20projects/IMG_20130919_202731_530_zps28b14e42.jpg" border="0" alt=" photo IMG_20130919_202731_530_zps28b14e42.jpg"/></a>

I welded them together to create two circles. I will weld one to the tank in the vessel and the other to the door. The gasket will glue to the circle on the door.

<a href="http://s281.photobucket.com/user/cuda_1970/media/welding%20projects/IMG_20130920_105637_701_zpsc32b0c6f.jpg.html" target="_blank"><img src="http://i281.photobucket.com/albums/kk240/cuda_1970/welding%20projects/IMG_20130920_105637_701_zpsc32b0c6f.jpg" border="0" alt=" photo IMG_20130920_105637_701_zpsc32b0c6f.jpg"/></a>
 
I welded in my returns today and one more supply. Just incase I want to run another line set for my upstairs unit. No pictures of the supply, but you get the idea.

<a href="http://s281.photobucket.com/user/cuda_1970/media/welding%20projects/IMG_20130929_175812_503_zps75a6a451.jpg.html" target="_blank"><img src="http://i281.photobucket.com/albums/kk240/cuda_1970/welding%20projects/IMG_20130929_175812_503_zps75a6a451.jpg" border="0" alt=" photo IMG_20130929_175812_503_zps75a6a451.jpg"/></a>

Also plumbed my pump.

<a href="http://s281.photobucket.com/user/cuda_1970/media/welding%20projects/IMG_20130929_175758_607_zps0e1dcd01.jpg.html" target="_blank"><img src="http://i281.photobucket.com/albums/kk240/cuda_1970/welding%20projects/IMG_20130929_175758_607_zps0e1dcd01.jpg" border="0" alt=" photo IMG_20130929_175758_607_zps0e1dcd01.jpg"/></a>

I then turned my attention my door again. I thought I had it the way I wanted, but I didn't like the door hinges, so I made them adjustable.

I started with this piece of angle

<a href="http://s281.photobucket.com/user/cuda_1970/media/welding%20projects/IMG_20130930_173946_321_zps8bd138ef.jpg.html" target="_blank"><img src="http://i281.photobucket.com/albums/kk240/cuda_1970/welding%20projects/IMG_20130930_173946_321_zps8bd138ef.jpg" border="0" alt=" photo IMG_20130930_173946_321_zps8bd138ef.jpg"/></a>

I cut two flat pieces out of it.

<a href="http://s281.photobucket.com/user/cuda_1970/media/welding%20projects/IMG_20130930_173958_665_zps465a08f1.jpg.html" target="_blank"><img src="http://i281.photobucket.com/albums/kk240/cuda_1970/welding%20projects/IMG_20130930_173958_665_zps465a08f1.jpg" border="0" alt=" photo IMG_20130930_173958_665_zps465a08f1.jpg"/></a>

Then drilled holes in one piece and cut slots in the other. I wise I had a mill, but the plasma cutter worked just fine.

<a href="http://s281.photobucket.com/user/cuda_1970/media/welding%20projects/IMG_20130930_180343_214_zps9141f9a7.jpg.html" target="_blank"><img src="http://i281.photobucket.com/albums/kk240/cuda_1970/welding%20projects/IMG_20130930_180343_214_zps9141f9a7.jpg" border="0" alt=" photo IMG_20130930_180343_214_zps9141f9a7.jpg"/></a>

and the finished product

<a href="http://s281.photobucket.com/user/cuda_1970/media/welding%20projects/IMG_20130930_185740_182_zps7903b5f1.jpg.html" target="_blank"><img src="http://i281.photobucket.com/albums/kk240/cuda_1970/welding%20projects/IMG_20130930_185740_182_zps7903b5f1.jpg" border="0" alt=" photo IMG_20130930_185740_182_zps7903b5f1.jpg"/></a>
 
I'm not sure if anyone stills looks at this thread, but i'll post this video anyway.
The lights and switches on the front are connected with the pump and fan. If the fan is on, the light is on.

Click on the video if you care to see it.

 
I like it

Pretty cool build. Although I bought my OWB, I'm seriously thinking about building a small one to heat my dad's shop with and I'm getting some neat ideas from your build. Keep up the posts, I'm still following it :msp_thumbup:
 
I'm not sure if anyone stills looks at this thread, but i'll post this video anyway.
The lights and switches on the front are connected with the pump and fan. If the fan is on, the light is on.

Still looking. Great work on the control box. I have a couple of lights very similar to yours that I need to install so I can see what's happening from the house also. The adjustable latch is good too and is simple.

Make sure your damper can't go past 90 degrees and get stuck in the open position - that will cause the fire to continue burning and boil the water. It's difficult to tell from the video if it could - maybe the control box door prevents it from opening too far. The solenoid sure moves the door fast on mine too. I like the idea of separating the fan from the door and the top mount into the firebox should minimize any soot issues into the fan. Is there an intake area on the control box for air or are you just counting on leakage around the plumbing? After you get it fired up you may find the need for a deflector to direct the air towards the fire.

You may also want to insulate the door if you haven't already. That would be very hot to the touch and would lose a lot of heat.

Looking forward to see it fired up and hear about how it works.
 
Nice build! I'd love to build my own but I bought one instead. Time restraint kept me from building my own.
 
Still looking. Great work on the control box. I have a couple of lights very similar to yours that I need to install so I can see what's happening from the house also. The adjustable latch is good too and is simple.

Make sure your damper can't go past 90 degrees and get stuck in the open position - that will cause the fire to continue burning and boil the water. It's difficult to tell from the video if it could - maybe the control box door prevents it from opening too far. The solenoid sure moves the door fast on mine too. I like the idea of separating the fan from the door and the top mount into the firebox should minimize any soot issues into the fan. Is there an intake area on the control box for air or are you just counting on leakage around the plumbing? After you get it fired up you may find the need for a deflector to direct the air towards the fire.

You may also want to insulate the door if you haven't already. That would be very hot to the touch and would lose a lot of heat.

Looking forward to see it fired up and hear about how it works.

I do need to do something about the damper. I tried some jack chain to hold it down but the solenoid was to violent for it. I'll figure something out.

No intake area on the cabinet yet. I'll probably drill a 3" hole on the bottom if I need too.

I'd like to insulate the inside of the door, but i'm not sure how. I thought about cutting a round piece of 14ga and welding it to the door so that it goes inside the fire box a inch to deflect heat. I'm not sure yet.
 
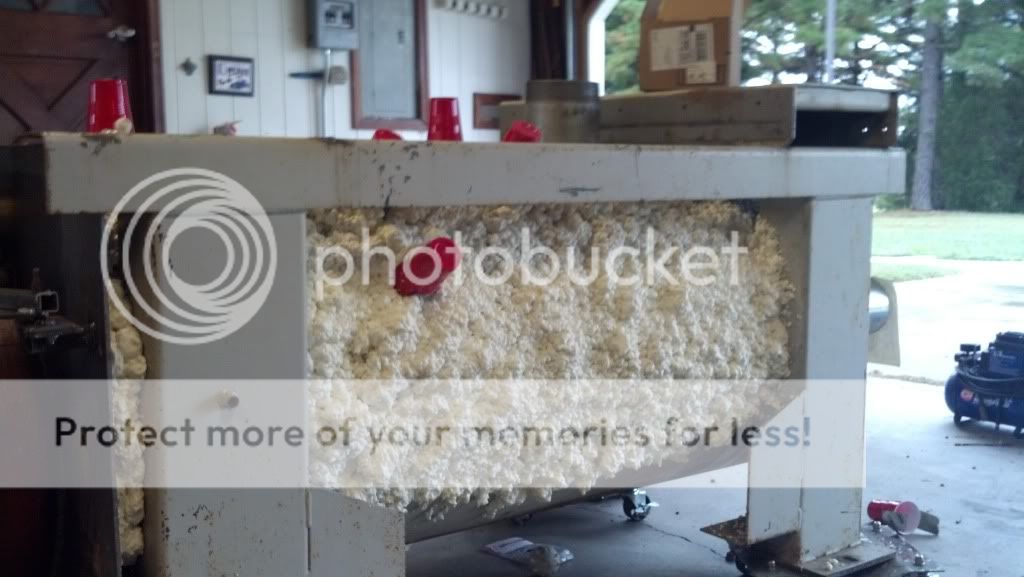
started insulating my owb. turns out I only had enough to get almost a 1/4 of it done.

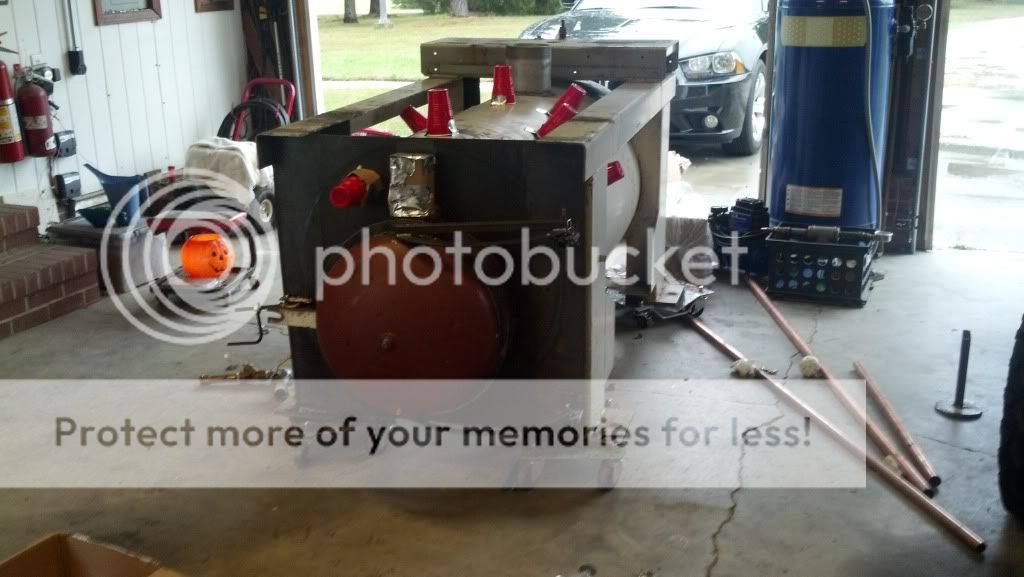
I found another use for red solo cups!


I like this spray foam insulation. I could find a lot of uses for it if it wasn't so expensive.

 
i really enjoyed your thread. I am currently building my own owb. I was pretty bummed out when i got done and had a couple of leaks.

I'm in the same boat when it comes to welding. I can kinda stick 2 pieces of metal together, but welding things together water tight is a different ballgame.

good luck! I look forward to seeing your installation.
 

Latest posts

Back
Top