Now time for First sharpening

Arborist Forum

Help Support Arborist Forum:

This site may earn a commission from merchant affiliate links, including eBay, Amazon, and others.

AaronB

ArboristSite Operative
Joined
Dec 1, 2008
Messages
199
Reaction score
50
Location
Kansas
I have the Granberg File-n-joint but have some questions about filing in general. Per the Oregon box I am to use a 7/32 file, which I did.

My question is how to you know how high the file is to be above the cutter. I have read 1/5 or 1/10th of the file above the tooth, but when I set the file to what I think that is, based on pictures I have seen, the file makes a 'dip' in the gullet.

I didn't think having that dip was correct, so I raised the file up so the gullet would have the flat bottom that it does now, or at least real close to flat. So any suggestions or pictures/illustrations that you guys have the would help me on how the file sits in the tooth. I did see some pictures but for the file to sit the way they showed it it would have to be a smaller file.

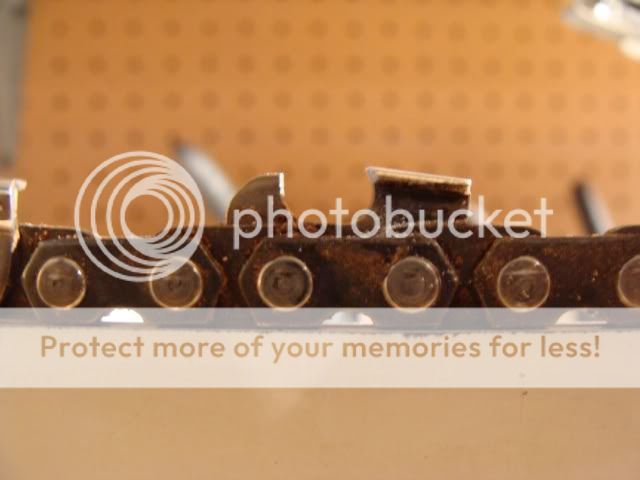
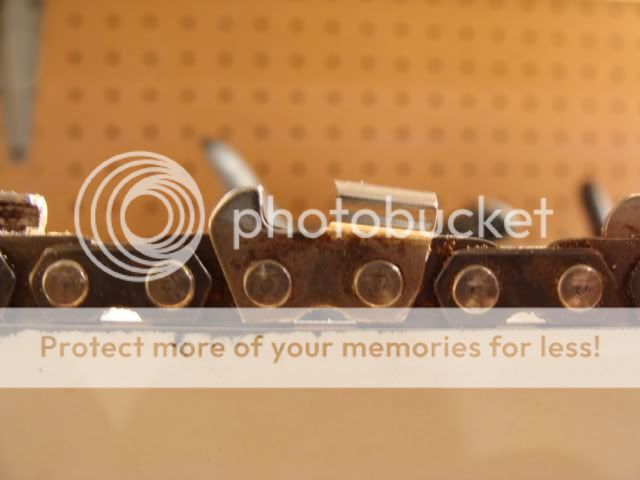
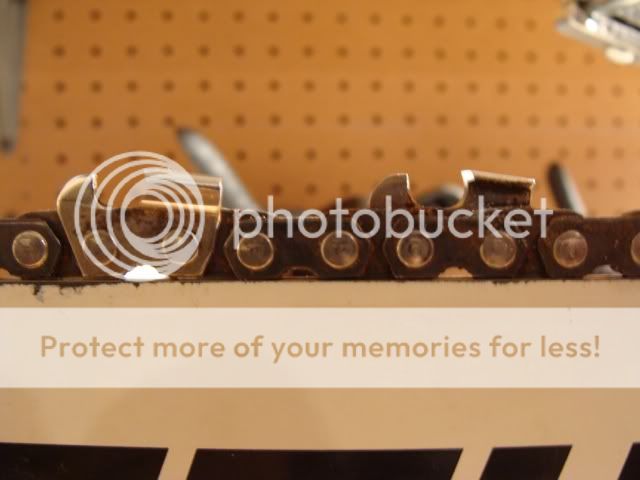
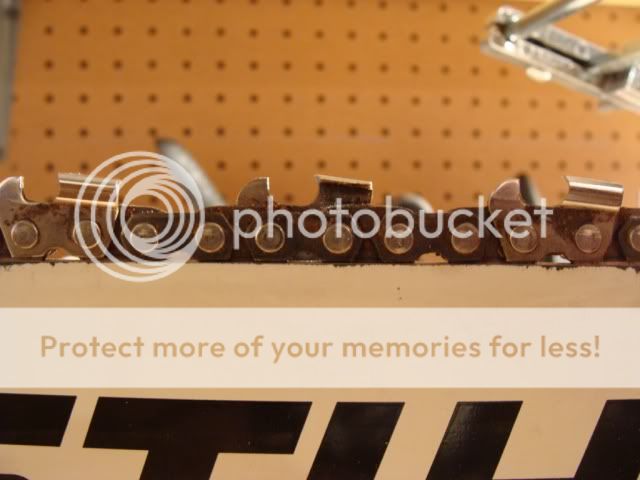
Anyway, here is some pictures of the setup and of some teeth I did. Let me know if you see any major issues. The last four I think are the way it should look after sharpened, but I have never done it, so I am not sure.
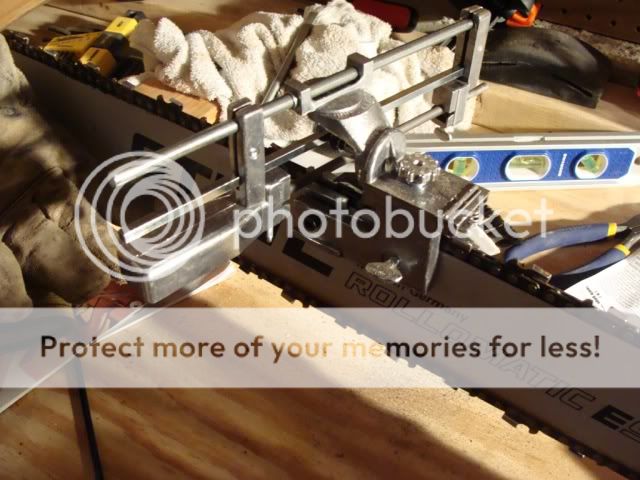
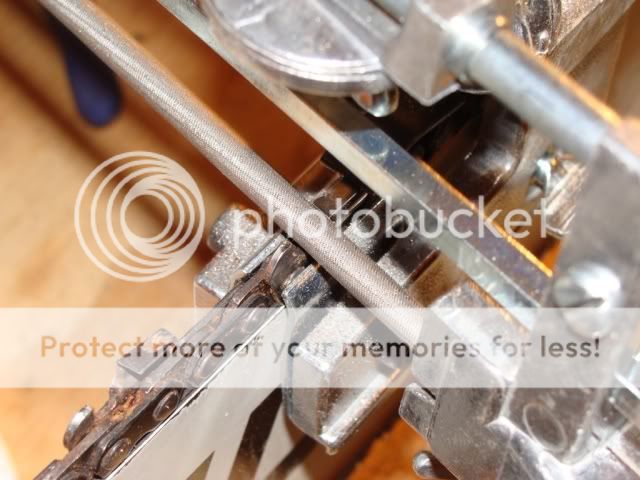
Chainsaw040.jpg

Chainsaw042.jpg

Chainsaw049.jpg

Chainsaw050.jpg

Chainsaw051.jpg

Chainsaw052.jpg

Chainsaw053.jpg

Chainsaw054.jpg
 
AaronB, you are right there with the proper questions. I was just going to start a thread on how to figure out how high to set the file too. I've read 20% of the file should clear the top of the tooth. But many other dims too. I'd suggest this...before some of the filing masters show up and comment...they might want to know what chain it is. Then they will know if the file is correct (or you can read it from the back of the box). It looks like the way I've done mine though, I use the same filing guide. I used 20% but not that file size. Mine has more of a hook on the tooth.
Hmm...just noticed from your top photo....I set my guide so I have the maximum amount of file available for use. The screw down near the handle that you drive the file with...is also a clamp. Undo the clamp (above the knob to clamp the file) and move the whole handle back so only the end of your file is held....at the blunt end. That way you'll get another inch of file travel, and clamp on the non filing part of the file.
 
Last edited:
I think you are looking pretty good. What will happen is that you will refine the process a bit while you mill, but you are at least 90% "there". It's part of the learning curve. You have a well defined gullet, the side is getting sharpened, so your bases are covered. You now just have to try it and see how it works. If it's not cutting well, you need to drop the file down a tiny bit the next time. If it cuts like crazy but wears quickly, raise it up a tiny bit next time. It looks like you will be fine from here, but as I said, continual refinement.
 
My question is how to you know how high the file is to be above the cutter. I have read 1/5 or 1/10th of the file above the tooth,
There are no set values, it's what works for you. You have to try it and if it works for you that's it. Somewhere between a 1/5 and 1/10 seems to be a staring point although my 3/16 basic Oregon file guide is operating at around 1/4 ?

but when I set the file to what I think that is, based on pictures I have seen, the file makes a 'dip' in the gullet.
Don't worry about that, just smooth gullet out so its nice and clean. It's best to go by how the saw feels while it's milling

The size of the file and how high it is above the cutter is what creates the hook.
Some hook is helpful so, together with a reasonable raker depth, the saw can self feed.
Too much hook and/or too high a raker and the chain will grab and the cutter loses its edge quickly
Too little hook and/or too low a raker and the chain will make too much powder. It will also go blunt because it's skating along on the top of the cutter instead of biting the wood.

There's usually a trade off between an aggressive cutting chain that can bog down and goes blunt compared to a less aggressive one that does not cut as fast but also does not go as blunt as quickly.

The picture below shows how hook varies with height and file size

attachment.php


Raising the file above the cutter (red circle) or using a slightly smaller file (blue circle) creates less hook. These are or course exaggerated because they are show with comparative white circles which have no height and ridiculous hook.

By sheer acccident I've ended up using a 13/64" file in a 5/32" file guide which ends up at a height above the cutter of 1/7. This seems to have enough hook to feed the saw at a reasonable rate but not blunt the cutters too quickly


Anyway, here is some pictures of the setup and of some teeth I did. Let me know if you see any major issues. The last four I think are the way it should look after sharpened, but I have never done it, so I am not sure.

They look OK to me.
 
Okay, Aaron, the resident CSM expert has spoken. Bob is "da man" when it comes to this, and the current CSM "king" of the site since aggie has been absent lately. Bob still takes the cake for being the technical guy.

Nice post, Bob!!!!
 
Another question.

does it matter which side you file from? I know you are supposed to sharpen on the push stroke only....but.....

with this sharpener I am pushing from outside in (back of tooth) when doing the teeth nearest me, but since all I have to do is change the angle on the guide I am now pushing the teeth on the other side from the inside out.

Doesn't feel like it would matter since the guide lets me do it, but thought I would ask.
 
Okay, Aaron, the resident CSM expert has spoken. Bob is "da man" when it comes to this, and the current CSM "king" of the site since aggie has been absent lately. Bob still takes the cake for being the technical guy.

Nice post, Bob!!!!

Thanks oldsaw - but you'll note I've said essentially the same as what you said with few numbers alongside :)

does it matter which side you file from? I know you are supposed to sharpen on the push stroke only....but.....

does it matter which side you file from? I know you are supposed to sharpen on the push stroke only....but.....
I think it does but only because I think it's easier to file from the inside to the outside, especially once the file is slightly used.
Filing from the outside in means the file has to actually file the chrome plating, this is harder on the file to begin with and then the hard chrome plating breaks off and rides away in between the file and cutter. Once the file is worn a bit filing becomes a little harder.
FIling from the inside out means the softer cutter metal is filed (easily) and then the thin chrome plating just breaks off. It probably does not give as fine an edge but any really fine edge is lost in the first 6 inches of a cut anyway. Filing should also be a touch quicker from the inside out.
 
Last edited:
Thanks oldsaw - but you'll note I've said essentially the same as what you said with few numbers alongside :)

Hence the "tech" note. I just realized that we have had a couple of the more heavy duty CSM guys go AWOL lately. Kind of a bummer. That's why the search function is so valuable.
 
a more general question about sharpening...

AaronB, you are right there with the proper questions. I was just going to start a thread on how to figure out how high to set the file too.

Thanks guys for starting this thread, it's just what I need. I'm a beginner miller, and I'm thrilled to see my first stack of wood drying in the shed. I've started with the easy stuff, yellow pine, strong but still easy to mill compared to the oak I'm getting ready to mill. I've always sharpened my firewood cutting chains either freehand with a file or with the granberg 12v die-grinder type sharpener you hold freehand. I also have the cheap, junky $30 Harbor Freight grinder that does a tolerable job. This Granberg file holder attachment y'all are talking about seems to be much more precise than what I'm using at the moment. I'm assuming that a precision sharpened chain will make me a more efficient miller and I should purchase this gizmo? I've been buying so much milling stuff that I'm reluctant to throw in an expensive electric bench top grinder on top of everything else I'm buying. Will one of these Granberg sharpeners y'all are talking about give me the best bang for the buck?
 
I also have the cheap, junky $30 Harbor Freight grinder that does a tolerable job. This Granberg file holder attachment y'all are talking about seems to be much more precise than what I'm using at the moment....and I should purchase this gizmo?
You can finesse the HF grinder to give decent results, if you set it up so that it barely grazes the cutter.

I've had better luck with grinders than with filing, but to each his own.
 
I've always filed free hand, but my eyes are getting so bad I can't get in a position where I can see the tooth well. Maybe reading glasses would help? I was out in my shop a couple days ago and found one of the Granberg file holders. A friend gave me 2 old Homelites last year, maybe it was in a box of stuff that came with the saws. I'm gonna give it a try soon. The saws came from my friends uncles shop. Now I've got to check, if he had the Granberg holder, he may have had a Granberg mill laying around, Joe.
 
I think it does. I think it's better to file from the inside to the outside.
Filing from the outside in means the file has to actually file the chrome plating, this is harder on the file to begin with and then the hard chrome plating breaks off and rides away in between the file and cutter.
FIling from the inside out means the softer cutter metal is filed (easily) and then the thin chrome plating just breaks off. It probably does not give as fine an edge but any really fine edge is lost in the first 6 inches of a cut anyway. Filing should also be a touch quicker and easier from the inside out..
A

I will keep that in mind for next time. Since the File-n-joint has a depth gauge (as in how many strokes you can take) on it, I didn't want to move the holder, that way all teeth would be the same. But to file inside out I will need to move it, but maybe counting strokes is better than the depth gauge.
 
You can finesse the HF grinder to give decent results, if you set it up so that it barely grazes the cutter.

It's nice to see someone not bashing this grinder, I wonder how many folks would admit to owning one? I got mine used for a lot less than 30 bucks, and couldn't resist the temptation to try it out. The wheel wobbles from side to side a bit, as the parts are all plastic, I've been thinking about getting new parts for it to see if it improves, but I've not really bothered because it gets my chains sharp anyhow. I've been told that grinders can overheat and disturb the temper of the cutting teeth, so the procedure is to sharpen with a swift, chopping motion, not letting the wheel make contact long enough to generate a lot of heat. I wonder if a wobbly wheel can accomplish the same, making contact for a fraction of a second, then backing off, etc.
 
I've got one, and it works okay once you figure it out. I bought it to covert chains to ripping chains, usually sharpening by hand a couple or three times on them, then running the HF on them again. That system has worked well for me. Wish I had a nicer sharpener, but the money isn't there for it.

Yes, short bites, and keep in mind that when you work the other side of the chain, you have to set it up all over again or you will get uneven teeth. That, the flexible chassis, and the lack of power are the only real problems with it.
All of them can be worked around.

The only other times I use it is to fix a chain that's been boogered up. All of my crosscut chains I do by hand.
 
I will keep that in mind for next time. Since the File-n-joint has a depth gauge (as in how many strokes you can take) on it, I didn't want to move the holder, that way all teeth would be the same. But to file inside out I will need to move it, but maybe counting strokes is better than the depth gauge.

Counting strokes is ok for touching up but you do have to at some stage actually measure the lengths of the cutters, usually after every few days milling is when I do it.

Once I settled on my working cutter parameters, I'm not all that concerned about them being too exact. I try to get raker depths within 0.005", cutter lengths within 0.010".
 
It's nice to see someone not bashing this grinder, I wonder how many folks would admit to owning one?
People on AS laugh at me because I actually admit to using the $30 grinder and even claim to get decent results with it.

For me, what worked was setting it up so that the wheel came down next to the cutter, then using a finger to push the flexy thing over against the cutter. This touches up the cutter nicely.

If you try to come down into the cutter, taking a lot of metal off at once, the $30 grinder flexes a lot and gives inconsistent results.

But, Santa just dropped off a Jolly Star grinder :chainsaw: which I'll be reporting on later tonight.
 
The comments so far are spot on but I thought I would add a couple bits of info.

Regarding the direction of filling. Yes there is a preferd difection and it is the one bob gave. even before hard chrome plated chain there was still a reason for tis same directuion and it is due to the file raising a burr. if you only file from one direction it will only raise a burr on one side and the chain will pull in that direction.

The angle of hook contributes to how well the edge will wear. a more acute angle of hook will cut cut faster but the thin cutting edge will be fragile and will not hold its edge very long befor becomeing dull. think in extremes and it will become very clear. for instance think of a hook so acute that it is like a razor. How long do you think a chain made of razor blades would last? In contrast a more obtuse hook angle will be stronger and will hold its edge much better. Again think in extremes. For instance a shear used for cutting metal is a great example an obtuse cutting edge, it is nearly 90* and it holds up to cuting metal. Now the reason we don't want hook angles of 90* is because the chain would cut so slowly the powerhead would burn up. I don't remember where I read it but a good starting point for hook angles is 40*-50*. adjust for the hardness and abrasivness of the wood.

Just for the record the hook angle is the angle that the tooth strikes the work surface.

The dip in the gullet will have zero effect on the performance of the chain.
 
The angle of hook contributes to how well the edge will wear. a more acute angle of hook will cut cut faster but the thin cutting edge will be fragile and will not hold its edge very long befor becomeing dull.

OK, I get it. I sure hope AaronB does since this is his post. Thanks bluerider. Though it sounds logical once you write it out, this is the detail I never found searching posts on sharpening. I searched a lot. I'm a 'by the numbers' guy but never considered how you can alter the geometry (quite easily with a guide) to tailer the cutter for your application, or preference. More hook, reduce the power required to make the cut but short lived edge. Less hook, more durability (within a small window of actual cutter/wood angles).
This little details explains why I see so much variation in numbers quoted. More hook could support lower rakers...it all depends on how it cuts and what it's cutting. Amazing once you visualize shears and razors.
So...just to be clear here. All cutters the same length (within a small window), all rakers the same height (within a small window and of course varied as the cutter wears), balance the amount of hook against your file diameter, raker height to obtain a cut in your wood you are happy with. Hmm...easy enough now that I see it's all rather subjective.
I know I'm going on and on here but to me....the whole point of all of this equipment is to get a cutter in the proper place. If the cutter isn't perfect...I'm just burning fuel. I now see that a "perfect cutter" is rather elusive. One that is close, isn't hard to understand.
 

Latest posts

Back
Top