


Nothing new or particularly interesting for most here but thought I'd document a recent rebuild / conversion of a Stihl 038.
Ever since building my Chinese 660 kit and reading countless times the usual comments along the lines of "steer clear of the kits and just rebuild a genuine saw" I have been on the lookout for a project. In 18 months of looking I had not come across one project worth even considering and came very very close to just ordering another kit. Then a very rough looking saw popped up on Ebay locally which was presumed to be an 038 by the seller (I could tell from the photos he was right). If only for the fact it was only 15 mins away I made a bid and surprisingly won it for £46 or $62 - my max bid and a figure that I literally guessed on the spot that I could make back if it was beyond repair and had to split for parts which I could sell on.
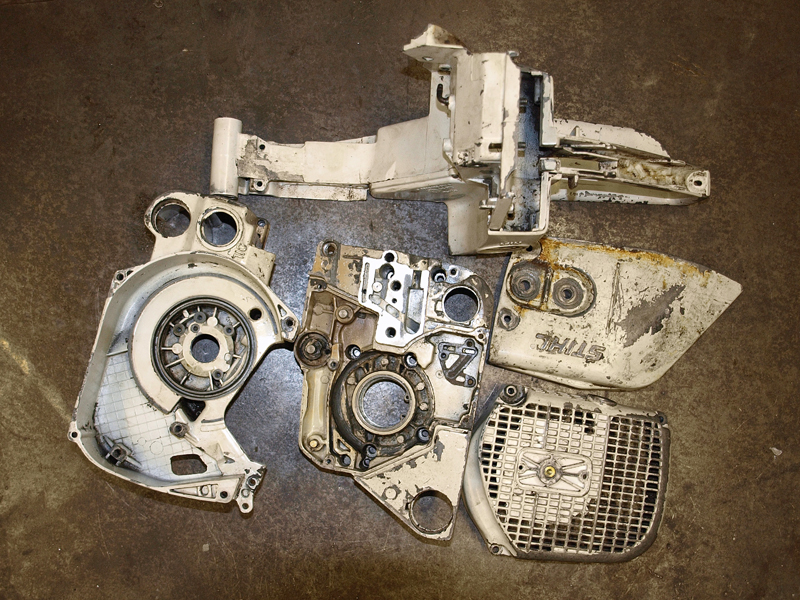
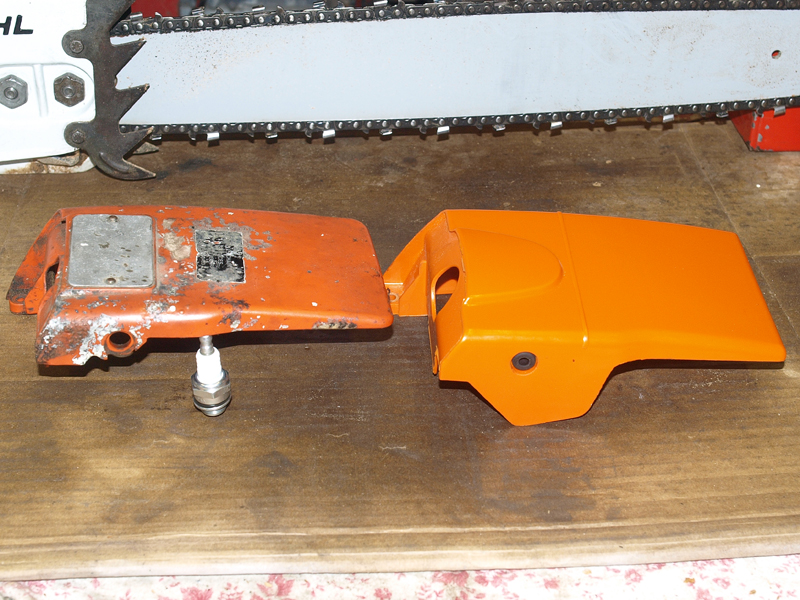
The following few photos are lifted directly from in the Ebay listing:
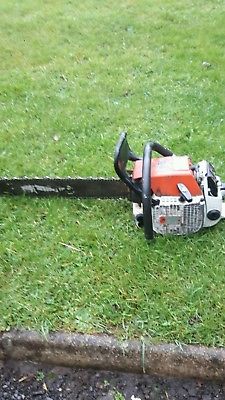
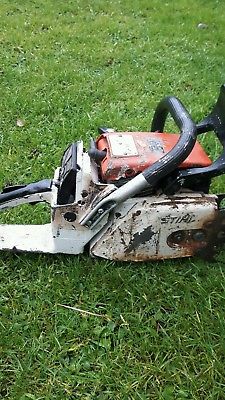
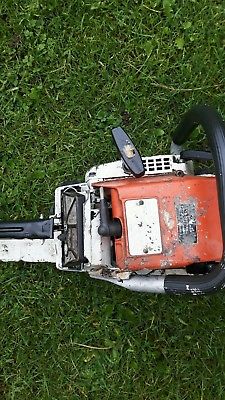
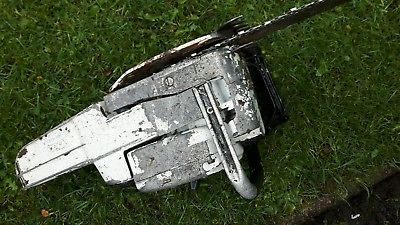
I could tell from the photos that it had been on fire at some point and had been worked to death. I didn't for one second believe the claim that it would actually fire but not run and figured a new top end would be needed.
I collected the saw and only had one surprise... a very tatty bar but a virtually new recently ground Stihl RM chain on it - this saw was in absolutely no condition to need a chain at all let alone a decent one
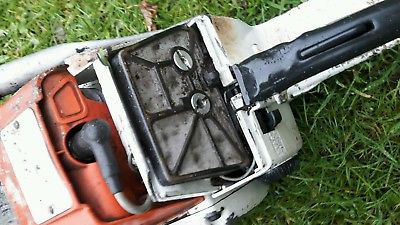
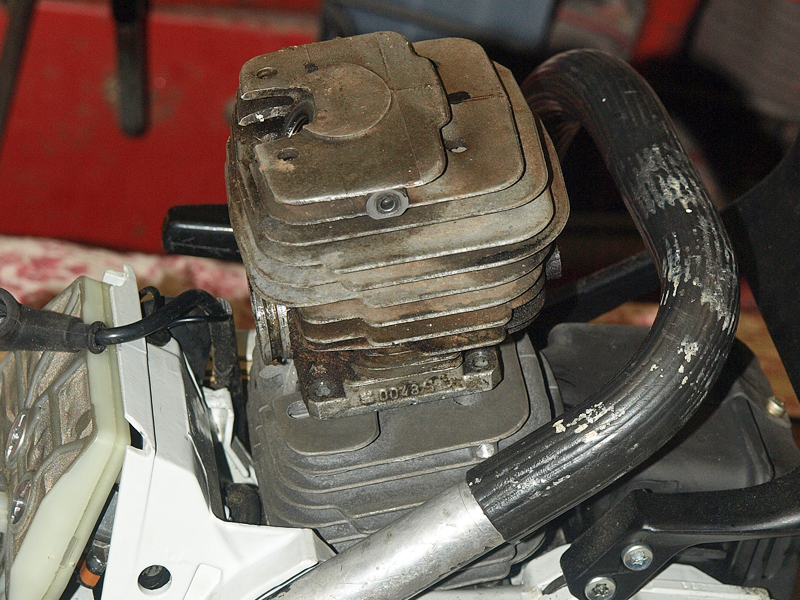
As was expected no compression at all - I didn't even bother to test the claim it would fire. Off came the muffler - sure enough P&C were scrap:
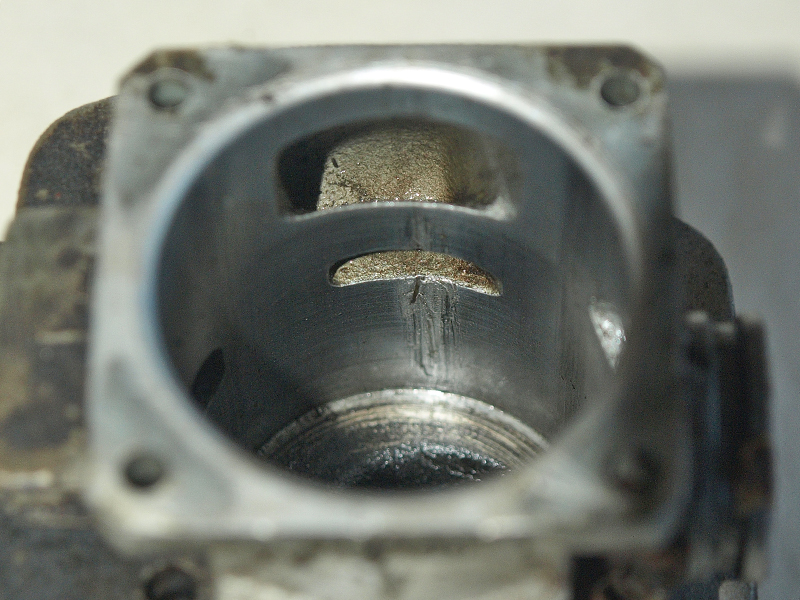
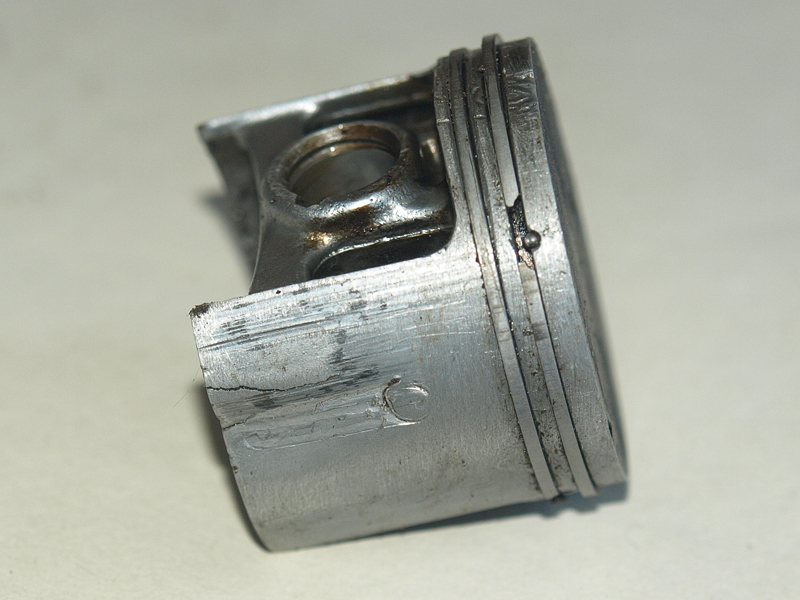
I'm guessing the wrist pin circlip let go and went through the transfer port.
The cylinder measured 50mm which makes it a Super. OEM top ends are hard to come by and 90% of AM appeared to be for the 52mm Magnum. I already knew a conversion was possible and so made the decision there and then to make the saw into a magnum albeit a AM version. Made a Hutzl order for P&C, plastics , muffler and all the other bits and pieces I could see needed replacing.
Realising I had at least 2 weeks (possibly more due to the Christmas holidays) before the bits would arrive I stripped the rest of the saw down to clean but only got a few minutes into that before deciding that I also had enough time to re-spray the metal work which was seriously tatty and rebuild the bottom end.
First job was to make the case splitter using the plans kindly shared here:
https://www.arboristsite.com/community/threads/case-splitter-homemade.245737/
3mm MS side plates had to do as that's all I had to hand:
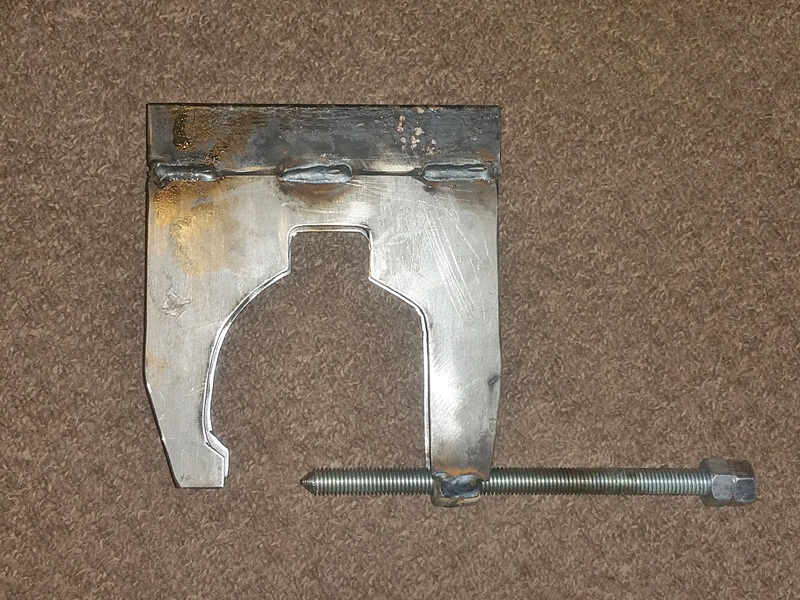
It worked better than I could ever have expected and I had the cases split before the welds were even fully cool.
Pulled the seals pressed the bearings out and I was ready to prepare the cases for paint:
I decided to make use of the sand blast gear put the case halves back together, plugged up all the holes and masked up all the with tape, tissue, heat shrink, hot melt glue etc whatever would work to protect the critical surfaces. A few hours blasting left me with a decent surface ready for paint:

Yes I did notice I'd missed a few spots which I sorted with a second round of blasting.
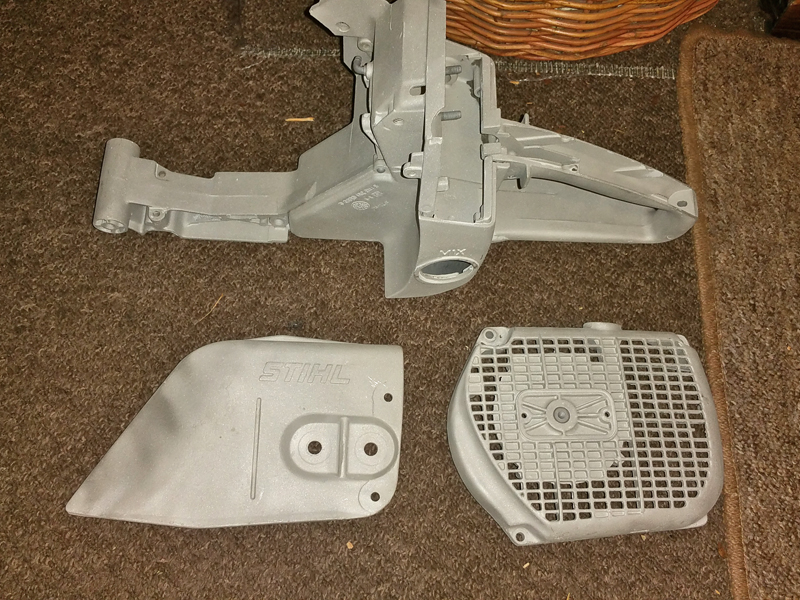
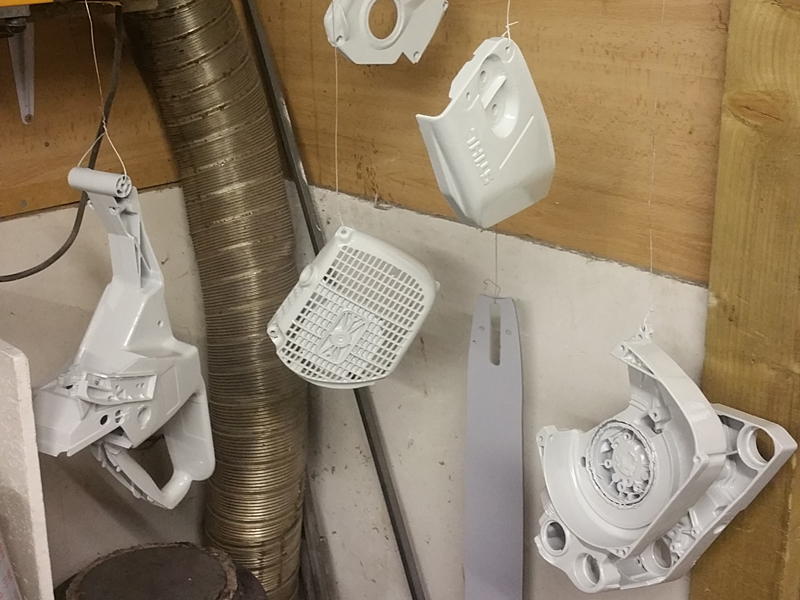
Everything had a good coat of epoxy primer cooked off above the stove:
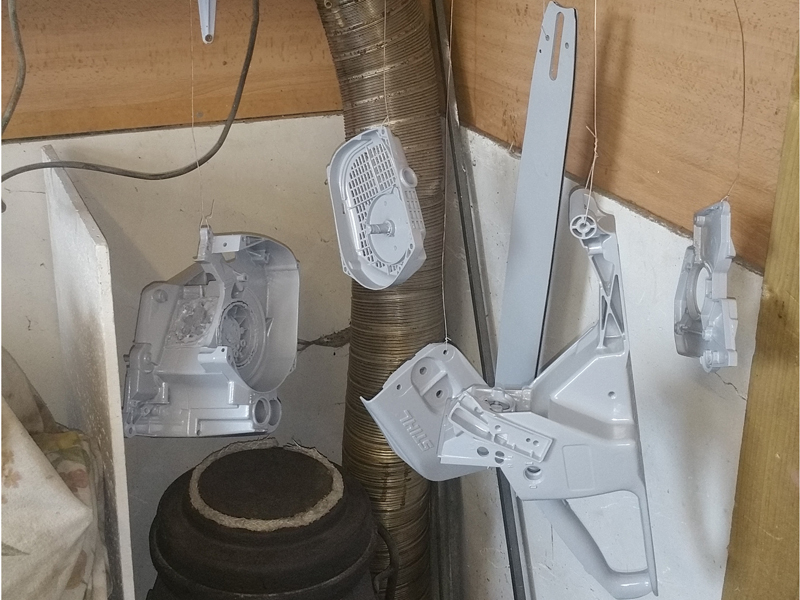
I used some fine filler to sort out some of the pitting and the primer keyed lightly before getting two coats of light grey 2K Gloss (RAL7035)
The paint was allowed to dry fully over the few extra days it took to order the bottom end parts from online - the local Stihl dealer insisted that a gasket set #1119 007 1050 didn't exist - he wouldn't even look and kept insisting he'd have to order all the bits in specially - which he quite clearly was too lazy to do in the run up to Christmas . I left empty handed with my money never to return...
A few hours each day after work saw the OEM bottom end back together after I thoroughly cleaned every last remaining particle of grit from the metalwork. That is the downside of grit blasting but the finish, I think, is worth it.
With the Chinese parts still at least a week away I read and re-read the guides posted by Mad Professor (and others of course) here on the forum:
https://www.arboristsite.com/community/threads/038-super-cylinder-questions.113258/
With all that digested I got on with assembling what else I could whilst waiting on the top end to arrive:
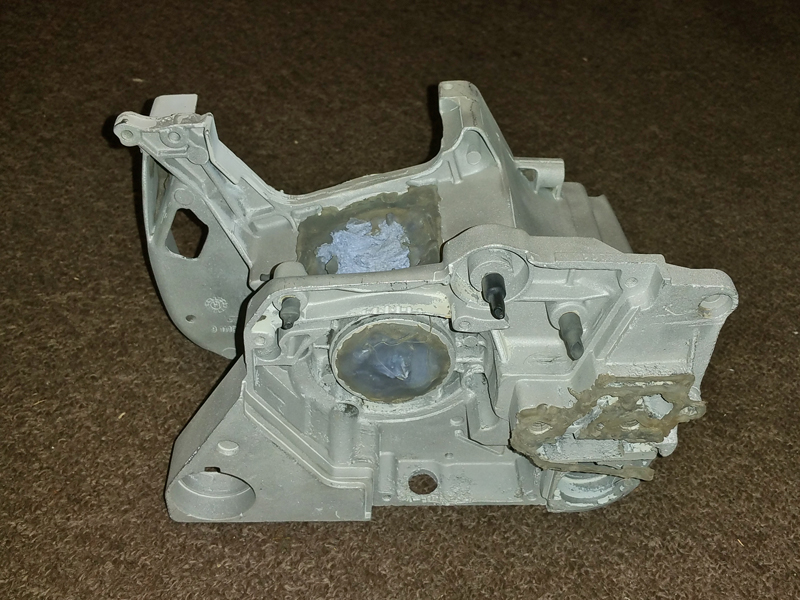
Half expecting the AM parts to arrive after Christmas I set it aside for a few days to get on with other jobs but to my surprise they showed up early. With the cylinder to hand I could now see that I would need to modify the case to provide clearance for the base of the cylinder (despite it being a Super). Stupidly I didn't take any photos (I was itching to get it together and fired up and forgot) but this bit is well covered in the thread I linked to earlier and other links contained within it. The only thing different I have to add is that with my dremel (cheap nasty copy) out of action and my die grinder way too big and aggressive for the delicate job of removing that step in the case I used a very sharp wood chisel to slowly pare it away (a tool I am plenty familiar with and that I knew would work on soft Magnesium Alloy) A quick tidy up with a fine file was enough to convince anyone that it could have been like that from the factory.
I slotted the cylinder bolt holes with a 5/32" file taking my time and having marked everything out carefully beforehand using the gasket as a guide. I turned the cylinder bolts down from approx 10mm diameter to 9mm on the lathe rather than cutting clearance for them on the cylinder itself. I did not need to open the holes to provide any clearance for the T-27 driver which was a bonus. All in all maybe 2 hrs work going very steady - next one I reckon could be done in less than a quarter of the time it was that easy.
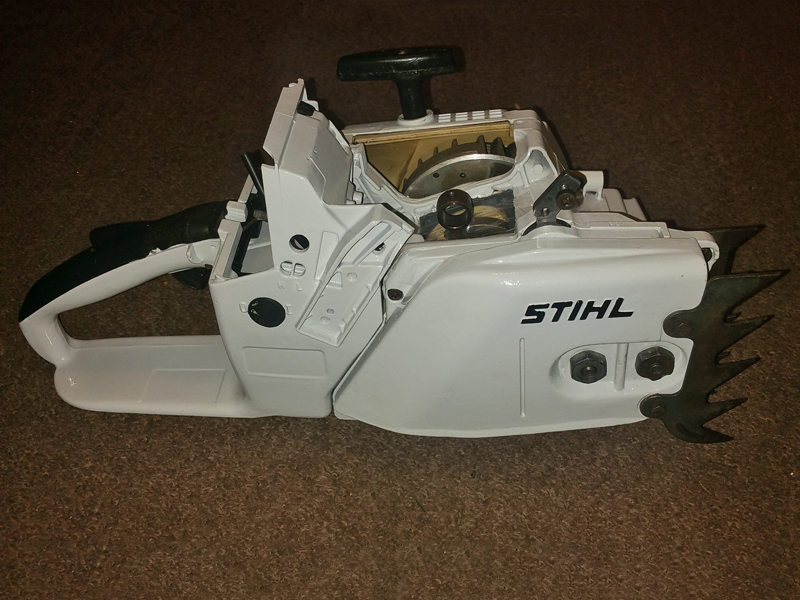
With the top end finished I put the rest of it together (not forgetting to pressure and vac test it along the way):
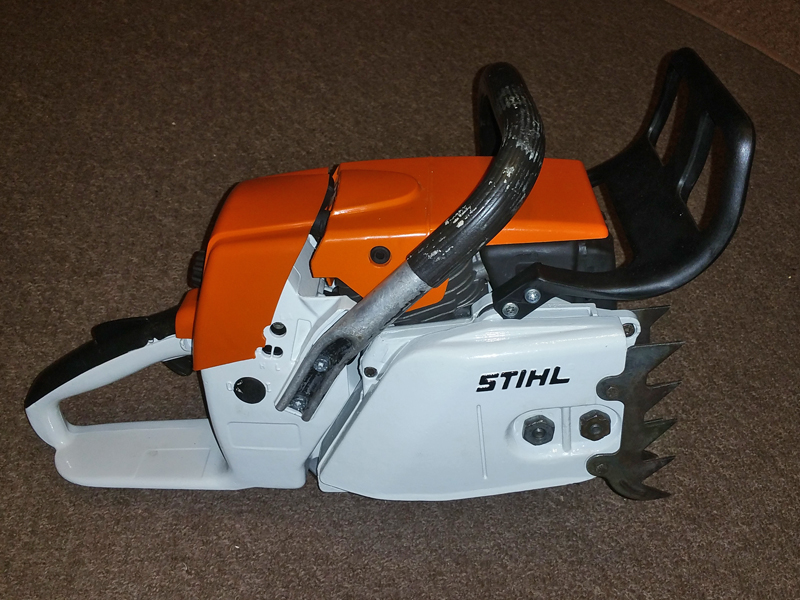
The handle may get a bit of a clean up at some point but then again I may not - not because I can't be bothered to do it but more as a reminder of what that saw started from - same goes for the partially melted plastic cover on the rear handle - as I've already experienced having shown the saw to a few people those bits are the talking points on what might as well be any other brand new looking saw... until you show them the before photos.
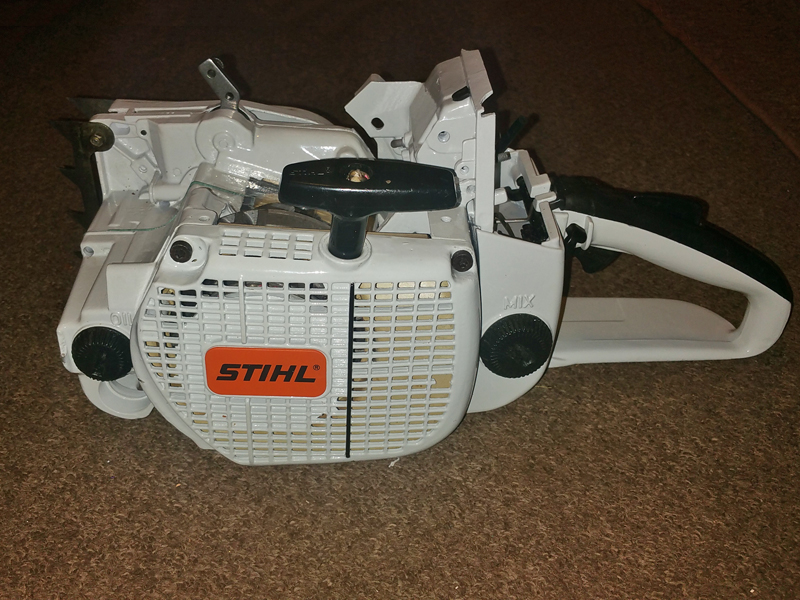
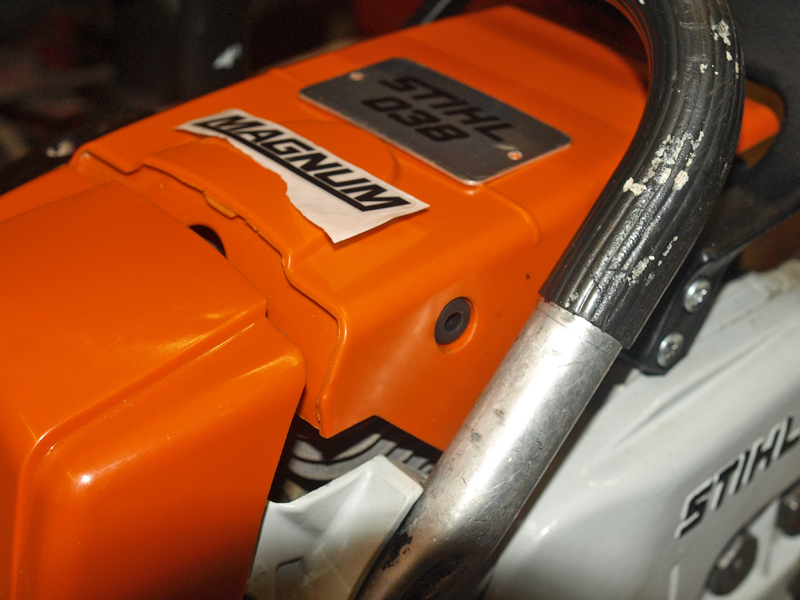
There are at this point a few bits still left to finish - model badge (which will not actually fit the MS380 style top cover) - I may source a new 038 style cover but again I may leave it as is - it gets people guessing what it could actually be. I do have an OEM rim sprocket kit on order as the old spur is definitely worn out. I also have a Tillotson carb repair kit on order which I think will iron out the hard starting from cold.
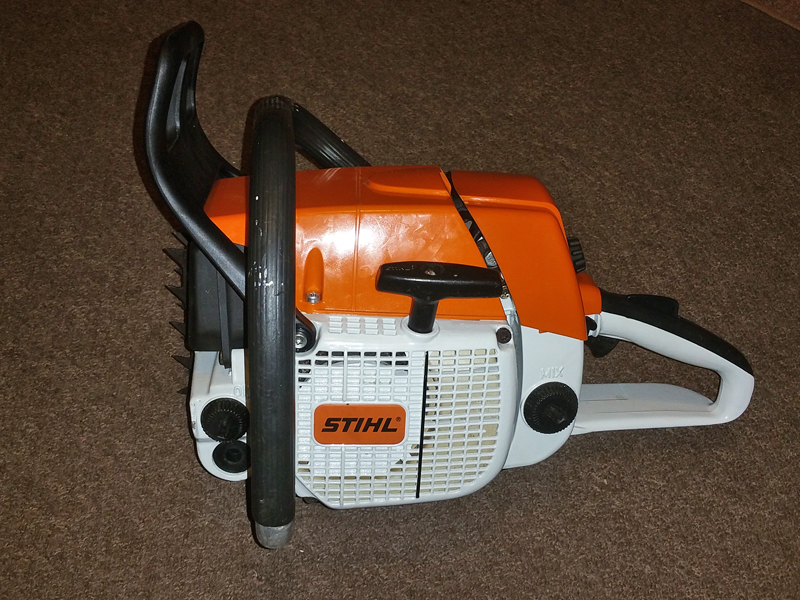
Wearing the 20" bar and chain it came with:
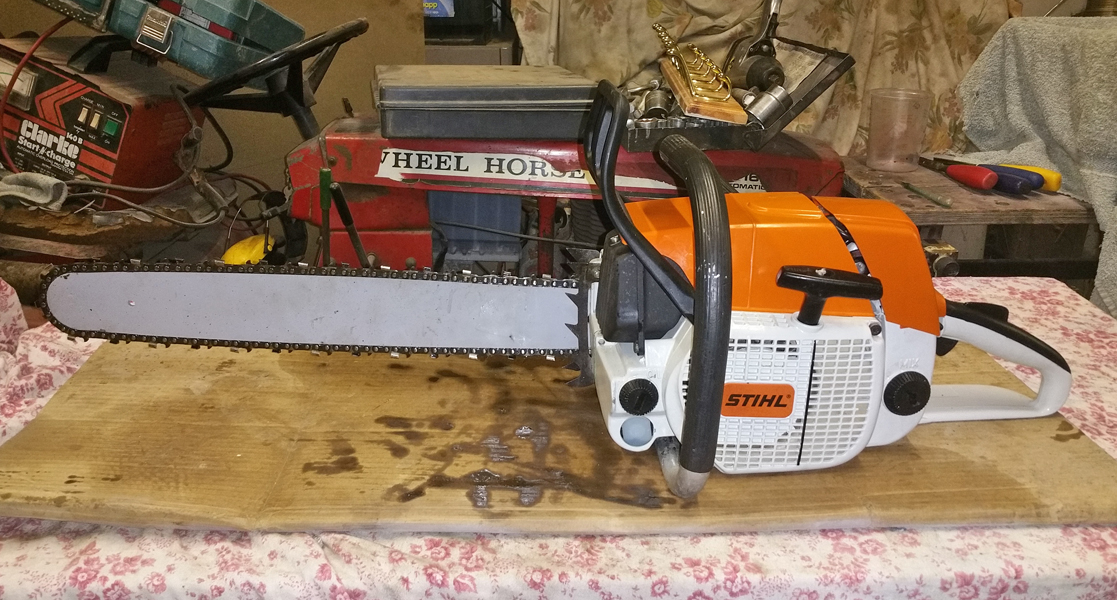
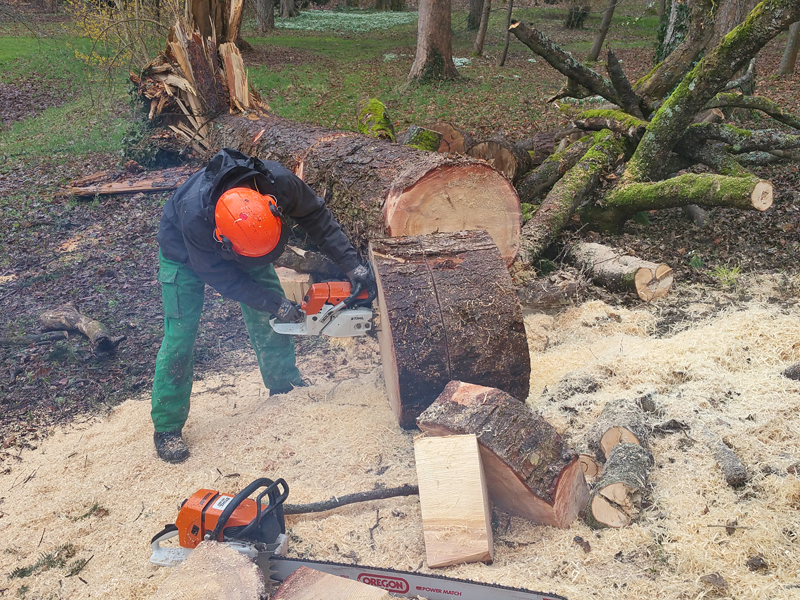
Proof that it actually runs:
Second start with 25:1 and still running very rich I quick test cut running like that tells me it's got plenty of power obviously not in the same league as the 660 but also in a different league to the 028 Super. I'll hopefully get a better video of it in use when the last few bits are finished off and the saw gets put back to work (hopefully for another 30 years)
Ever since building my Chinese 660 kit and reading countless times the usual comments along the lines of "steer clear of the kits and just rebuild a genuine saw" I have been on the lookout for a project. In 18 months of looking I had not come across one project worth even considering and came very very close to just ordering another kit. Then a very rough looking saw popped up on Ebay locally which was presumed to be an 038 by the seller (I could tell from the photos he was right). If only for the fact it was only 15 mins away I made a bid and surprisingly won it for £46 or $62 - my max bid and a figure that I literally guessed on the spot that I could make back if it was beyond repair and had to split for parts which I could sell on.
The following few photos are lifted directly from in the Ebay listing:
I could tell from the photos that it had been on fire at some point and had been worked to death. I didn't for one second believe the claim that it would actually fire but not run and figured a new top end would be needed.
I collected the saw and only had one surprise... a very tatty bar but a virtually new recently ground Stihl RM chain on it - this saw was in absolutely no condition to need a chain at all let alone a decent one
As was expected no compression at all - I didn't even bother to test the claim it would fire. Off came the muffler - sure enough P&C were scrap:
I'm guessing the wrist pin circlip let go and went through the transfer port.
The cylinder measured 50mm which makes it a Super. OEM top ends are hard to come by and 90% of AM appeared to be for the 52mm Magnum. I already knew a conversion was possible and so made the decision there and then to make the saw into a magnum albeit a AM version. Made a Hutzl order for P&C, plastics , muffler and all the other bits and pieces I could see needed replacing.
Realising I had at least 2 weeks (possibly more due to the Christmas holidays) before the bits would arrive I stripped the rest of the saw down to clean but only got a few minutes into that before deciding that I also had enough time to re-spray the metal work which was seriously tatty and rebuild the bottom end.
First job was to make the case splitter using the plans kindly shared here:
https://www.arboristsite.com/community/threads/case-splitter-homemade.245737/
3mm MS side plates had to do as that's all I had to hand:
It worked better than I could ever have expected and I had the cases split before the welds were even fully cool.
Pulled the seals pressed the bearings out and I was ready to prepare the cases for paint:
I decided to make use of the sand blast gear put the case halves back together, plugged up all the holes and masked up all the with tape, tissue, heat shrink, hot melt glue etc whatever would work to protect the critical surfaces. A few hours blasting left me with a decent surface ready for paint:
Yes I did notice I'd missed a few spots which I sorted with a second round of blasting.
Everything had a good coat of epoxy primer cooked off above the stove:
I used some fine filler to sort out some of the pitting and the primer keyed lightly before getting two coats of light grey 2K Gloss (RAL7035)
The paint was allowed to dry fully over the few extra days it took to order the bottom end parts from online - the local Stihl dealer insisted that a gasket set #1119 007 1050 didn't exist - he wouldn't even look and kept insisting he'd have to order all the bits in specially - which he quite clearly was too lazy to do in the run up to Christmas
. I left empty handed with my money never to return...A few hours each day after work saw the OEM bottom end back together after I thoroughly cleaned every last remaining particle of grit from the metalwork. That is the downside of grit blasting but the finish, I think, is worth it.
With the Chinese parts still at least a week away I read and re-read the guides posted by Mad Professor (and others of course) here on the forum:
https://www.arboristsite.com/community/threads/038-super-cylinder-questions.113258/
With all that digested I got on with assembling what else I could whilst waiting on the top end to arrive:
Half expecting the AM parts to arrive after Christmas I set it aside for a few days to get on with other jobs but to my surprise they showed up early. With the cylinder to hand I could now see that I would need to modify the case to provide clearance for the base of the cylinder (despite it being a Super). Stupidly I didn't take any photos (I was itching to get it together and fired up and forgot) but this bit is well covered in the thread I linked to earlier and other links contained within it. The only thing different I have to add is that with my dremel (cheap nasty copy) out of action and my die grinder way too big and aggressive for the delicate job of removing that step in the case I used a very sharp wood chisel to slowly pare it away (a tool I am plenty familiar with and that I knew would work on soft Magnesium Alloy) A quick tidy up with a fine file was enough to convince anyone that it could have been like that from the factory.
I slotted the cylinder bolt holes with a 5/32" file taking my time and having marked everything out carefully beforehand using the gasket as a guide. I turned the cylinder bolts down from approx 10mm diameter to 9mm on the lathe rather than cutting clearance for them on the cylinder itself. I did not need to open the holes to provide any clearance for the T-27 driver which was a bonus. All in all maybe 2 hrs work going very steady - next one I reckon could be done in less than a quarter of the time it was that easy.
With the top end finished I put the rest of it together (not forgetting to pressure and vac test it along the way):
The handle may get a bit of a clean up at some point but then again I may not - not because I can't be bothered to do it but more as a reminder of what that saw started from - same goes for the partially melted plastic cover on the rear handle - as I've already experienced having shown the saw to a few people those bits are the talking points on what might as well be any other brand new looking saw... until you show them the before photos.
There are at this point a few bits still left to finish - model badge (which will not actually fit the MS380 style top cover) - I may source a new 038 style cover but again I may leave it as is - it gets people guessing what it could actually be. I do have an OEM rim sprocket kit on order as the old spur is definitely worn out. I also have a Tillotson carb repair kit on order which I think will iron out the hard starting from cold.
Wearing the 20" bar and chain it came with:
Proof that it actually runs:
Second start with 25:1 and still running very rich I quick test cut running like that tells me it's got plenty of power obviously not in the same league as the 660 but also in a different league to the 028 Super. I'll hopefully get a better video of it in use when the last few bits are finished off and the saw gets put back to work (hopefully for another 30 years)


 .
.
