OH_Varmntr
Burner of stored sunlight
So this splitter has been around for years. Grandpa built it about 30 years ago now, and it sat in the weeds for many years. I drug it out a few years ago, and replaced the motor with a 13HP Honda GX390. The new motor isn't electric start, so I ended up buying an electric start kit so I could have an on-board battery to run a hoist with a winch on it.
The old hydraulic pump didn't last long after sitting for so long so I ended up replacing it as well. It's been a few years but I'm pretty sure it's a 13gpm 2-stage pump.
Anywho, the splitter beam is 1" thick and it's very heavy. The axle sits too far back and is very hard to move around with the implement tires that were on it. The beam also sits pretty low to the ground. The hydraulic tank was a short run of the i-beam that was boxed in, and only held 2 gallons of oil. The small oil capacity, coupled with incorrect hydraulic fittings caused the oil to overheat quickly and after about 15 minutes of operation the splitter would lose a lot of it's splitting capabilities.
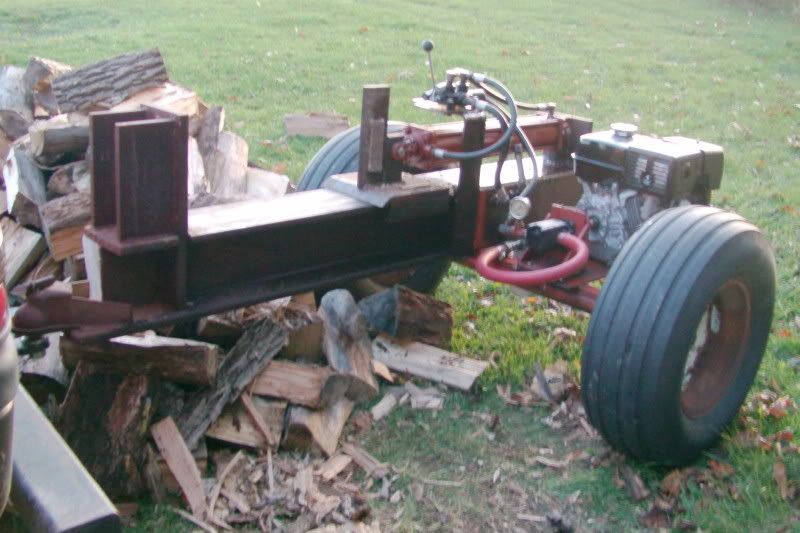
Here it sits a few years ago after splitting some oak.
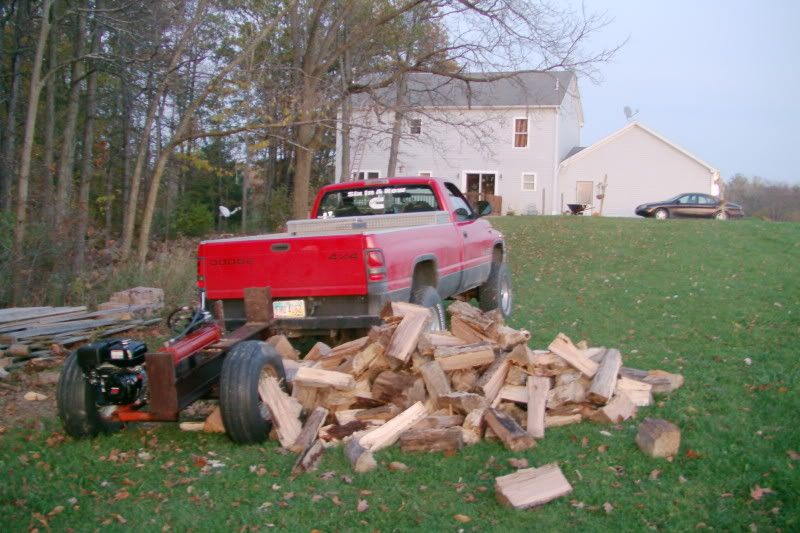
Well I finally got fed up with messing around with it and decided to modify it. I was thinking of starting from scratch and building an entire new splitter but for now I'm going to modify this one. If I end up building my own it will have a diesel powerplant...
Anywho, I've been tinkering around with it the past week and here's where I'm at. I'm using scrap steel which requires a lot of grinding and wire-wheeling to get a good clean weldable surface but it works.
First off, I had some new hoses made with higher flowing fittings. The old fittings were straight-thread fittings with o-ring seals, but the holes they went into are NPT tapered threads. There were also 150# galvanized pipe fittings being used throughout the hydraulic system. Pretty lucky we never had a terrible accident with one of those.
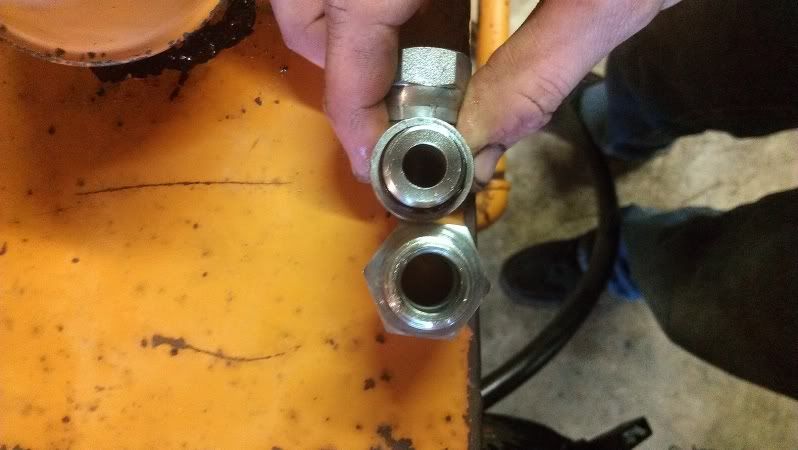
Quite a difference of inner diameters here. Old fitting on top, new fitting on bottom.
We then temporarily fitted a 10 gallon hydraulic tank I bought off of craigslist for $75. Came with two 3/4" hydraulic hoses that I ended up using for the supply and return lines for the valve, and a return filter assembly. The old lines were 1/2" lines that went into 1/2"-3/4" NTP bushings so this also helped with more flow. With the new hoses and fittings, I took about 7 seconds off of the cycle! Definitely worth it there!
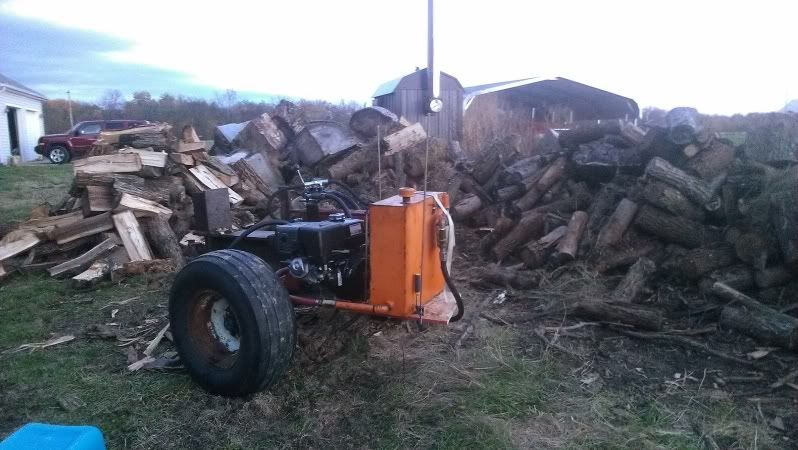
Here's the splitter with the tank temporarily clamped down for a trial run.
Now that I'm happy with how it cycles, it's time to break out the welder.
First thing on the agenda is to reverse the hitch point. I welded up a piece of 2x4x.250 steel tubing about 6' long to the i-beam off the "back" of the splitter. I'm doing this because I'm going to swap the wedge and foot to make it a fixed wedge/pushplate setup. I'll be building a 4-way. This way I'll be pushing wood off the back of the splitter and not off the front and into the bumper of whatever the splitter is hitched to at that time.
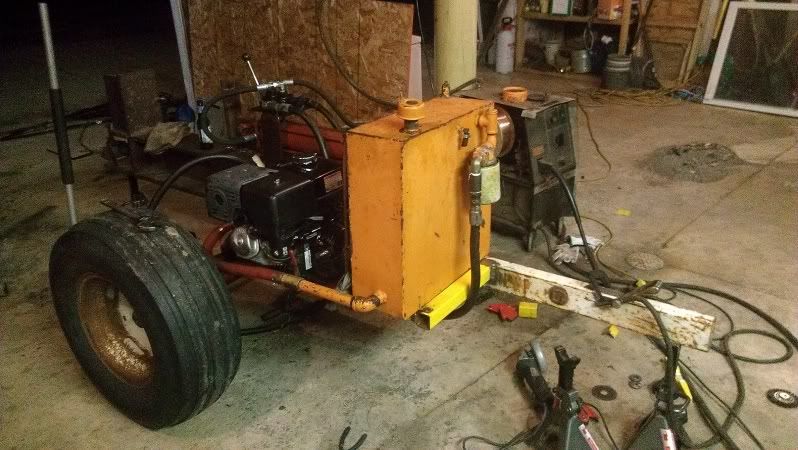
Here's the new hitch bar welded up, along with a new platform for the hydraulic tank which is made from 2x2x3/16 steel tubing. Keep in mind that all my cutting is done with a grinder and cutoff wheels so my tolerances aren't perfect, but I square things up, tack in place, recheck squareness then fully weld.
I then welded a 2" ball coupler to the hitch bar, then welded in a trailer jack. I found an a-frame trailer jack on clearance so I made it work.
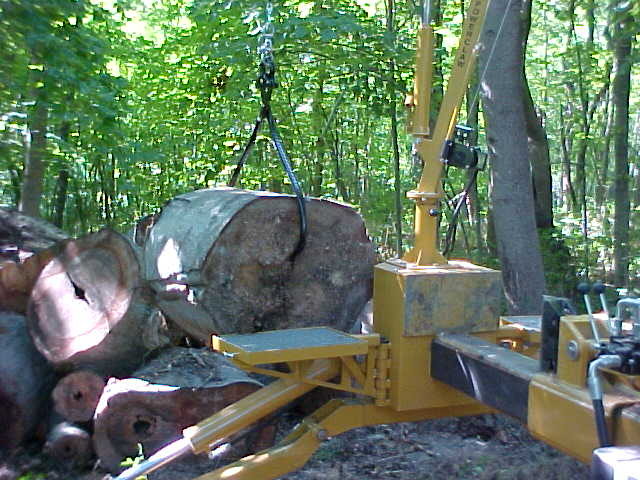
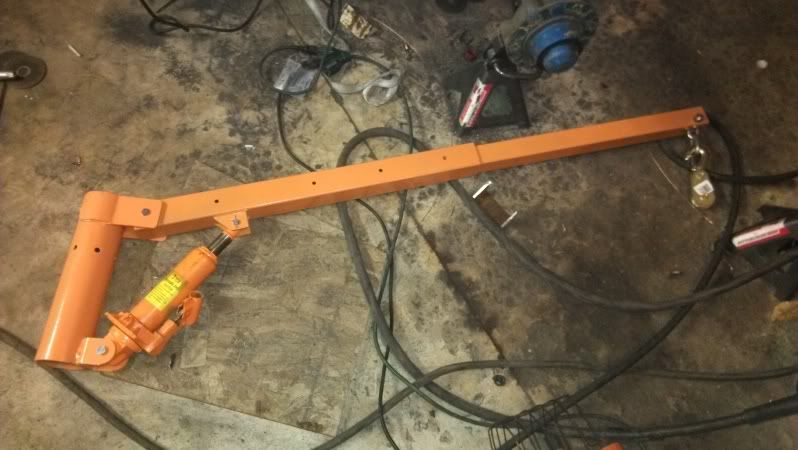
From there, I cut out a plate from a piece of 1/4" plate of steel I had laying around from when I built my truck bumper. I used this to box in the other side of the i-beam from where the hydraulic tank is. This will be used for a mounting point for some upright supports for a hoist I'll be installing as well. Instead of building a hydraulic log lift, I'm going to be mounting a truck hoist equipped with an ATV winch to lift rounds up to the splitter. I feel this type of lift will help minimize the amount of time I'll need to be bent over rolling rounds to a hydraulic lift table. The lift I'm using has about a 52" reach on it. With the winch I'll be able to grab rounds and drag them over to the splitter from up to 50' away.
So here's the 1/4" thick plate welded to the beam, then the 2x4x.250 uprights welded in place on either side. It will all come together shortly...
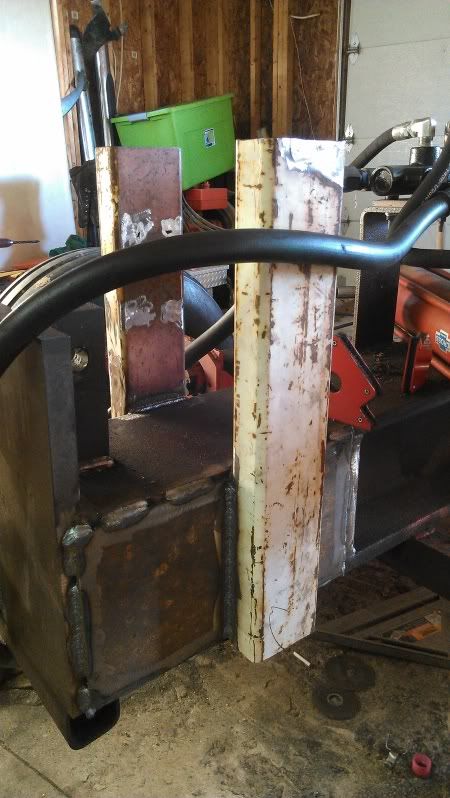
I'm no welder but I'm pretty happy with my welds. I've got a Hobart Beta Mig 250amp 240v welder and it lays the heat it pretty good I think.
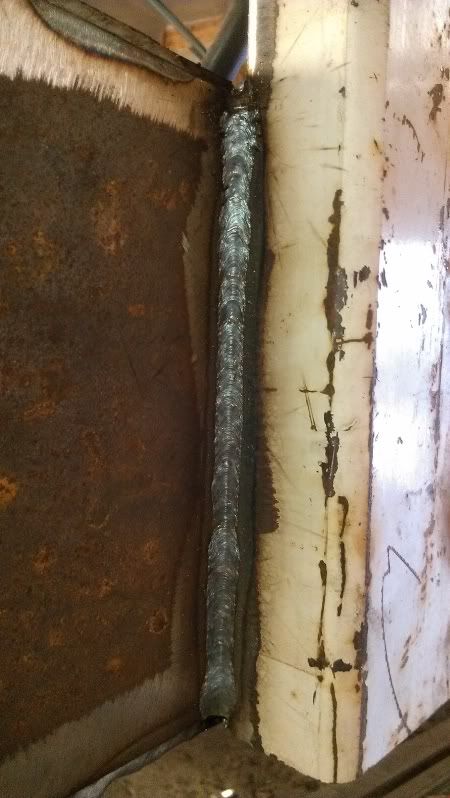
Other side support. This shows the hitch bar pretty clearly as well. I plugged the old hydraulic tank fittings but kept one open to keep from pressurizing the tank and creating a real big problem.
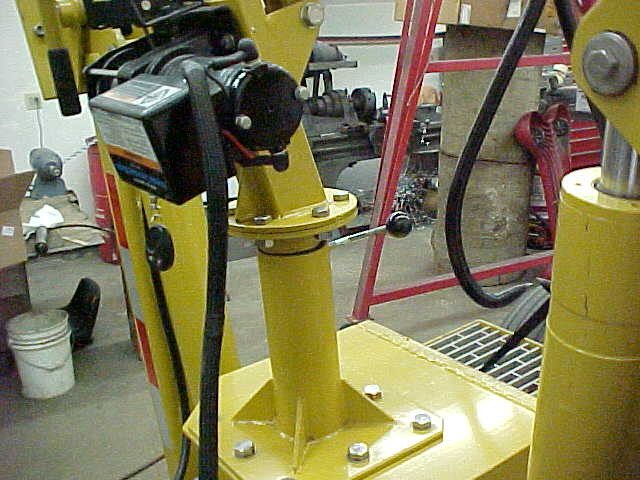
Here's the hoist I'll be using.
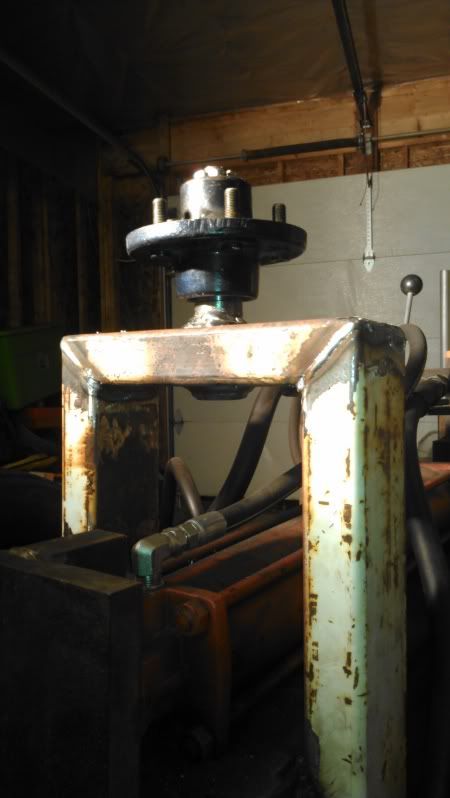
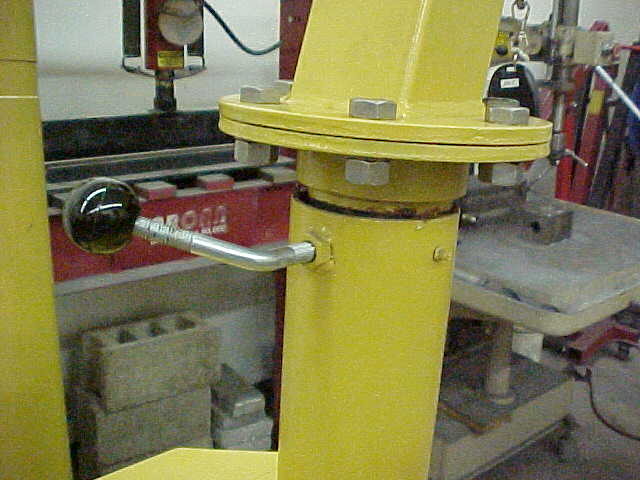
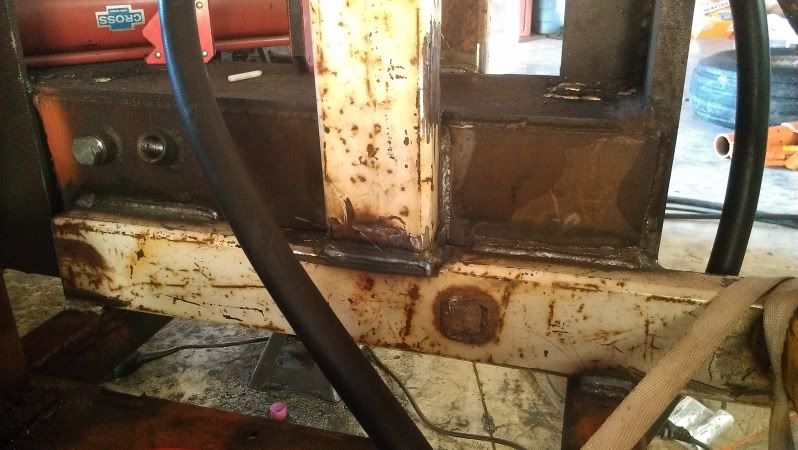
I beveled the 2 uprights and beveled the cross piece where the hoist will mount. I'll be boring through the center of the cross-tube tomorrow to accept a hub spindle that the hoist will rotate on. Easiest way to explain it is to show a picture.
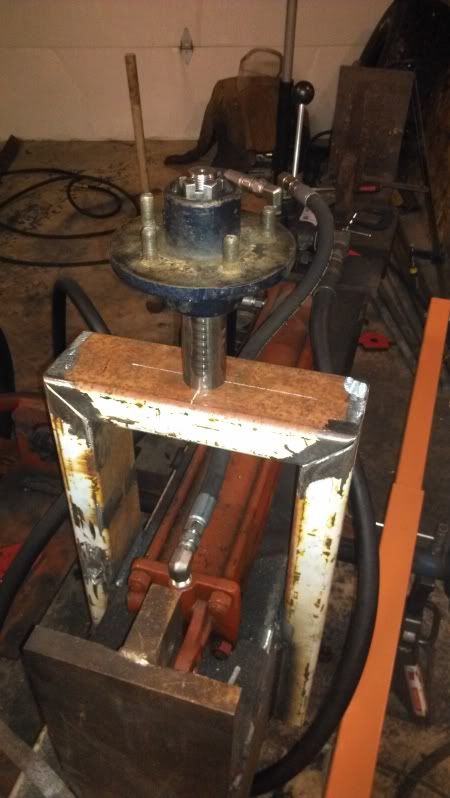
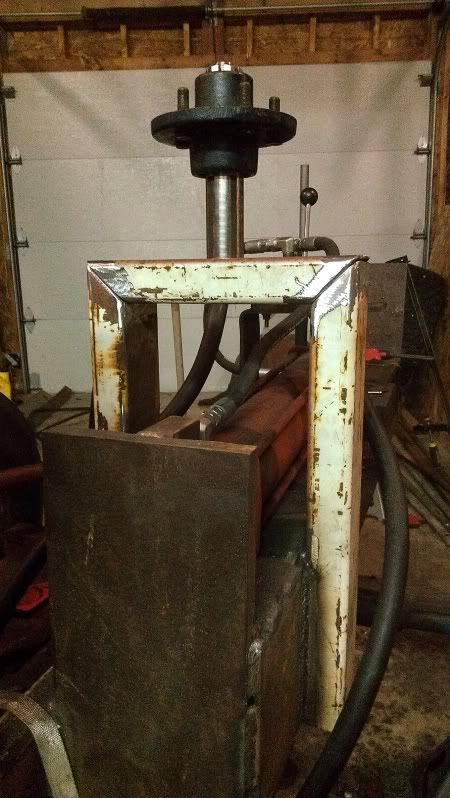
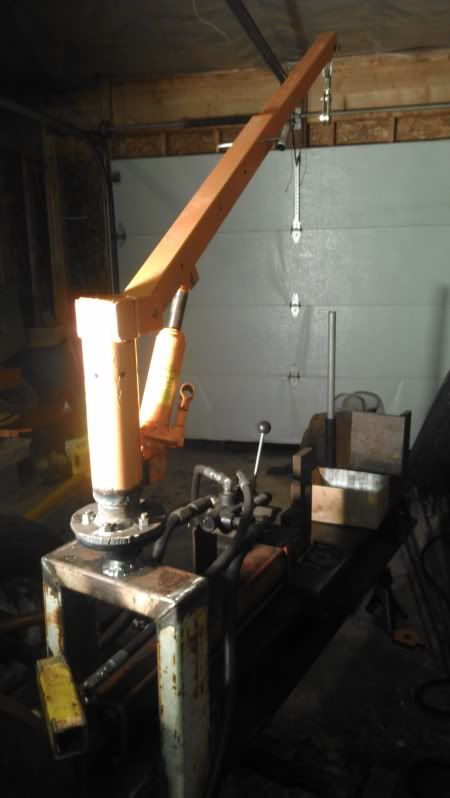
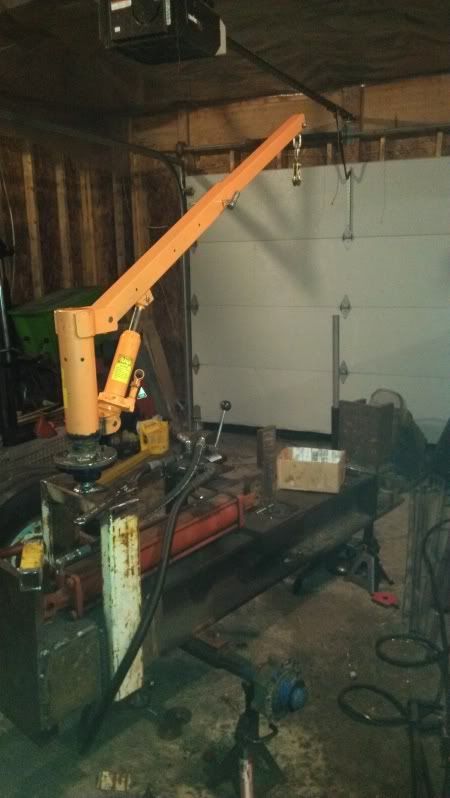
And here it sits for now. Still have a bit of work to do.
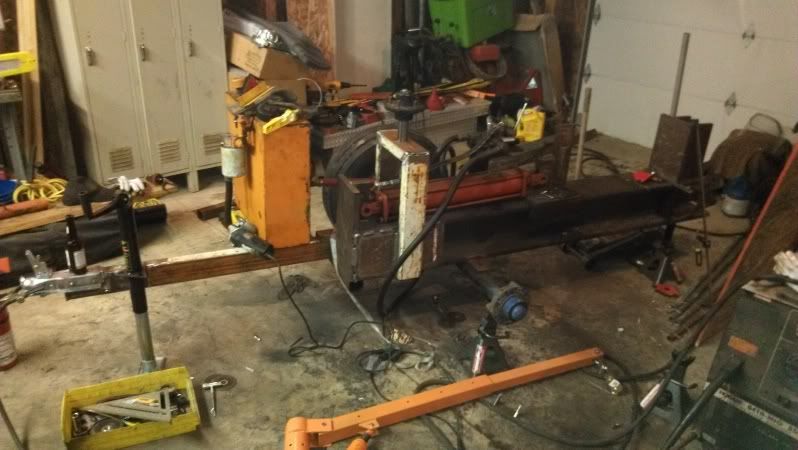
I am going to be relocating the current axle setup about 12" back to apply more weight to the new hitch coupler. Right now it's nearly balanced but I want more tongue weight than what I currently have. It axle will also be quite a bit wider to help stabilize the splitter when the hoist is in use for dragging and hoisting those big rounds up. Once it's operational I'll decide if I need to make some outriggers to stabilize it even more.
The old hydraulic pump didn't last long after sitting for so long so I ended up replacing it as well. It's been a few years but I'm pretty sure it's a 13gpm 2-stage pump.
Anywho, the splitter beam is 1" thick and it's very heavy. The axle sits too far back and is very hard to move around with the implement tires that were on it. The beam also sits pretty low to the ground. The hydraulic tank was a short run of the i-beam that was boxed in, and only held 2 gallons of oil. The small oil capacity, coupled with incorrect hydraulic fittings caused the oil to overheat quickly and after about 15 minutes of operation the splitter would lose a lot of it's splitting capabilities.
Here it sits a few years ago after splitting some oak.


Well I finally got fed up with messing around with it and decided to modify it. I was thinking of starting from scratch and building an entire new splitter but for now I'm going to modify this one. If I end up building my own it will have a diesel powerplant...
Anywho, I've been tinkering around with it the past week and here's where I'm at. I'm using scrap steel which requires a lot of grinding and wire-wheeling to get a good clean weldable surface but it works.
First off, I had some new hoses made with higher flowing fittings. The old fittings were straight-thread fittings with o-ring seals, but the holes they went into are NPT tapered threads. There were also 150# galvanized pipe fittings being used throughout the hydraulic system. Pretty lucky we never had a terrible accident with one of those.
Quite a difference of inner diameters here. Old fitting on top, new fitting on bottom.

We then temporarily fitted a 10 gallon hydraulic tank I bought off of craigslist for $75. Came with two 3/4" hydraulic hoses that I ended up using for the supply and return lines for the valve, and a return filter assembly. The old lines were 1/2" lines that went into 1/2"-3/4" NTP bushings so this also helped with more flow. With the new hoses and fittings, I took about 7 seconds off of the cycle! Definitely worth it there!
Here's the splitter with the tank temporarily clamped down for a trial run.

Now that I'm happy with how it cycles, it's time to break out the welder.
First thing on the agenda is to reverse the hitch point. I welded up a piece of 2x4x.250 steel tubing about 6' long to the i-beam off the "back" of the splitter. I'm doing this because I'm going to swap the wedge and foot to make it a fixed wedge/pushplate setup. I'll be building a 4-way. This way I'll be pushing wood off the back of the splitter and not off the front and into the bumper of whatever the splitter is hitched to at that time.
Here's the new hitch bar welded up, along with a new platform for the hydraulic tank which is made from 2x2x3/16 steel tubing. Keep in mind that all my cutting is done with a grinder and cutoff wheels so my tolerances aren't perfect, but I square things up, tack in place, recheck squareness then fully weld.

I then welded a 2" ball coupler to the hitch bar, then welded in a trailer jack. I found an a-frame trailer jack on clearance so I made it work.
From there, I cut out a plate from a piece of 1/4" plate of steel I had laying around from when I built my truck bumper. I used this to box in the other side of the i-beam from where the hydraulic tank is. This will be used for a mounting point for some upright supports for a hoist I'll be installing as well. Instead of building a hydraulic log lift, I'm going to be mounting a truck hoist equipped with an ATV winch to lift rounds up to the splitter. I feel this type of lift will help minimize the amount of time I'll need to be bent over rolling rounds to a hydraulic lift table. The lift I'm using has about a 52" reach on it. With the winch I'll be able to grab rounds and drag them over to the splitter from up to 50' away.
So here's the 1/4" thick plate welded to the beam, then the 2x4x.250 uprights welded in place on either side. It will all come together shortly...

I'm no welder but I'm pretty happy with my welds. I've got a Hobart Beta Mig 250amp 240v welder and it lays the heat it pretty good I think.

Other side support. This shows the hitch bar pretty clearly as well. I plugged the old hydraulic tank fittings but kept one open to keep from pressurizing the tank and creating a real big problem.

Here's the hoist I'll be using.

I beveled the 2 uprights and beveled the cross piece where the hoist will mount. I'll be boring through the center of the cross-tube tomorrow to accept a hub spindle that the hoist will rotate on. Easiest way to explain it is to show a picture.


And here it sits for now. Still have a bit of work to do.

I am going to be relocating the current axle setup about 12" back to apply more weight to the new hitch coupler. Right now it's nearly balanced but I want more tongue weight than what I currently have. It axle will also be quite a bit wider to help stabilize the splitter when the hoist is in use for dragging and hoisting those big rounds up. Once it's operational I'll decide if I need to make some outriggers to stabilize it even more.


