What's everyone use to clean a carb when rebuilding

Arborist Forum

Help Support Arborist Forum:

This site may earn a commission from merchant affiliate links, including eBay, Amazon, and others.

woodlandcammies

ArboristSite Operative
Joined
Apr 1, 2017
Messages
107
Reaction score
100
Location
Jacksonville Fl
gents,
I've tried using the carb cleaning cans, and I've used acetone to soak the carb bodies in when they are dissembled. For me the acetone seems to be the best option as it dries without leaving residue, but what's your opinions
 
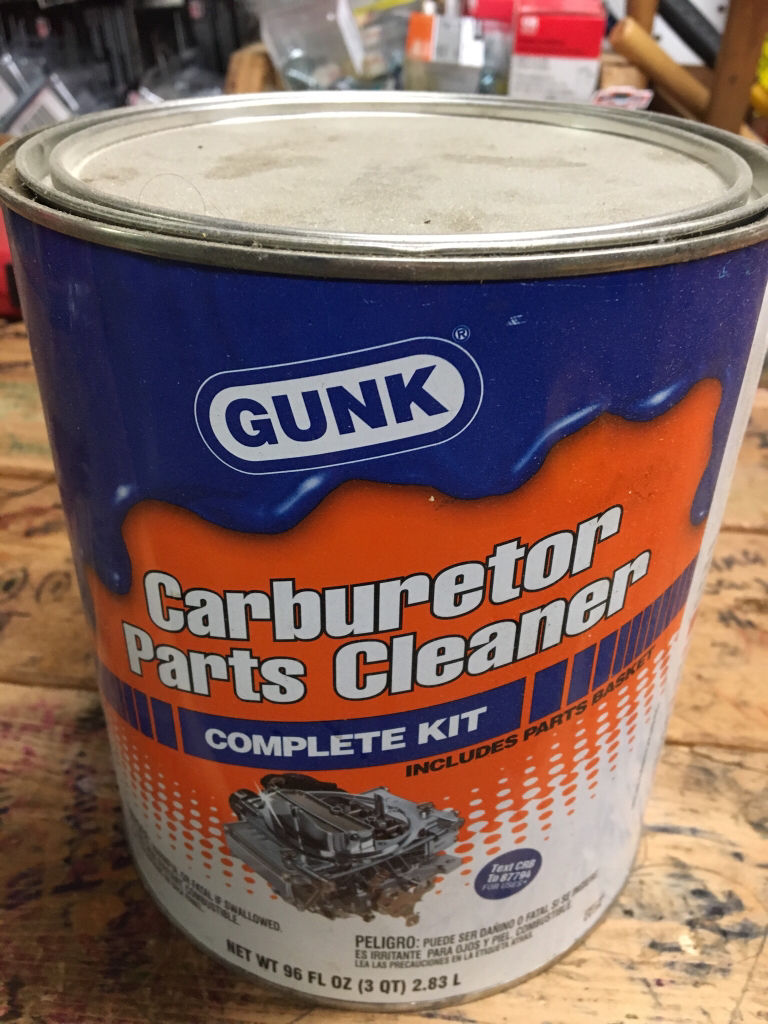
I like these:
1e7a2c29394998d0f5f03bbc698edd65.jpg

Disassemble, drop in basket to soak, remove and rinse...done. Worked pretty well so far


Sent from my iPhone using Tapatalk
 
I've used a Harbor Freight ultrasonic with heat. Not sure if much better than carb cleaner

Sent from my SM-N900P using Tapatalk
 
Lacquer thinner to clean the exterior., careful of the inlet barb.
Then WD40 inside, with gentle air to disperse of excess. WD40 is very clean straight out of the can.
Careful on the HS check nozzle.
Carb cleaner can distort the check valve rubber, and high pressure air gun blasts can kill mylar disc checks.
A bit of WD40 to wet the fuel pump checks just prior to tightening the final few twists of the screwdriver.
 
For chainsaws and small engine carbs I use a heated ultrasonic, (lyman brand) and just use 50/50 white vinegar and water. Do a run for about 10 min then low pressure air then back for another 15 min.

For the large automotive carbs I use the gallon cans of chemdip or gunk, use rubber chemical gloves.
I have some bottoms cut off of plastic 5 gallon buckets as cleaning pans with sides about 6 inches high and pour some of the carb cleaner into the plastic pans then use a paint brush to apply the dip. can keep parts separated into different pans and I place the small parts into the chemdip interior pan.
After the parts have soaked at least 24 hours total I have a 5 gallon bucket with the bottom cut out and a screen wire on top that I can rinse the carb parts with water and blow dry with air. The screen catchs any small parts that might come loose during the rinse.

When through I strain the carb dip through a fine screen and back into it container and lid sealed snug.

By keeping the dip away from water and air it will store for very long time. Water and air exposure will severely shorten the life of the dip.

I have some acetone and lacquer thinner but very rarely use either on a carb. I ALWAYS use real good chemical gloves when handling acetone, lacquer thinner and carb cleaners. Do not need my insides cleaned just yet.

For the carb bowls that are oxidized and not coming clean in the crevices I use some small dremel brushes and a DREMEL tool.

I do not store spare re-built carbs dry. I place small amount of auto transmission fluid inside or WD 40 and store them in sealed plastic bags. They last forever if stored with little interior lube. Keeps the aluminum/pot metal from oxidizing and producing the white powder during storage.

If a small engine carb bowl is oxidized or the carb looks bad on the inside I won't rebuild it for anyone else other than
myself because go backs are quite common on the nasty ones and several cloned small engine carbs are less than $50 now days. If someone don't want to pay for a new carb they can work on it themselves or go to someone else that needs some carb experience.
 
I have a 1/2 pint mason jar full of 91% ISO-propyl alcohol (from the Wal-Mart pharmacy). I think it costs 3 bucks for a pint.
I will carefully disassemble the carb on a clean towel and drop anything that is not rubber into that jar (I do not put the needle valve assembly in the jar). I screw on the lid and give it a few gentle shakes. Then I let it sit for about an hour. I then remove the carb body and hit it with a little bit or carb cleaner (in the spray can). Finally I will blow it out with compressed air. It works great, and that ISO-propyl alcohol does a great job removing old dried on crud. WHEN YOU ARE HITTING IT WITH THE COMPRESSED AIR, BE CAREFUL NOT TO BLOW OUT THE LITTLE FILTER SCREEN THAT IS DIRECTLY ACROSS FROM THE NEEDLE VALVE.
 
i don't clean many carbs anymore. Too often they don't improve at all, or the problem recurs in a few weeks making it a waste of time and effort. With aftermarket carbs running $8-20 in many cases, it just isn't economical to fart with most of them for any length of time.
Have you ever had an AM carb fail or not work from the start? I'm always skeptical because the prices seem to be too good to be true.
 
Ultrasonic is the way to go. I haven't done much playing around with it yet, so I have just used water in mine. We have one at work too I just haven't had the opportunity to do carb work. I mostly do repower's on boats at work though. I have found the passageways on these small carbs hard to clean with out using a carb dip or ultrasonic cleaner.
If you realy want to you could buy a new aftermarket carb. I can't speek for all of them but I put a Chinese carb off ebay for $8 on a go ped for a my cousin and it worked fine.
 
So far only one problem. It was a knockoff Walbro for a Redmax. Goofy two barrel strato thing. It was pig rich and I couldn't make it work. Also had one assembled wrong with the top throttle plate facing the wrong direction. That was an easy fix. Out of a couple dozen that ain't bad. Oddly enough, both of the problem units were the more expensive end of the aftermarket carbs ($20). Zero problems with $8-12 ones.

As far as I know all of them are still working fine. I have one on my own to BG 86 handheld blower it's been used for light commercial use for four or five years now
 

Latest posts

Back
Top