Simonizer
Addicted to ArboristSite
I like this guy too,..Nice job!
Welcome to the place, I think you will fit in nicely.

I like this guy too,..Nice job!
Welcome to the place, I think you will fit in nicely.
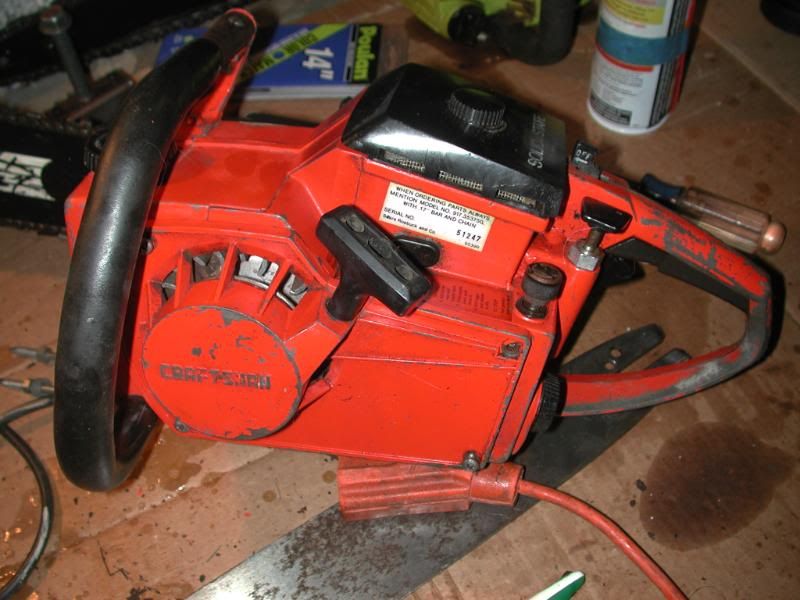
New to your forum, but not new to much of anything else. I happen to have an old Roper built Craftsman 3.7 saw that belonged to my father in the early/mid 70's, it was well used by us and ended up in storage after a bolt on the drivecase carrier came free and knocked off a lot of fins from the flywheel. The other 2 bolts loosened and wallowed out the threaded holes in the case. I have fixed this and use it still, but wanted to replace the flywheel. This is the saw with model number.
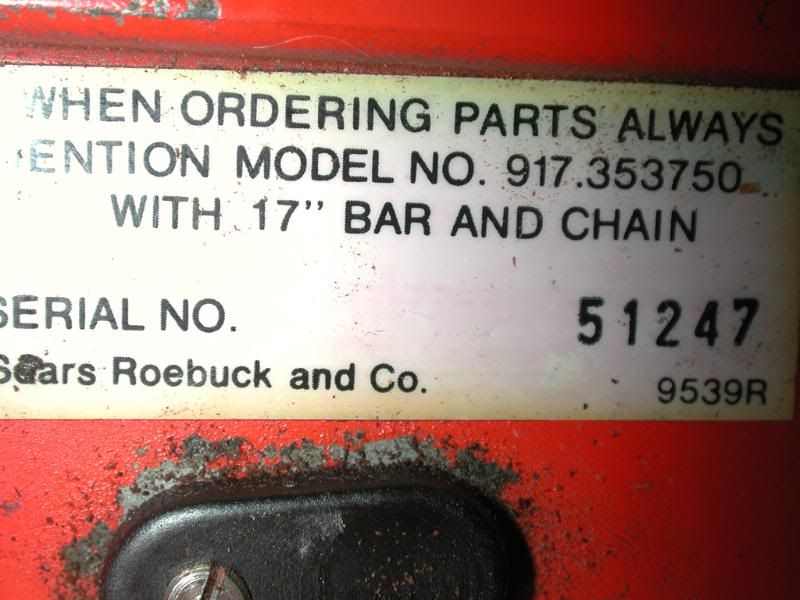
I recently came across a similar saw but not the same model number Roper on craigslist and bought it. The owner claimed it had run recently, but stopped and he couldn't get it restarted. I bought it as reading on this forum and elsewhere had told me many parts were interchangeable. This is the model number.
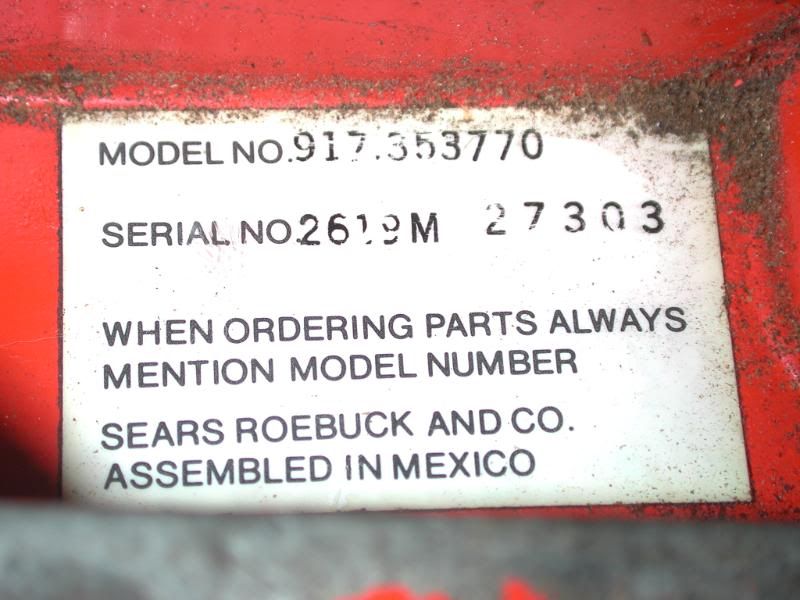
This particular saw hadn't experienced quite the love mine had, but was completely intact, I decided to do a tear down after I couldn't make it run via the basic measures. The flywheel was fused on very solidly, I didn't like the "hold the flywheel and hammer on the end of the crankshaft til it pops loose" technique so felt compelled to make a puller out of stuff I had laying around. This is what I came up with and would of course like to share it. I used 1" square 1/8 walled tubing cut to length, with holes drilled at the appropriate span to allow two 2" #10 24 tpi alloy bolts to screw completely into the threaded holes for the starter pawls, then drilled a large enough hole for a 1/2 in fine threaded bolt (okay, it is 12mm 1.25 pitch). There is a nut inside the square tubing which allows me to tighten the big bolt which presses against the end of the crank and the flywheel will pop loose with a satisfying sound as you tighten down the bolt. You can stabilize the motor from turning over by two methods. One being the Nylon rope down the sparkplug hole that you are all familiar with, or you can put a wrench across the square tubing to hold it while tightening down on the big puller nut. This took me about 30 mins to put together with pretty simple tools, a series of careful measurements and a minimum of swear words and bloodloss. Though it may seem excessive, I have this tool for future use on my other saws. Here it is.
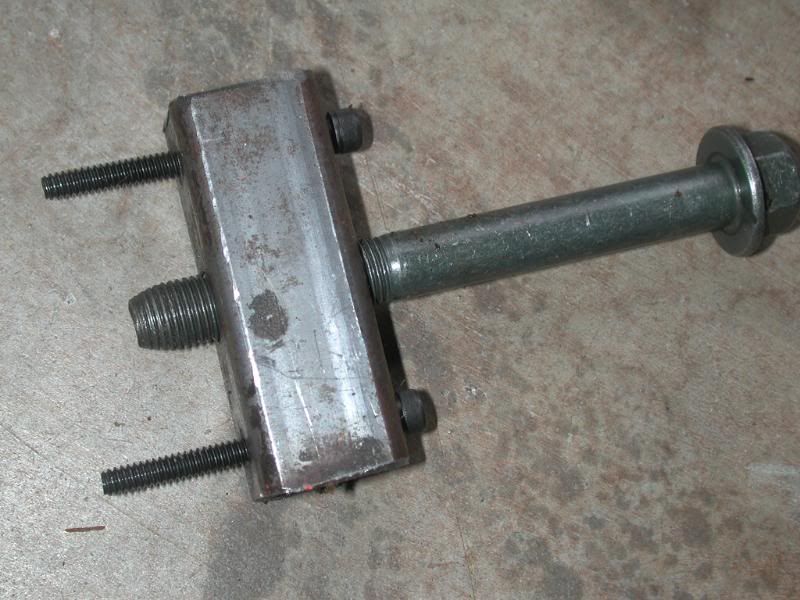
Here you can see the nut down the inside of the tubing, it won't turn because it wedges against the insides of the tubing. It was a flange nut, so I ground some flats on opposing sides.
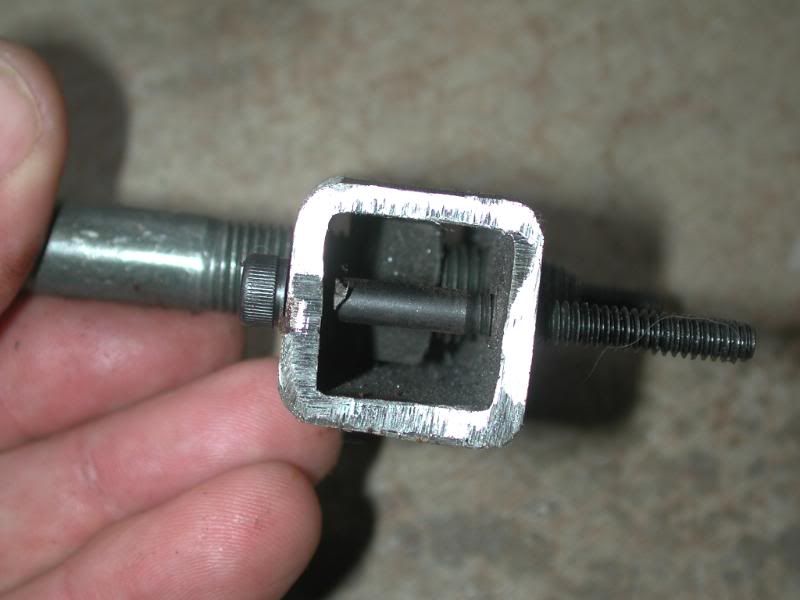
To allow for some standoff from the flywheel threaded holes, you can see I put in two spacers I had laying around, just happened to be aluminum but a stack of washers would have worked as well.
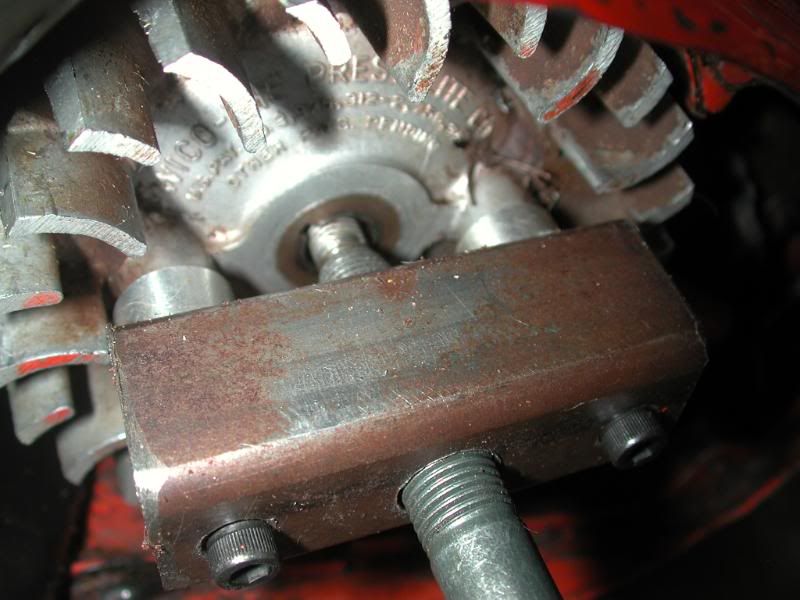
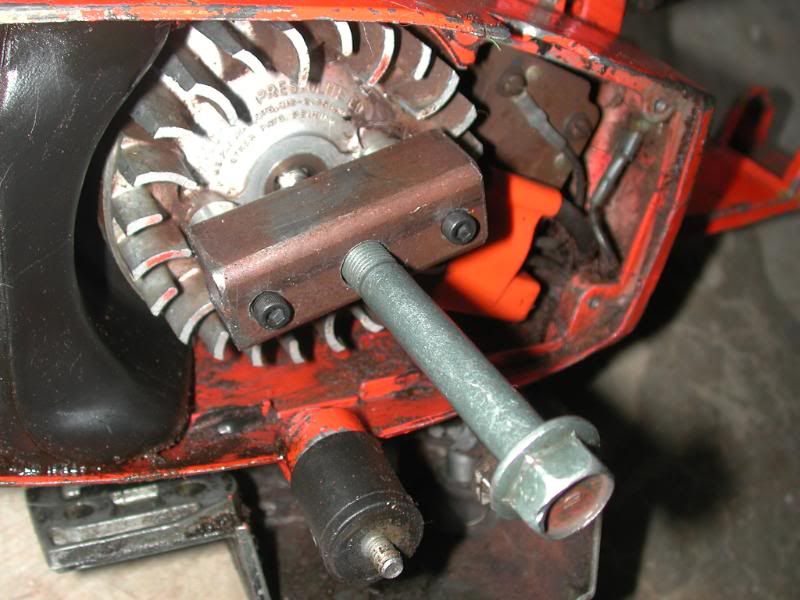
Tighten the big bolt in the middle and Bob's your Uncle. It's off. I did spray some penetrating oil on this over the period of 2 days before I applied my tool to it. PB blaster is known to be the Jeepers friend and seemed appropriate on a vintage saw. Hope this helps someone. Since I don't want to exceed my photo post limit, on to the next post.
I made a similar tool....but flywheel will not budge......suggestions?New to your forum, but not new to much of anything else. I happen to have an old Roper built Craftsman 3.7 saw that belonged to my father in the early/mid 70's, it was well used by us and ended up in storage after a bolt on the drivecase carrier came free and knocked off a lot of fins from the flywheel. The other 2 bolts loosened and wallowed out the threaded holes in the case. I have fixed this and use it still, but wanted to replace the flywheel. This is the saw with model number.


I recently came across a similar saw but not the same model number Roper on craigslist and bought it. The owner claimed it had run recently, but stopped and he couldn't get it restarted. I bought it as reading on this forum and elsewhere had told me many parts were interchangeable. This is the model number.

This particular saw hadn't experienced quite the love mine had, but was completely intact, I decided to do a tear down after I couldn't make it run via the basic measures. The flywheel was fused on very solidly, I didn't like the "hold the flywheel and hammer on the end of the crankshaft til it pops loose" technique so felt compelled to make a puller out of stuff I had laying around. This is what I came up with and would of course like to share it. I used 1" square 1/8 walled tubing cut to length, with holes drilled at the appropriate span to allow two 2" #10 24 tpi alloy bolts to screw completely into the threaded holes for the starter pawls, then drilled a large enough hole for a 1/2 in fine threaded bolt (okay, it is 12mm 1.25 pitch). There is a nut inside the square tubing which allows me to tighten the big bolt which presses against the end of the crank and the flywheel will pop loose with a satisfying sound as you tighten down the bolt. You can stabilize the motor from turning over by two methods. One being the Nylon rope down the sparkplug hole that you are all familiar with, or you can put a wrench across the square tubing to hold it while tightening down on the big puller nut. This took me about 30 mins to put together with pretty simple tools, a series of careful measurements and a minimum of swear words and bloodloss. Though it may seem excessive, I have this tool for future use on my other saws. Here it is.

Here you can see the nut down the inside of the tubing, it won't turn because it wedges against the insides of the tubing. It was a flange nut, so I ground some flats on opposing sides.

To allow for some standoff from the flywheel threaded holes, you can see I put in two spacers I had laying around, just happened to be aluminum but a stack of washers would have worked as well.


Tighten the big bolt in the middle and Bob's your Uncle. It's off. I did spray some penetrating oil on this over the period of 2 days before I applied my tool to it. PB blaster is known to be the Jeepers friend and seemed appropriate on a vintage saw. Hope this helps someone. Since I don't want to exceed my photo post limit, on to the next post.
Never have come across a flywheel that I couldn't get off. This old Roper built Sears saw has me stumped. I'd sure hate to break that flywheel, but I need to get to the points. The saw has no fire.I made a similar tool....but flywheel will not budge......suggestions?
Patience grasshopper!I made a similar tool....but flywheel will not budge......suggestions?
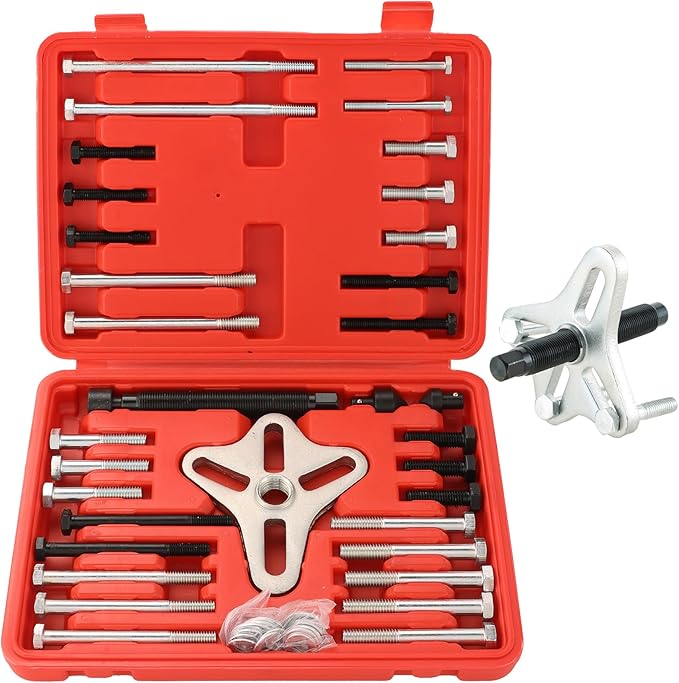


Heat. Kroil. Time.I made a similar tool....but flywheel will not budge......suggestions?