MS461 Giveaway Saw Build Thread

Arborist Forum

Help Support Arborist Forum:

This site may earn a commission from merchant affiliate links, including eBay, Amazon, and others.
Status
Not open for further replies.
waiting to see how you do the muffler mod. stock deflector?
 
I like your work space. Nice and tidy.

Thank you, and to Brad for stepping up to help a member. I belong to a few other online communities but none other compare to the comradere shared here. I wish I could contribute more to the forum with knowledge, but I am just learning the ways of the oil burners.

Thanks again.
 
Not really......spill the beans man.

The 461 is Stihl's first use of a new idea they call "delayed scavenge." The transfers open when there is still a tad of pressure above the piston, and allow exhaust to start to backfill the transfers. Like a Strato engine, the incoming charge is preceeded by using something other than fuel to purge the chamber. In this case it is exhaust from the previous combustion event. When they did this, obviously they discovered temperature of the transfers is much hotter (since there is hot exhaust in there now.) Well this means more heat adjacent to the wrist pin in the cylinder, and consequently more heat there. Supposedly they were getting a strong running saw for a short time, and then the wrist pin bearing would fail. That little deflector is to splash cool fuel on the underside of the piston and give the pin bearing a fighting chance. Of course, it also takes up space and acts as a crank stuffer. They say it will run fine without the deflector in there, but the pin bearings will probably fail within MINUTES(!!!) YMMV. Have you tried one without the deflector yet?
 
The 461 is Stihl's first use of a new idea they call "delayed scavenge." The transfers open when there is still a tad of pressure above the piston, and allow exhaust to start to backfill the transfers. Like a Strato engine, the incoming charge is preceeded by using something other than fuel to purge the chamber. In this case it is exhaust from the previous combustion event. When they did this, obviously they discovered temperature of the transfers is much hotter (since there is hot exhaust in there now.) Well this means more heat adjacent to the wrist pin in the cylinder, and consequently more heat there. Supposedly they were getting a strong running saw for a short time, and then the wrist pin bearing would fail. That little deflector is to splash cool fuel on the underside of the piston and give the pin bearing a fighting chance. Of course, it also takes up space and acts as a crank stuffer. They say it will run fine without the deflector in there, but the pin bearings will probably fail within MINUTES(!!!) YMMV. Have you tried one without the deflector yet?

The timing numbers I'm seeing are in contradiction with what they are telling you here Tim. The transfer ports on this engine are far lower than a 044 or 066 even. Now that baffle in the muffler could cause enough back pressure to stuff the exhaust down the transfers.....

I did start one, and make two cuts without that baffle.....I saw no difference in the way it ran. I suspected it to be a stuffer of sorts, and trusted that it was a well thought out addition to this design, so I just moved on in my thinking.

A new and improved AS and now randy has action shots! Sweet!

Great job Randy. Can't wait to see the before and after vids!

No before vids Rory. I've do so many of these that I know exactly how they run stock and modded. No sense in getting it dirty before I tear it down. This saw has never been fueled.
 
Last edited:
I would like to see a picture of the timing key you are removing material from.

I undertand how moving the flywheel advances timing but am just a tad confused how you actually execute this.
 
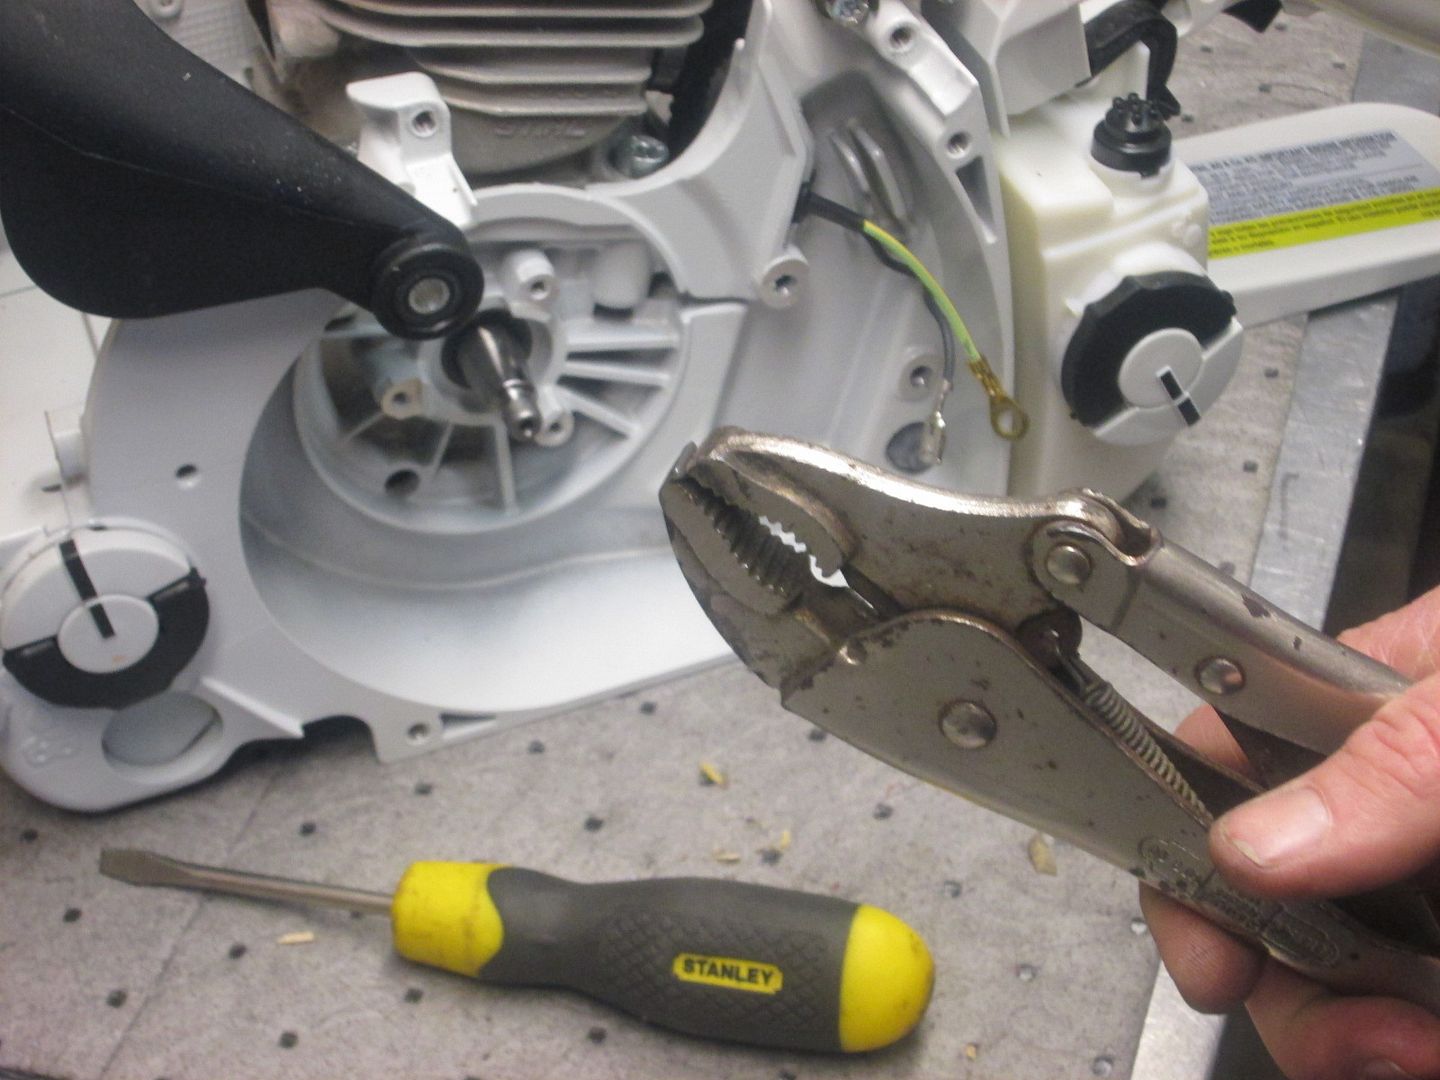
The key is in this set of Vice grips....


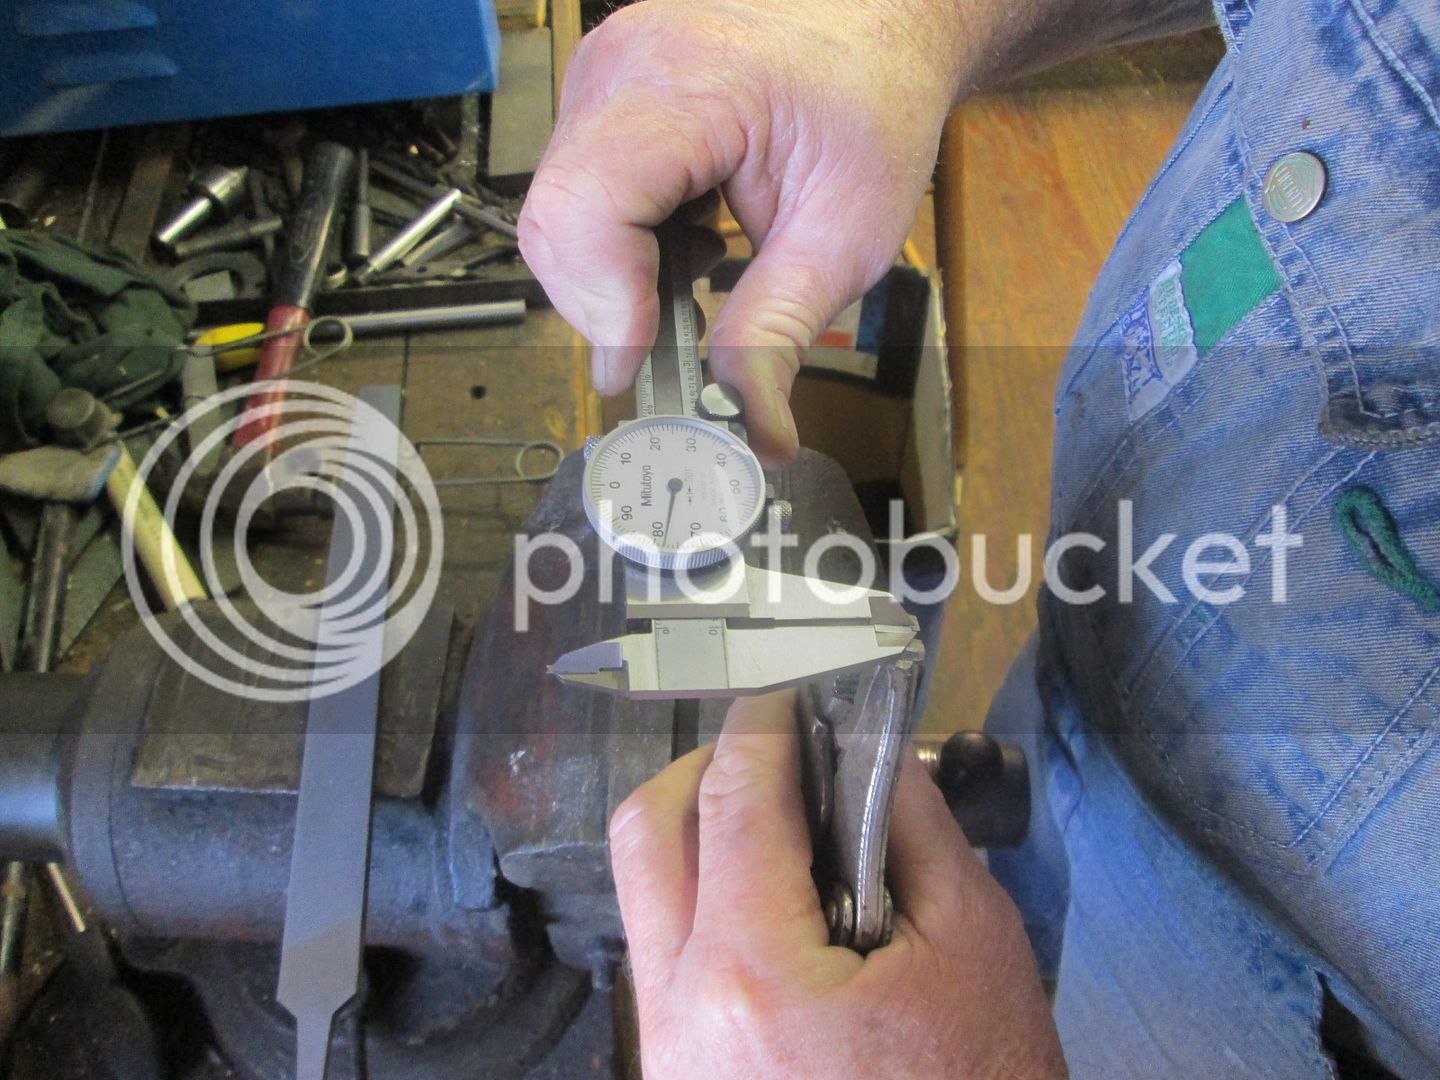
Here I'm measuring the thickness of the key


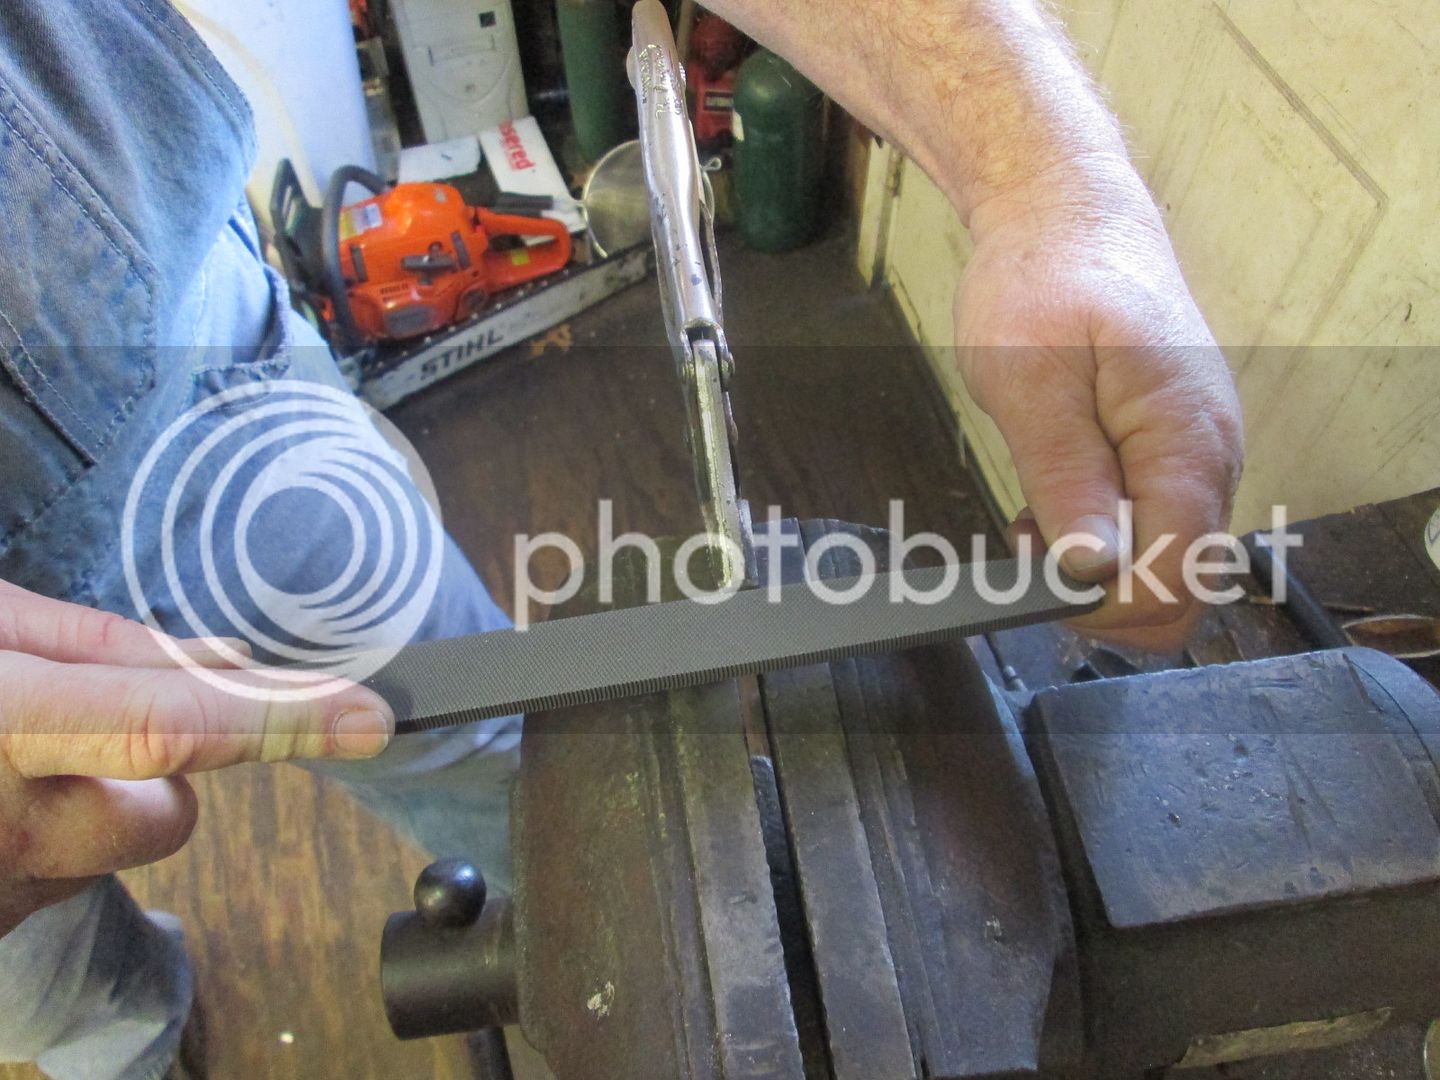
And here I'm filing it down.....


After we eat and get back to the saw I'll explain about how to install the altered key, and be sure that the flywheel stays where it should.

We've got other saws we're working on too......and test running last weeks jobs to get them ready for shipping. No rest for the weary......
 
I like your work space. Nice and tidy.

Thank you, and to Brad for stepping up to help a member. I belong to a few other online communities but none other compare to the comradere shared here. I wish I could contribute more to the forum with knowledge, but I am just learning the ways of the oil burners.

Thanks again.


It's not always tidy. We just have 200 sq ft, and do a bunch of work here.......it's has to be somewhat organized or it becomes a nightmare......

AS hosts a great group of guys for sure.......but it has more to do with the sort of people we all are than the place itself. I'm not saying AS ain't great......just that it's the members that make the forum what it is. When the last T-Bone donation was going down, we had many donations from guys on other forums as well as what came from AS members. There are great people on other forums too. That's one reason I've never made it any kind of a secret that I am a member of many different forums, and have made some great friends on them all. The working man understands hardship, and that bonds us in a way few ever get the chance to experience.
 
Last edited:
Been looking for this thread for a while. Glad you are finally getting started on it and in turn the next round of donations.
 
Guys you all better get in on the donations, I have a mastermind built 461 and its a torque monster. I'm actually starting to like it more than my mastermind built 460.
 
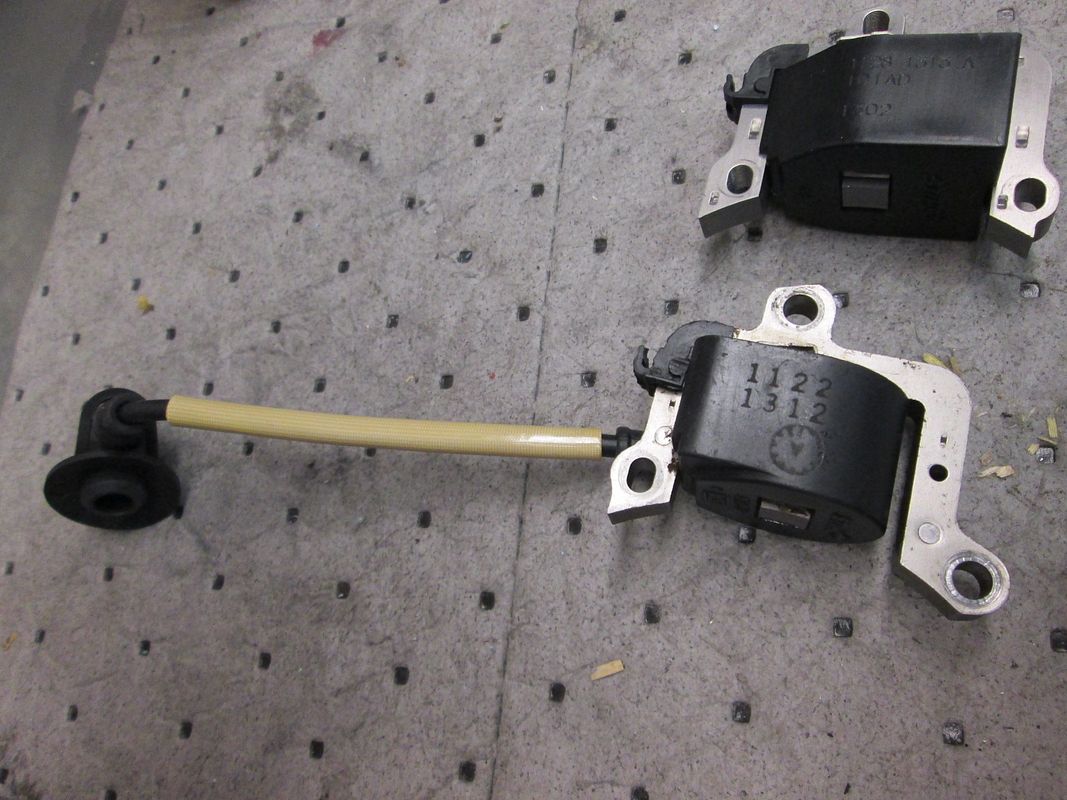
Coils.....

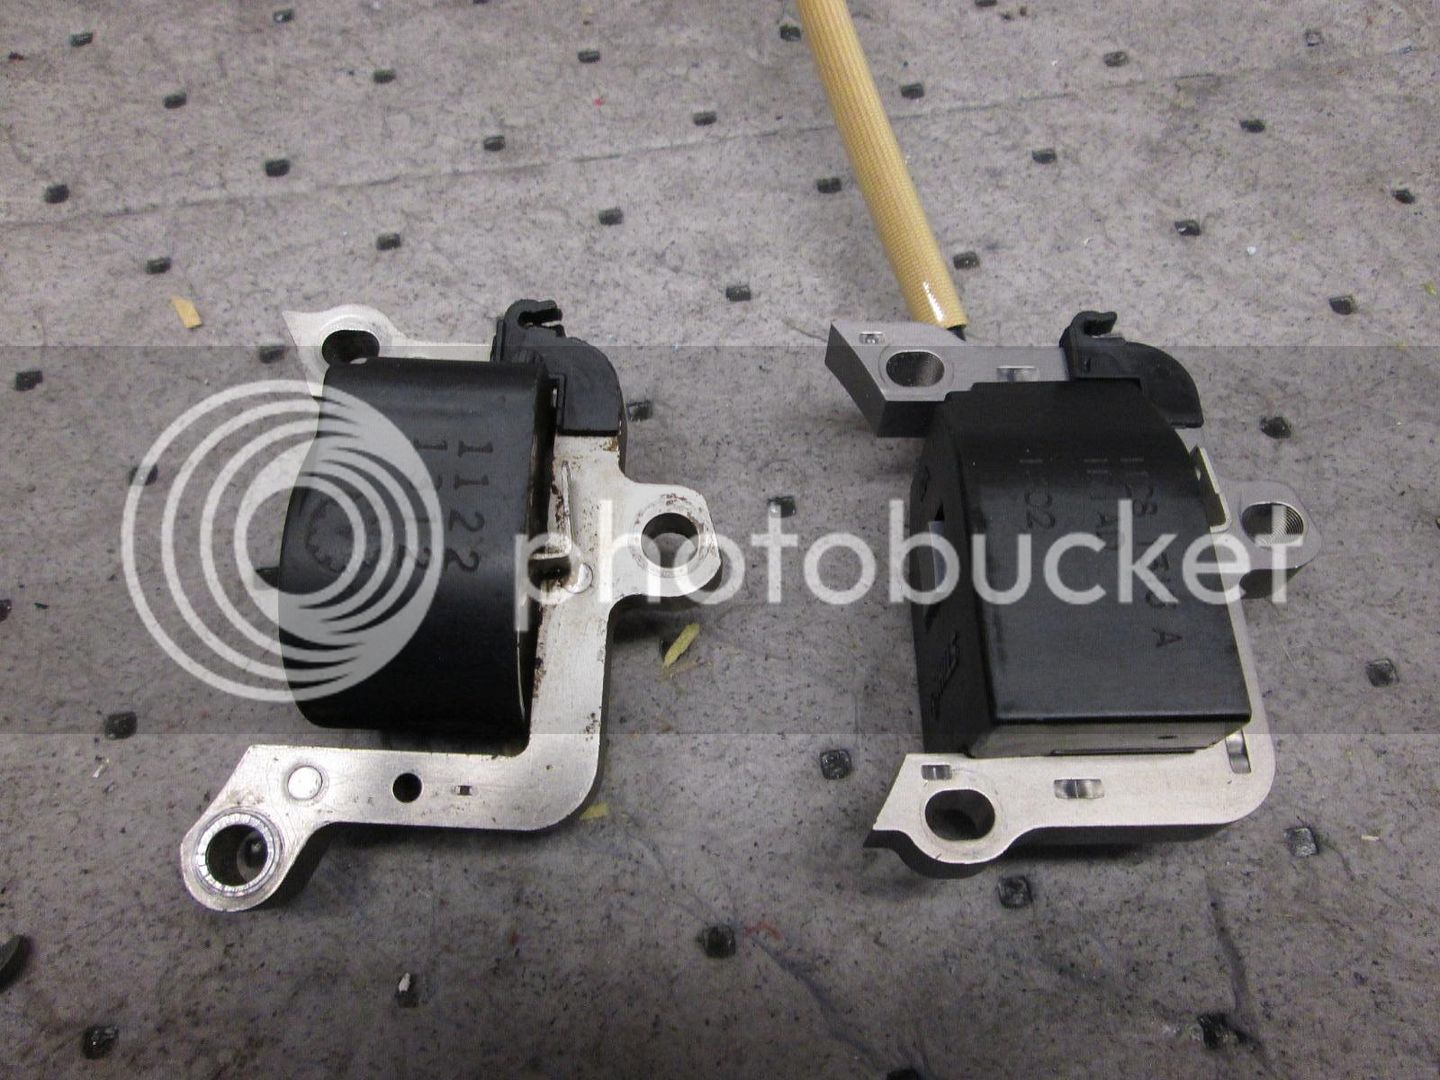
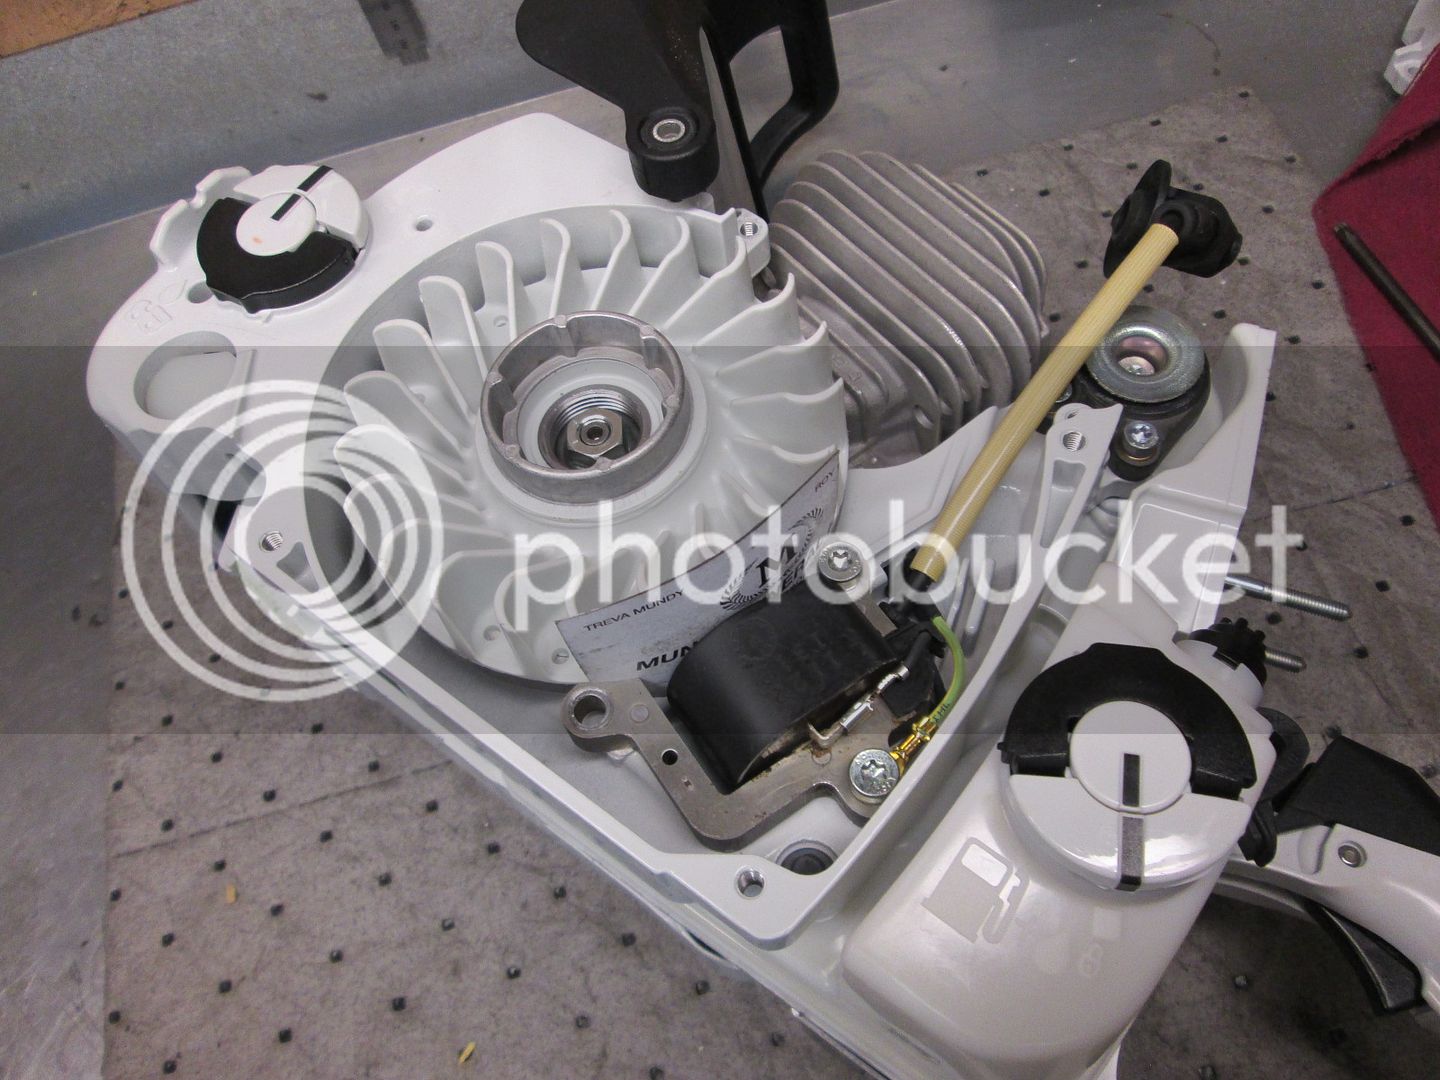
The MS461 is rev limited to 13,500. To make the saw unlimited I use either a 460, or 660 coil. On this saw, I have a 660 coil to use.


As you can see in this pic, all three holes don't line up using the 660 coil. On the 460 coil there are only two bolts as well, so I don't worry about this.

 
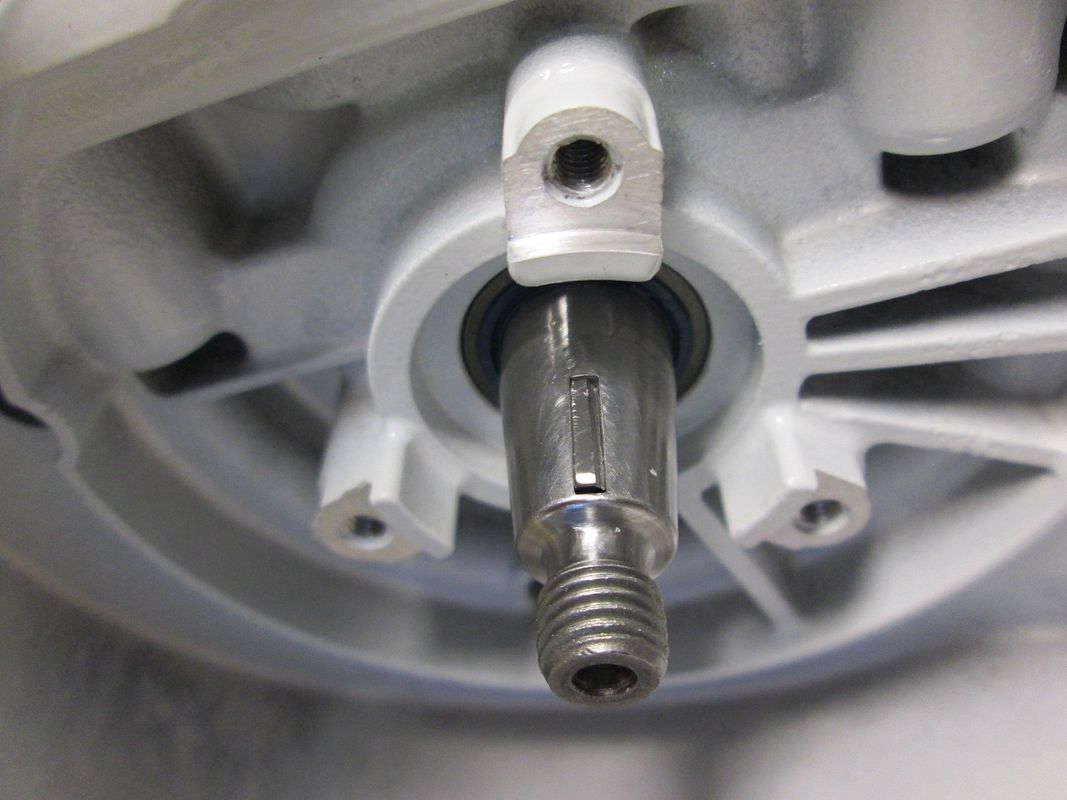
Let me back up just for a second. Here's a shot of the flywheel key.


See how the area I cut is on the right side? That will make the flywheel rotate counter-clockwise further than it was from the factory. I've found that by taking .020 from the key that I get around 6° advance.

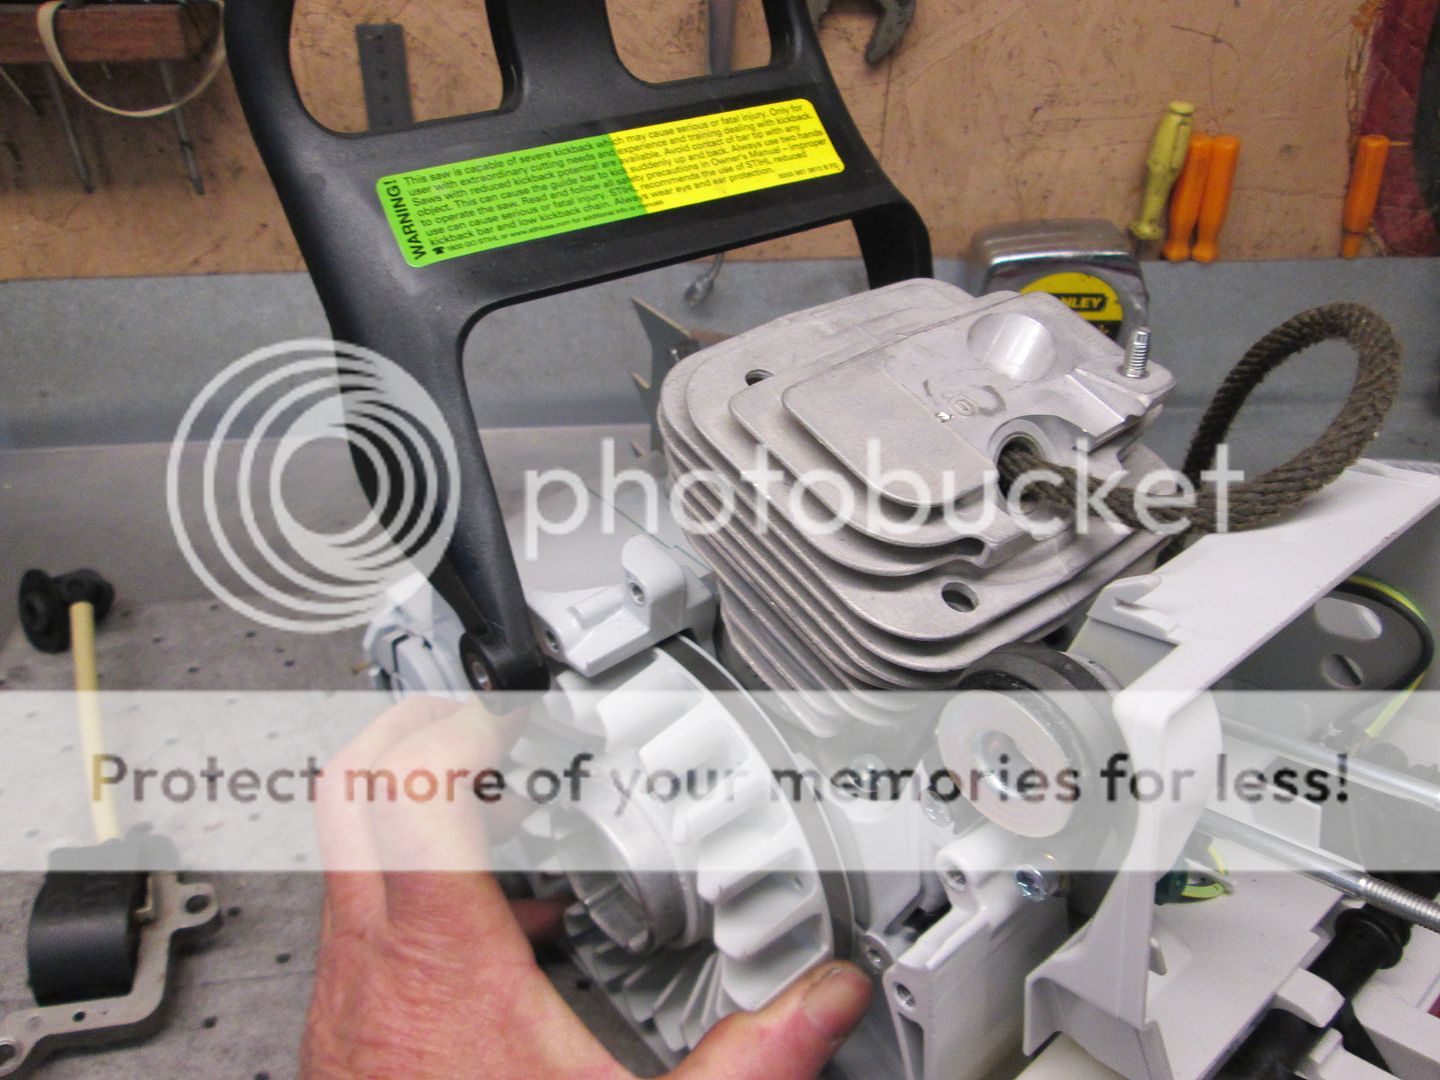
Now here I'm holding the flywheel against the rope I'm using as a stop, then I tighten the flywheel nut as tight as I can while holding it like this.


After it's snugged up to hold the flywheel in place, I rotate the engine to catch the stop in a way that allows me to finish tightening the flywheel.
 
Last edited:
Status
Not open for further replies.

Latest posts

Back
Top