Tool Forum

Arborist Forum

Help Support Arborist Forum:

This site may earn a commission from merchant affiliate links, including eBay, Amazon, and others.
Well Bob it is Mall 3/4 chain that I would like to see spinning around sometime soon. I think it will limber up after a soak in some diesel and then some oil.

Yeah, that's a good start. Then it's on to clamping the drivers in a vise one by one and smacking the straps to free them up; once everything's moving at least somewhat, clamp an old bar in the vise with the nose pointing upwards, then put the (well-lubed) chain over the nose and pull it side-to-side while pulling down quite firmly to really get the links working around the curve of the nose. Takes a long time but I resurrected a couple REALLY ugly 3/8" chains back in the winter doing it.
 
I like the look of killer - (S)He sure is a good looking hound!

Yep, she's a pretty cool dog. I've always loved them. Not much of a guard dog (except against invaders of the rodent and insect variety!), but she's one heck of a good house alarm. The slightest knock or noise and she's right on it. She has a pretty good sniffer for such a little runt too.
 
Make those ports nice n smooth. :)
1002683g.jpg

1002688n.jpg

1002681ad.jpg

1002691c.jpg
 
vincem77

Nice assortment of abrasives and mandrels in that Mac Kit! Not familiar with those tapered rolled abrasives,I mean I have seen them, but wondered how they were made to stay on. I guess looking at the picture they kinda screw on to those mandrel's with the threads.Am I correct? Is there a nut on the bottom of that type of mandrel?
Thanks for the post!
Lawrence
 
Yes the threads on the mandrel help it to grip on when you first spin it up, and when it comes time to remove it. The rolls are pretty stiff so they stay fairly solid. No nuts are used.
 
Heat Gun

Just picked up a used Milwaukee heat gun at a very good price at the garage sale.It is a variable heat model.I think the maximum heat temp is a shade over 1000 Fahrenheit. If you own a heat gun I would be interested in what you fellas use yours for.
Thanks
Lawrence
 
I use a heat gun to get fuel lines over fuel filter fittings (lots of fffffs) I keep the line 4" away and roll the line to get uniform heat. Only takes a few seconds and then it slips right on and as it cools it shrinks making a permanent air tight seal. Just have to be careful not to melt it. As soon as the sharp edge of the line starts to roll, I pull it away. I do them all like this now.
 
I use a heat gun to get fuel lines over fuel filter fittings (lots of fffffs) I keep the line 4" away and roll the line to get uniform heat. Only takes a few seconds and then it slips right on and as it cools it shrinks making a permanent air tight seal. Just have to be careful not to melt it. As soon as the sharp edge of the line starts to roll, I pull it away. I do them all like this now.

on a chainsaw?
 
Heat gun is a great tool to apply heat to shrink wrap tubing used on wireing and even when applied over chainsaw handles. Thawing frozen water lines, expanding aluminum and magnesium to fit steel parts into bores, like installing bearings in chainsaw cases. Swelling pistons to allow removal and installation of piston pins in the saws that have an interference fit, like Pioneer. Softens fuel lines like tygon and even to get penetrating oil to get deeper into frozen /rusted parts.
Pioneerguy600
 
Last edited:
Removing paint, decals, softening old rubber parts to make disassemble easier. Heat guns are very useful.
 
Heat gun is a great tool to apply heat to shrink wrap tubing used on wireing and even when applied over chainsaw handles. Thawing frozen water lines, expanding aluminum and magnesium to fit steel parts into bores, like installing bearings in chainsaw cases. Swelling pistons to allow removal and installation of piston pins in the saws that have an interference fit, like Pioneer. Softens fuel lines like tygon and even to get penetrating oil to get deeper into frozen /rusted parts.
Pioneerguy600

Ah, so THAT's the secret with those pistons. I thought I was going to destroy the two Mac 10-10 pistons I've removed pins from. They were stuck tighter than paint to a wall, and I'd never seen an unclipped piston pin before, so I just went the brute force way.

Regarding heat guns, mine gets used a fair bit. It's just a $20 Canadian Tire dual-heat-range jobbie, but all it has to do is blow hot air so it doesn't need to be expensive and fancy, and I think it goes over 500°C. It's hot enough to catch stuff on fire, I know that! Mine sees most of its action heating heatshrink tubing and metal parts for sweat-fitting, as Jerry mentioned. I just started using it for stubborn fuel lines a while ago after seeing that mentioned here in another thread somewhere. It's a good idea.

One use that hasn't been mentioned yet is for stripping paint, which is really the primary market for heat guns. Latex paint especially will blister right up and come off with minimal effort. Of course it depends on what surface said paint is on - vinyl siding etc. would be a bad idea!

Something else I do once in a while with mine is melt solder. They are plenty hot enough to do the job - if I'm remembering electronics school right, regular lead/tin solders melt at anywhere from ~180 - 225°C depending on the mixture. In school we would use a heat gun to melt the solder connections on the backs of circuit boards. Rather than using a soldering iron and heating only one or two at a time, the heat gun could melt dozens at a time so that the electronic components on the other side of the board could be pulled off and salvaged for future projects. A couple guys could literally have an entire TV reduced to its base components in ten minutes.

I'm not sure if a heat gun would put out enough BTUs to heat a copper pipe for soldering. Copper is one of the best conductors of heat and requires a lot more heat than an equivalent chunk of steel - the steel is slower to heat up, but once it's hot it won't lose the heat nearly as fast as the copper. It would be worth trying though - it would be nice to have another option besides a torch in tight areas.
 
Vise rebuild finished

I swung by a surplus/liquidation store today to check out what they had for cheap paint. They always have a bunch of random colors of name-brand stuff. I snagged a can of an interesting Dupli-Color blue automotive enamel for $3. It flowed and stuck to the primer really well, and dried very quickly too. I gave it two coats an hour apart, then let it sit for another hour and started assembling it.

attachment.php


attachment.php


attachment.php


It's not quite the "electric" blue it looks in the photos (especially the last one). It's a nice enough color though. I don't know how well this quickie paintjob will hold up, but for pity's sake, it's a vise that's going to get hammered on and showered with sparks anyway, so I'm not really worried about it. If it does crap out totally though, I can have this thing apart in less than 5 minutes now that all the rust and schmootz is gone, so re-doing it wouldn't be the end of the world. I know the paintjob looks really rough, but it's just the raw cast metal. The original enamel must have been 10 coats thick because it smoothed the surface out pretty well.

I'll let it sit for a few days to let the paint harden up as much as possible before I think of doing anything with it. Not quite sure where I'll put it; my existing workbench is far too high - the vise jaws would be near chest-high. One thing that could use improving is the mechanism for releasing the head's tilt. You have to loosen the two allen-head cap screws in the tail cap of the vise body, visible in the last picture right beside where the spindle exits the rear of the vise body. I'm going to look into getting or making some slide-lever screws, like the ones that release the base's swivel, just much smaller. I'm not sure there's adequate clearance from the spindle though, unless it was extended all the way out the front. It's just a PITA to have to keep an allen wrench handy. But overall, a small complaint as I'm sure it'll spend 90% of its time upright anyway.

It may just be a matter of opinion, but as far as the mounting base is concerned, what would you guys consider the "front"? It has three bolt holes, would you say the front is the "empty" side, or the one with the middle bolt hole? Personally I'd say the "empty" side, if only because it would allow the vice to be placed an inch or more closer to the edge of the bench.

I have to say I never thought it would clean up nearly this well. It was locked up solid as a brick when I picked it up. I can't find a manufacturer's mark or anything anywhere on it though - just a "69"(!) on the end of the main spindle. It operates really smoothly, and I haven't even oiled the threads yet. It's excellent as far as racking is concerned, too. I clamped a piece of 1/2" keystock at one extreme edge of the jaws at average strength, and it the jaw gap was about 1/64" less at the other edge. It was hard to measure really accurately on the textured jaws, but suffice it to say it's plenty good enough for me and is leagues beyond the vises I've been using.
 
Last edited:
Porting tools

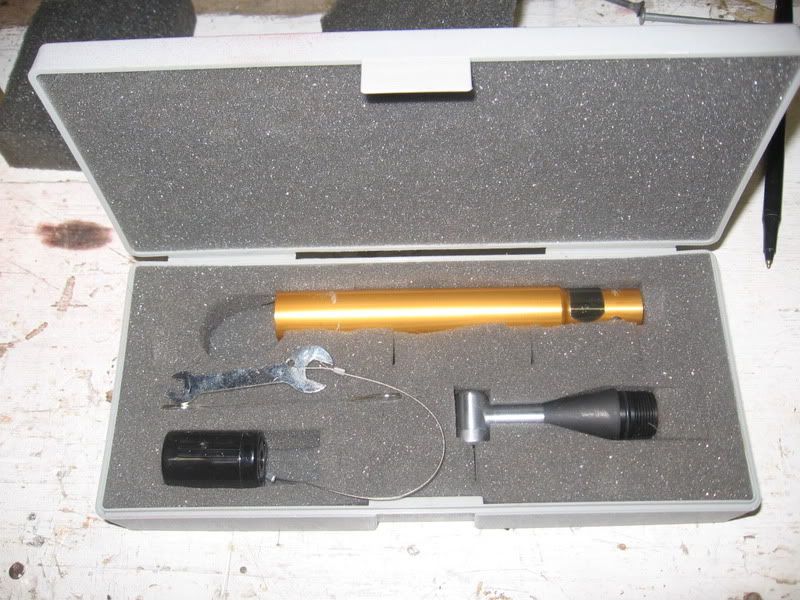
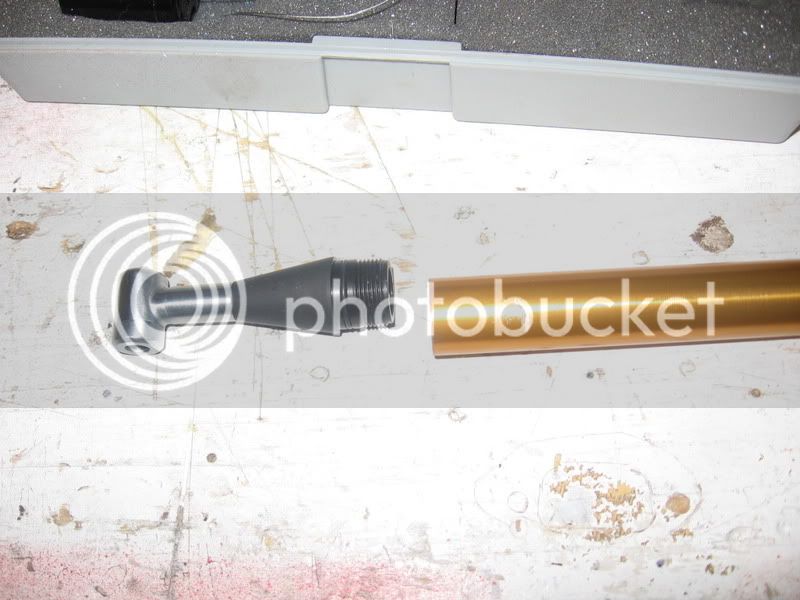
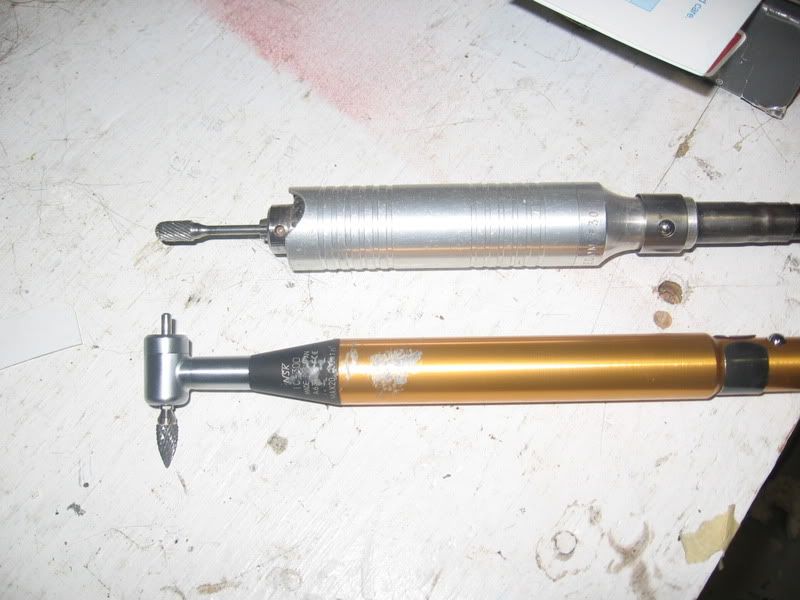
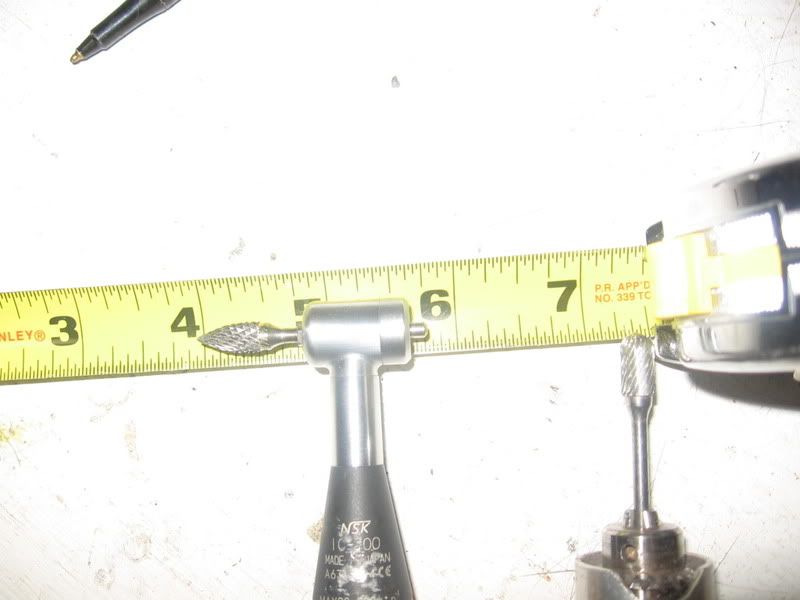
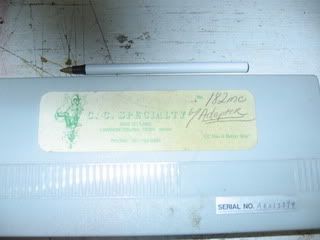
There haven't been any pictures of porting tools lately, so I thought I show you all what C&C Specialty Tools has. This is a tool you can attach to any Foredom tool. It uses the same drive coupling. It's nice because you can really get into the transfers and clean them up well. It puts out a lot of torque.

030.jpg


031.jpg


The marks on the gold part of the handle are from reaching into the cylinder to get to the transfers.

032.jpg


033.jpg


034.jpg
 
Brad Morgan

Really nice job you have done on the vise there.They had a vise similar to yours at the garage sale but it did not have replaceable jaws, so I did not think that was to good.
Lawrence
 
Really nice job you have done on the vise there.They had a vise similar to yours at the garage sale but it did not have replaceable jaws, so I did not think that was to good.
Lawrence

Thanks. I just checked the paint today, and it's hardened up really well. I scratched it in a couple inconspicuous places and it took some effort to get down to the metal - not quite as much as a proper auto paintjob, but plenty good enough for now. I used a dark green of the same Duplicolor to paint the air compressor I built a while back, and it's holding up to oil just fine, so that shouldn't be a problem. Heat and sparks might be another issue, but time will tell.

I looked into some prices on ones like this and while they aren't nearly as expensive as those Wilton "bullet" style vises, they're not really cheap either - though I do think they're not bad for what you get. The various ones like mine with the replaceable pipe jaws command a bit more - I saw them well over $200, while the one that Wilton makes with non-replaceable jaws was around $150. I don't know why a reputable company like Wilton would cheap out on such a simple thing - all that would be involved is drilling and tapping four holes, and adding the subsequent set screws and locknuts to hold the replaceable pieces. The only major difference I can see between mine and the newer ones is that they tend to have a quick-release mechanism for the head rotation with a few positive stops on the rear cap of the vise body. Mine has no such luxury - though I'm sure I could probably modify it without too much difficulty. But, as I said before, it'll likely spend the vast majority of its life upright so I don't think it's worth the effort and/or risk.


I came across this a couple days ago in the back of my toolbox:

attachment.php


attachment.php


attachment.php


It's a Bacharach draft gauge for testing ventilation in stuff like chimneys and ducting etc. This one is fairly old, judging by the packaging anyway, though it would appear they still make them identical to it. I paid $2 for it at a flea market - they're pricey little gadgets though at just under $100 average!

http://www.tequipment.net/BacharachDraftrite13-3000.html

I don't know if this thing would have any use with engine porting and checking flows etc. or not - I would imagine it operates at an entirely different range from what would be needed.
 
Last edited:

Latest posts

Back
Top