Pleasantly Surprised by First Attempt at Plastic Restoration

Arborist Forum

Help Support Arborist Forum:

This site may earn a commission from merchant affiliate links, including eBay, Amazon, and others.

PogoInTheWoods

Don't forget about the alligators...
. AS Supporting Member.
Joined
Dec 13, 2009
Messages
6,946
Reaction score
6,264
Location
Reportedly in the Area
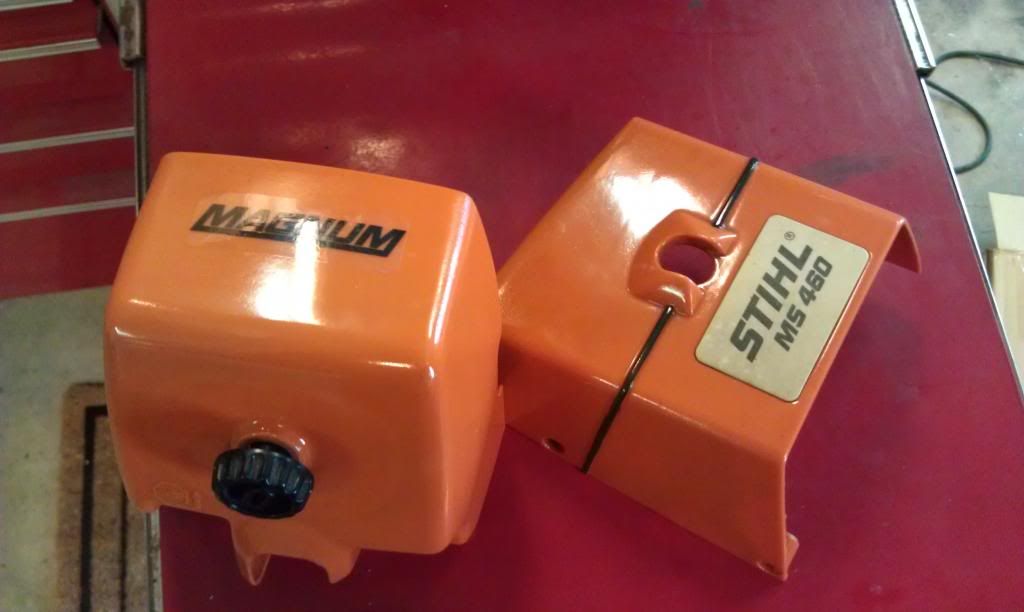
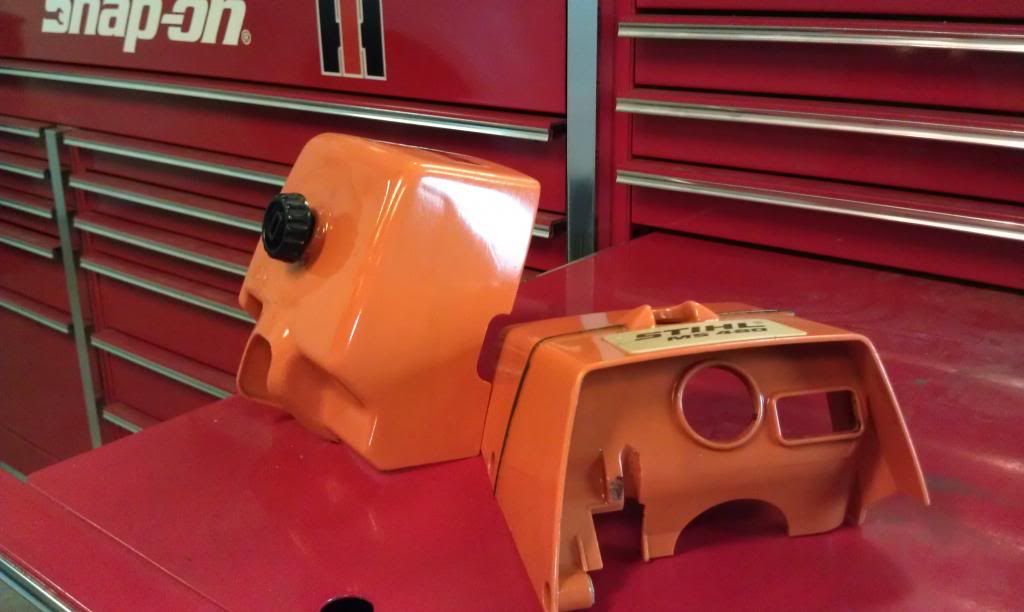
Have seen several threads on the subject and finally got around to trying the wet sanding and clear coat approach on some really nasty 066 plastics and I'm delighted with the results so far. Started out with 400 grit and wasn't getting very far very fast. With not much to lose, I went down to 220, put some ass into it, and started getting through the fading and oxidation fairly fast. Then back to the 400 wet (with Liquid Wrench), then some 600, then a bath in Blue Dawn before a coat of Krylon indoor/outdoor Crystal Clear gloss. BTW, I got the Liquid Wrench tip from JJ for wet sanding metal, but it works great on plastic, too. Thanks, JJ. If I would have known it was gonna turn out as well as it did, I would have been a little more patient and detailed in my sanding, but I'm thinking another light sanding and another fine coat should finish it up decently. The shroud will be a little more challenging and ain't no way I'm sanding all the way through some of the impregnated stain, but I intend to take a little more time with it and see how it goes. I'll post a coupla more pics when I'm done with it. I have about a half hour total in the air box cover which doesn't seem too bad for the result.

And yes, I buy all my clapped out 066's from Hoover Hardware and Gift Shop.:rock:

attachment.php


attachment.php
 
Last edited:
I might have to try this. cant be much harden than wet sanding high gloss finishes on my wood turnings. If you take your time, you can get them looking like there encased in glass
 
good job

This is the first plastic restoration of mine. Yours looks about like mine. Next time I'll sand more with fine paper. I also put lots of coats on it. I think I put close to ten coats on it and I painted the black stripe on the plastic and let it dry for a day before the clear. The black could blead into the clear if it's not completely dried.
IMAG0354_zps13369c3c.jpg
IMAG0353_zpsdf63136d.jpg
 
The key to a super glass like finish is high grits and lots of time. I would go all the way to atleast 600 grit on the plastic, if not 1000. then with each clear coat wet sand (with water) between each coat. Start with 600 grit, then use 1000. Keep repeating until you get a better than new finish. This will end up being something you could use as a mirror. It is so nice to be able to apply my wood working skills with saws.
 
This is the first plastic restoration of mine. Yours looks about like mine. Next time I'll sand more with fine paper. I also put lots of coats on it. I think I put close to ten coats on it and I painted the black stripe on the plastic and let it dry for a day before the clear. The black could blead into the clear if it's not completely dried.

Nice job. Don't think my beast is worth goin' with 10 coats, though. I'm just happy at how it turned out with one!:hmm3grin2orange:

:cheers:
 
The key to a super glass like finish is high grits and lots of time. I would go all the way to atleast 600 grit on the plastic, if not 1000. then with each clear coat wet sand (with water) between each coat. Start with 600 grit, then use 1000. Keep repeating until you get a better than new finish. This will end up being something you could use as a mirror. It is so nice to be able to apply my wood working skills with saws.

Good point on the water wet sanding between coats. A solvent like Liquid Wrench would probably be the last thing you'd want to use for that! Worked great for me on the initial main sanding, though.
 
Hey, they both look great. It took me quite a few attempts to get my finish that good.
 
Good point on the water wet sanding between coats. A solvent like Liquid Wrench would probably be the last thing you'd want to use for that! Worked great for me on the initial main sanding, though.

Liquid wrench will strip off spray paint until it has a few days to cure. I think if you wet sanded a finish with that, it would remove it.
 
The 3M headlight restoration kit might come in handy for such projects. I dropped the cover on the 362 I had and scuffed it. I used it with great results on that.


Sent from my iPhone 5 using Tapatalk
 
Great results from everyone...

I have a couple questions though. Has anyone here tried wet sanding thru the grits until you get to a superfine grit e.g. 1500 wet and then buffed the plastic back using a bench mounted buffer and different compounds? it would add more time etc but then you would'nt have a chance of the clear peeling off...Which leads into my next question, how rugged is the clear? does it chip off easily? I realize that they are saws, but im curious.
 
i've been doing this for years on saws and dirt bikes. works awesome. only thing is to speed up the process i scrape the plastic with a semi sharp knife. i used to clear coat it also but maybe i was using the wrong clar coat for the job. would chip off and it annoyed me so i started just using never dull on the plastic after wet sanding. shines it right up and no clear coat to chip or peel. did an old cr250 for a guy a couple months ago. was an 86 and the bike sat outside for a long time. the guy couldn't believe it that it looked almost brand new. good work. i've lost patience doing it on saws. as long as they run they can be ugly for all i care. i use them more then i look at them. nice job :clap:
 
I somehow lost track of the responses to this thread and just wanted to provide a brief update...

I think the wet sanding with the Liquid Wrench really helped with toning down the mega-oxidation on the shroud for the clear coat to be as effective as it is. Sanded the piss outta this thing with multiple grits starting at 220 again and hosed her down in a Blue Dawn bath before applying a starter coat. Let it sit overnight and applied a slightly heavier coat that I'll fine sand for one last coat and not look back. The last pic shows a more detailed result of what's left to clean up. Piece o' cake. Pretty easy and very effective for just wanting to bring some nasty plastics back to life on a clapper rebuild project if ya don't want a mirror finish for shavin' and combin' yer hair....and stuff.

Bottom line? Nuthin' to it and it pretty much looks like it should.... and I'm pleased with the effort to result ratio.

attachment.php


attachment.php


attachment.php

:cheers:
 
Last edited:
Wow,that looks great. I would have never imagined it could be brought back like that. How much time did you have in it?
 
Looks good I should do my 044 but I kinda like my ol ugly saw. Kinda like a rat rod-new hopped up engine and old cruddy paint!
 
stay away from the liquid wrench oil and paint dont mix one little speck somewhere the soap didnt wash off and you have fisheye. just use dawn and water to sand with. also sem makes a urethane clear with flex additive like they use on plastic auto bumpers. im getting some old plastic delivered soon ill put some pics on here
 
stay away from the liquid wrench...

Damn. Guess I messed up, huh?:dizzy:

But point well taken. On the other hand, we ain't talkin' about restoring a split-window '63 Corvette, either.

Worked for me under the circumstances and the results speak for themselves....and I'd use the same process again given similarly oxidized plastics based on those same results.

I would encourage others to give it a try, too.
 
Last edited:
Back
Top