Check another one off the list: Gear hauler done

Arborist Forum

Help Support Arborist Forum:

This site may earn a commission from merchant affiliate links, including eBay, Amazon, and others.

Nuzzy

Trail Gnome
Joined
Dec 15, 2007
Messages
1,502
Reaction score
948
Location
North Bend, WA
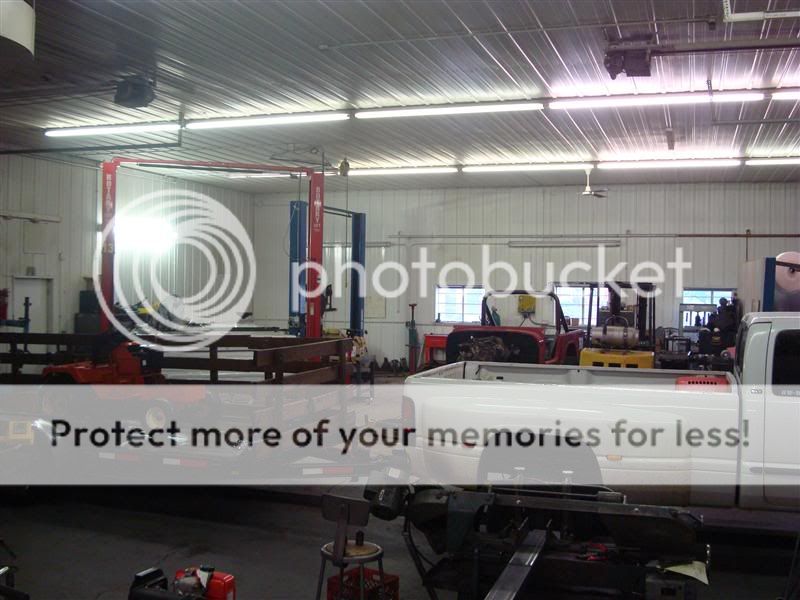
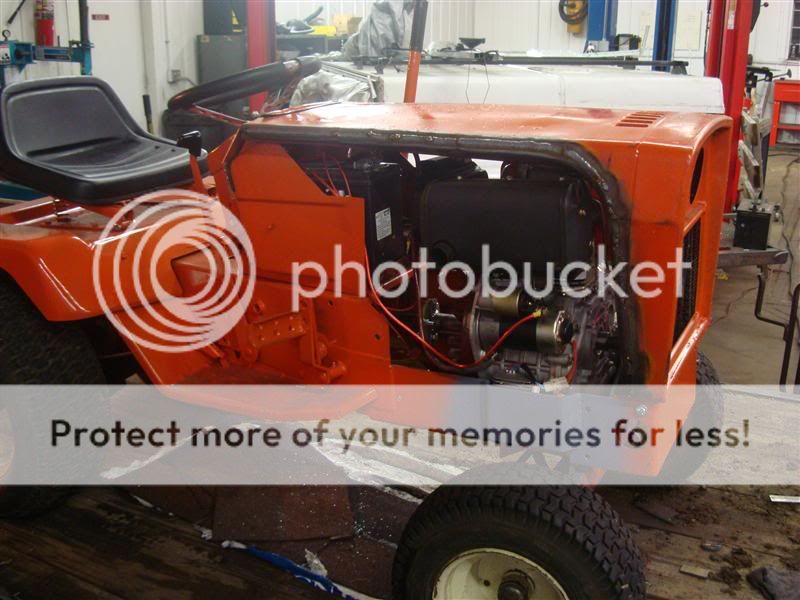
We're in our slow(er) season at work which means I get more time to play around with projects I've been meaning to do. Got the log arch pretty much done, but carrying all my gear into the woods was a pain. Something HAD to be done!


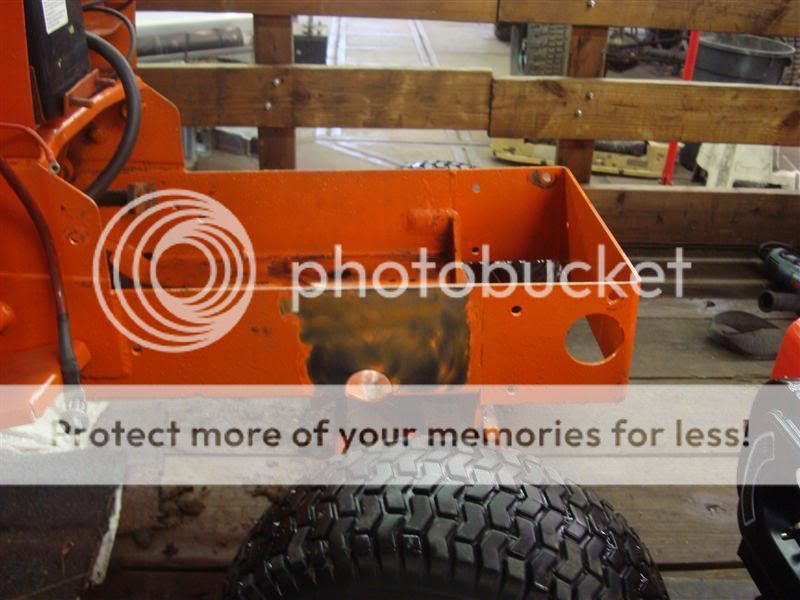
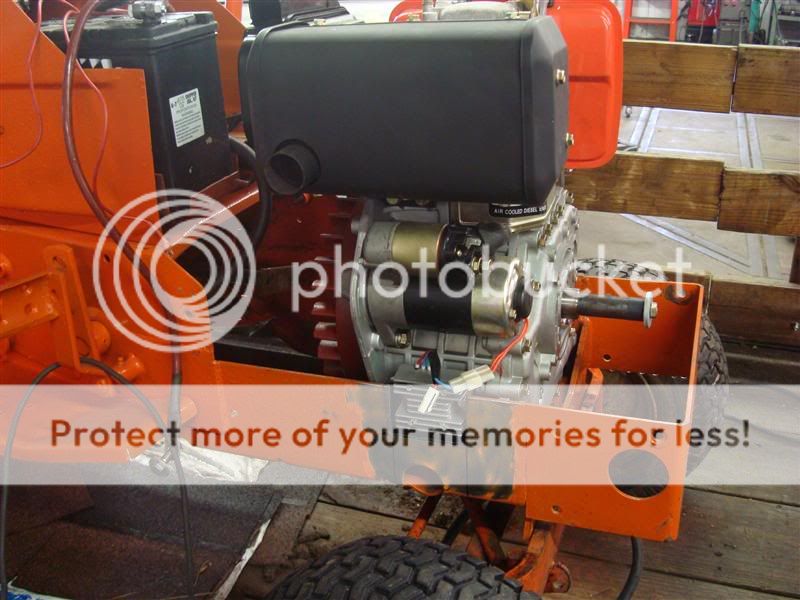
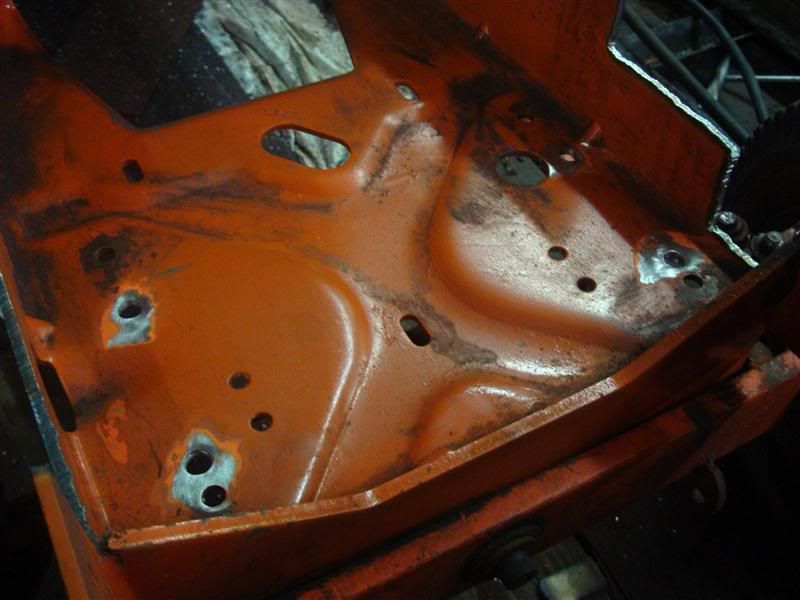
So tonight I made this

DSC09382Medium.jpg


It sits atop of my adjusty hitch (so I could keep it inboard more so than all hanging out the back), and stores everything I need when I head into the woods. Saw box, fuel, oil, mingo, various chains and shackles, big and little saws, etc.

DSC09376Medium.jpg


DSC09370Medium.jpg


DSC09375Medium.jpg


DSC09381Medium.jpg


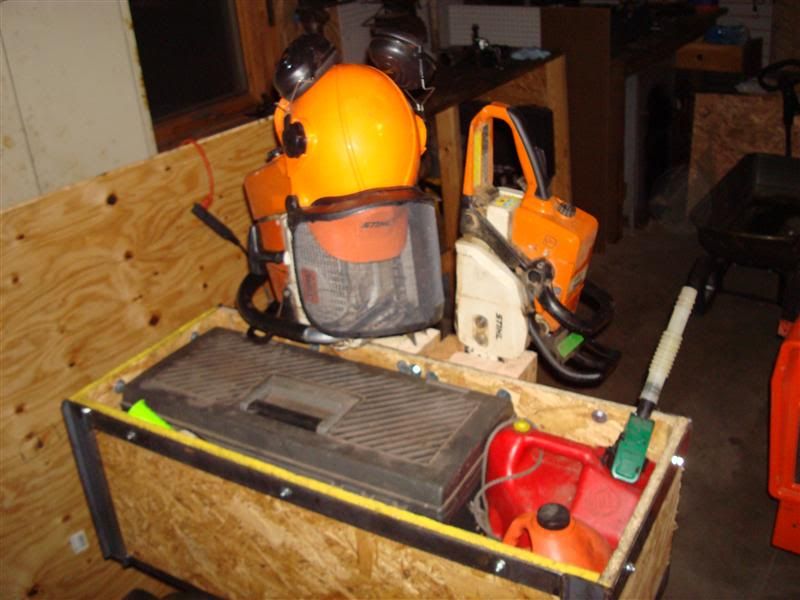
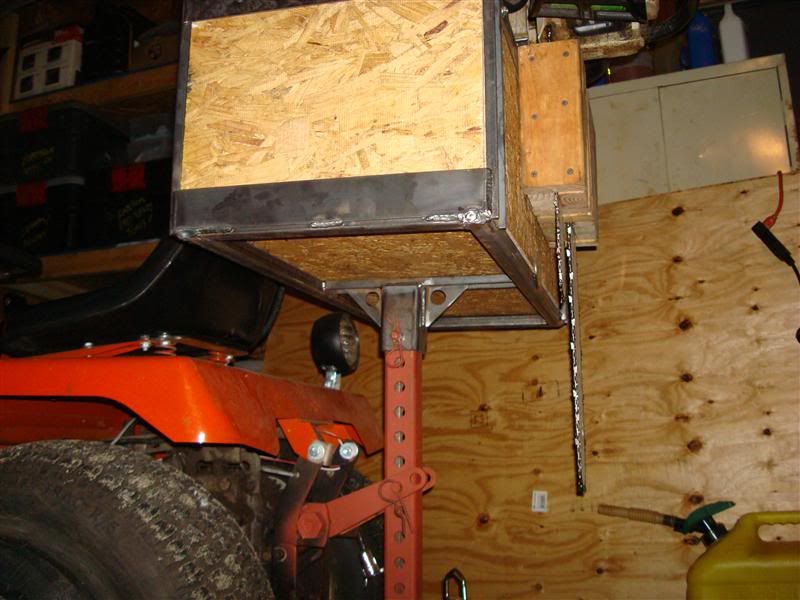
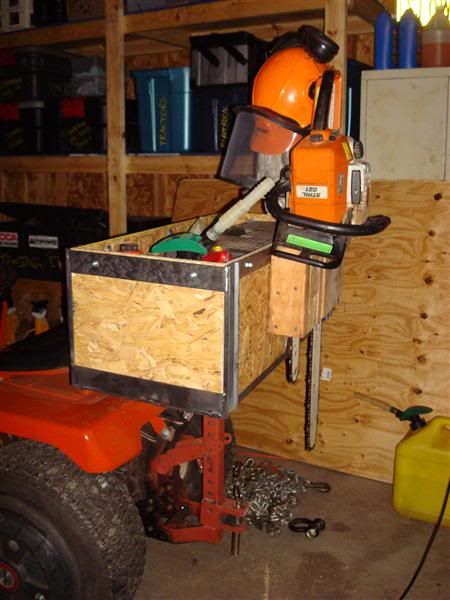
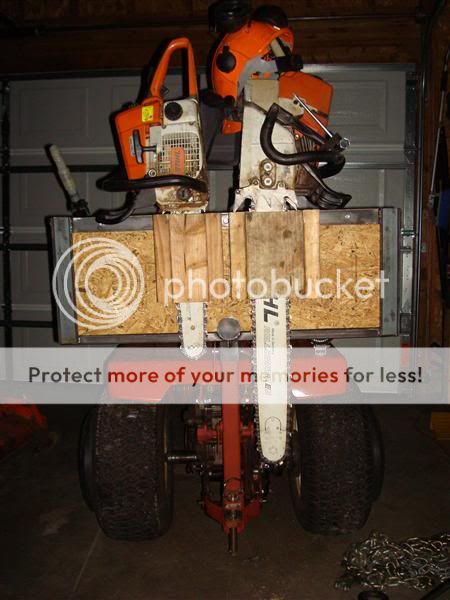
It's out of the way and high enough that it wont interfere with the tight turning of the log arch, and should securely hold everything in place through uneven terrain. The saws are held on with gnarly screws and fender washers so hopefully they'll stay put!

I can't wait to get out in the woods this weekend!!
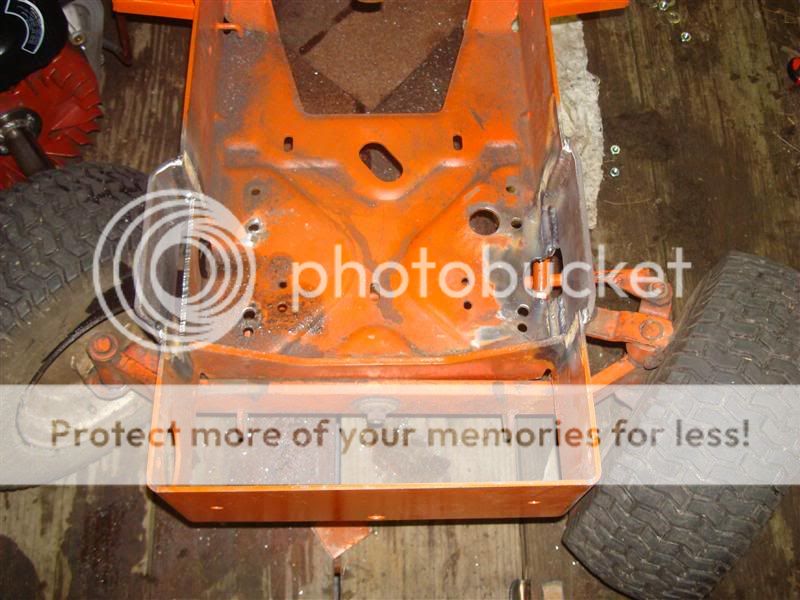
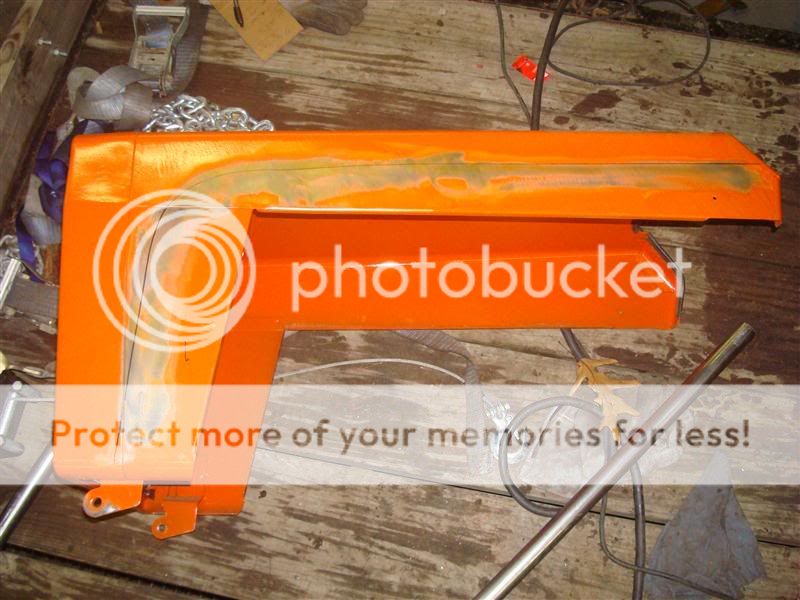
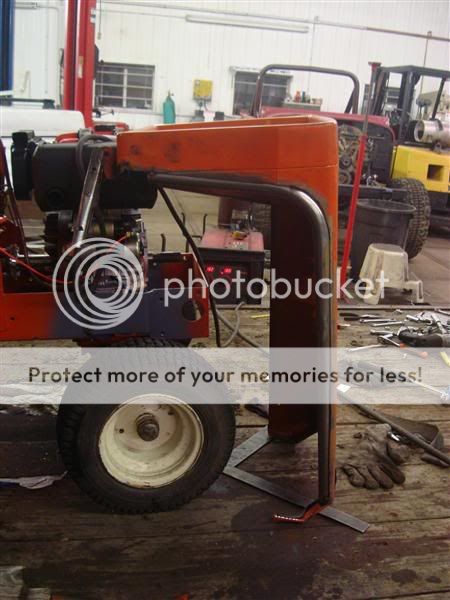
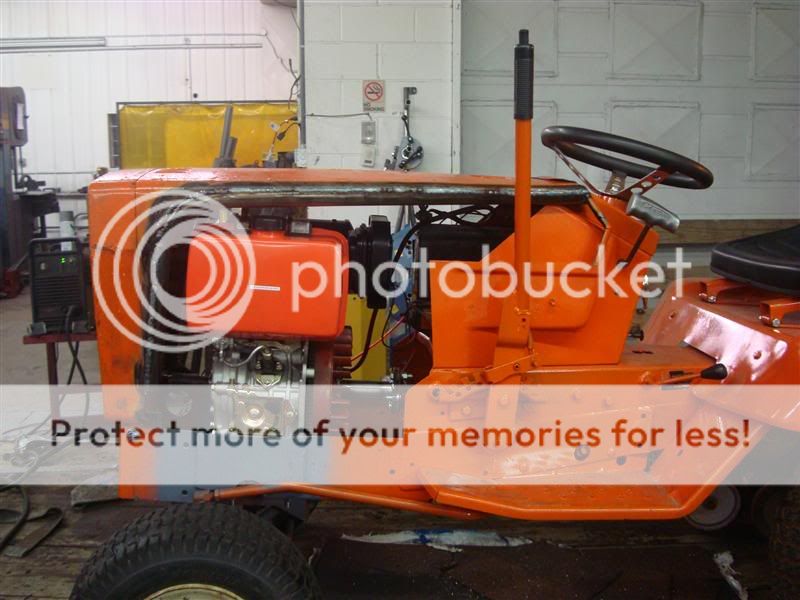
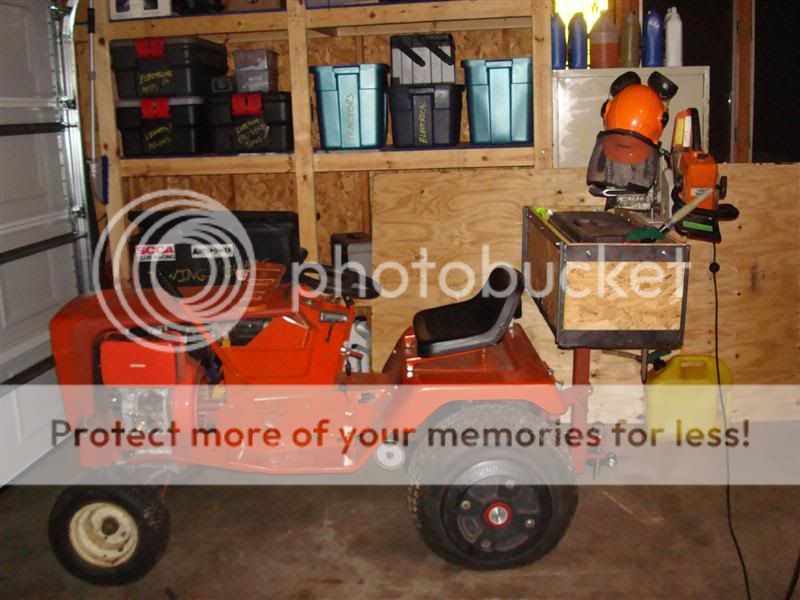
 :clap::clap::chainsaw:
 
A pic of my wood lot transportation....it has 2 saw brackets....I can hall cans and stuff, but taking the time to run back to the shed to sharpen and fill up is when I take my break and get a drink....

attachment.php
 
With the weight of your box and the weight of the log arch does your front end of the tractor get a little lite in the steering dept?


Beefie
 
With the weight of your box and the weight of the log arch does your front end of the tractor get a little lite in the steering dept?


Beefie


The box and gear isn't any heavier than any other rear mount implement. A tiller for example easily weighs over 125 lbs which isn't much compared to the 1000lb tractor. As for the arch, by design the weight of the log is suspended directly over the arch wheels meaning there is very little tongue weight. In fact, even with a 2000 lb log, you can pick up the tongue pretty easily! That's the beauty of the log arch system :cheers:

I do have some homemade suitcase weights made up, waiting to be filled with concrete come winter for plowing duties though. They'll be able to mount front or rear depending on situation :chainsaw:
 
Tractor is a late 70s-early 80s ish Allis Chalmers 912 Hydro that I've re-powered with a 10 horse diesel. Love it now with the diesel. :chainsaw:

Diesel=good! It looked like a new engine, thought maybe you repowered. Care to share what engine you went with?

Thanks for the info. Looking for a used tractor right now, just not sure what model to pick up, so thats the reason for the question. I want to do just about the same thing you did to yours.

Very nice set up. Thanks KD
 
Nuzzy find some tire chains

That garden tractor will become tens times the tool once you put a set of tire chains on her.
 
Care to share what engine you went with?


I went with a China diesel Yanmar clone (mine was DEK branded but there are quite a few brands of the same thing). Carroll Stream sells them for $550ish with some sort of warranty which is nice since the engine assemblers are not always the most thorough. However they were backordered when I wanted mine so I found a guy selling them down in KY and got mine for $425 shipped. Was a lot better than paying upwards of $800 to have one of my old gas motors machined and rebuilt.


That garden tractor will become tens times the tool once you put a set of tire chains on her.

Have them sitting in the garage on my other tractor currently :cheers:


A set of AGs would work too!

And I have my eye on a set of Ags as well! Just have to get some more money in the fun money fund ;)
 
GREAT set-up! Would love to hear more about the diesel re-powered tractor!

Very nice Nuzzy! Id like to see more of the engine swap also.


Can do. I'll just quote myself from my swap thread on one of my tractor forums:

Well, after 2 broken and 1 non running Kohler, I decided to go a different direction So I sourced up a 10hp China diesel and today it showed up at work.


dek.jpg


Have a couple candidate AC 912Hs, but will likely be dropping it in this one.

DSC09272Medium.jpg


This weekend should be fun!!


Did a little prep work tonight at work before heading home.


First was taking off the recoil assembly. Found out the threaded holes aren't exactly equidistant to each other. Won't be a problem, but made drawing them into the CAD software a bit trickier...

IMG00208-20100423-1705Medium.jpg


...So I just left them out of the plasma process. Instead I hand marked and drilled them in the bridgeport.

IMG00209-20100423-1736Medium.jpg


Test fitting looks good. Just need slightly shorter 6mm bolts.

IMG00210-20100423-1753Medium.jpg


Current plan is to weld this tube in the center and then weld a piece onto the end which will bolt to the two holes in the fiber disc coupler. I'll just have to be careful to check and recheck before final welding to ensure it's as balanced as possible. After all, any noticeable wobble could have disastrous results. As for the tube, I found 1.5"OD .120 wall fit perfectly around the flywheel nut and still allowed enough room to get a socket on the bolts.

IMG00217-20100423-1800Medium.jpg


Wanted to build a base plate for the motor since obviously the mounting holes will be different than stock. This way I can build whatever structure I need to get the motor in the right position (height, lateral, and tilt if needed). I found some dimensions drawing for these motors somewhere on the internet and (after converting metric to english) drew it up. Sure is nice to have access to a plasma table whenever I want!

IMG00219-20100423-1952Medium.jpg


Need some longer bolts here too, but that all will come soon. I may yet change the plate depending on how I decide to mount and where things need to go, but at least I know the mounting holes are dead on.

IMG00221-20100423-1959Medium.jpg


With any luck, I'll be back at it tomorrow evening
 
More...

Well, it's 3:30am and I just got home, but it runs!

Got into the shop tonight and decided I really didn't want to unload the tractor. So I just drove the whole shebang in and worked on it as it sat


DSC08737Medium.jpg


I started taking some basic measurements to see where I'd need to clearance. Did I mention how painful it is to take a wire wheel to an area you recently painted...?


DSC08739Medium.jpg


I found out the centerline of the engine is surprisingly close to the original spec'd gas motors, so I didn't even need my base plate other than as a template to drill my holes. Grabbed the handheld plasma and was on my way.

DSC08743Medium.jpg


DSC08744Medium.jpg


DSC08748Medium.jpg


I had the motor in and out a few times cutting a little more each time until I was happy and everything that needed accessing was accessible (oil fill, oil drain, throttle linkage, etc.). Then I resumed work on my coupler/adapter. I tacked my tube in place, spun the fly wheel, and adjusted for wobbles.

DSC08750Medium.jpg


When I felt it was as good as it was gonna get, I made up the fiber disc end.

DSC08749Medium.jpg
 
almost done

And then burned it all together, leaving spaces for the bolt heads.


DSC08757Medium.jpg


DSC08758Medium.jpg


To reinforce what I had cut out, I grabbed some 4" x 1/4" flat stock and bent up the ends in the press to create bumps for clearance. Then burned them in, inside and out because I like overkill.

DSC08764Medium.jpg


DSC08769Medium.jpg


Finally, had to address the fuel tank and muffler as they both interfered with the hood. I could easily have made a new muffler and replumbed the fuel lines into the original tank... However, I really want to run a larger battery and am planning on utilizing the space where the stock tank sits. Thus, I decided to cut *gasp* the hood. I like some things looking stock, but I think the whole modded rat rod thing can look interesting too! So I took some basic measurements, bent up some 1 1/4 .120 wall, and busted out the plasma again to cut into the hood. Then I did my best (which isn't very good because I HATE sheet metal work and our welders at work really aren't set up for it at all) to weld the seam between the hood and the tube. Eventually I'll grind it all smooth and repaint the whole hood.

DSC08771Medium.jpg


DSC08774Medium.jpg


DSC08776Medium.jpg


DSC08779Medium.jpg
 
Back
Top