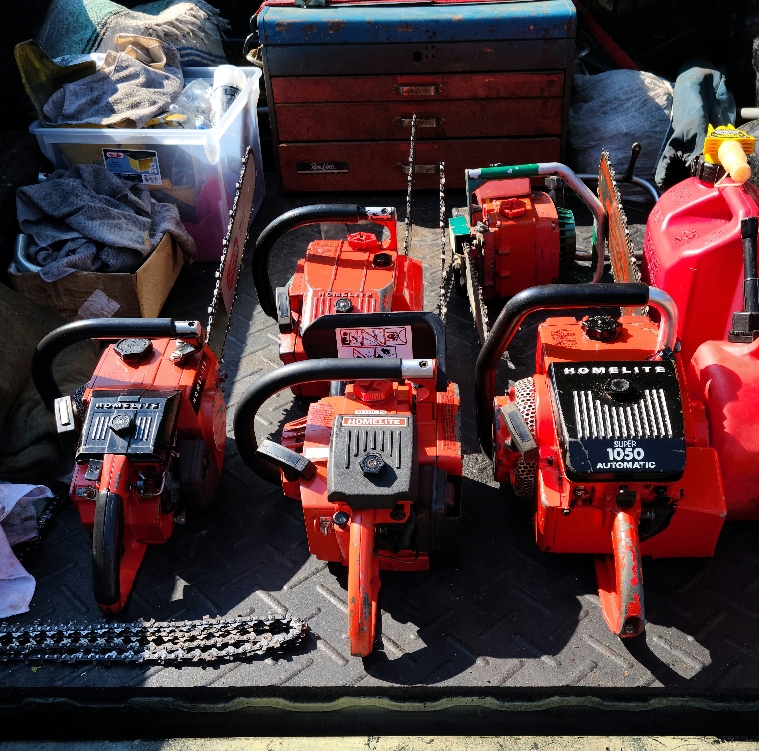
Homelite Chainsaws

Arborist Forum

Help Support Arborist Forum:

This site may earn a commission from merchant affiliate links, including eBay, Amazon, and others.
I tried but the EZ had to go back on the shelf. Need to restock my carb kits to get it running. This one is just marked E-Z automatic but I do have a SEZ somewhere in the pile. Also have a running 360 and 550. View attachment 934901
You say 3 Homelite saw plan? My plan is a lot more than 3[emoji1787]
f92286f0339d2d7824eef44557c42d47.jpg
94215e728f487ceb11deba02b323c492.jpg
1be530b33cec17df742881fa98867254.jpg


Homelite enthusiast in training [emoji879]
1ec6a2feaaa881bbb5179d6d180e933d.jpg
 
I tried but the EZ had to go back on the shelf. Need to restock my carb kits to get it running. This one is just marked E-Z automatic but I do have a SEZ somewhere in the pile. Also have a running 360 and 550. View attachment 934901
I actually prefer the little EZ over the Super EZ.

I have the Canadian versions but assume they are the same. My Blue XL-1 seems to have a better sound.
 
Your storage is a little nicer than mine. Once I get everything cleaned up I will build shelves along the wall.View attachment 934905
Your saws look to be on the floor, I believe that is a recipe for disaster (mag rot). The cement or concrete does a job on the cases.

Homelite enthusiast in training [emoji879]
 

Your storage is a little nicer than mine.
I even see a couple SXL knock-offs in your mix. And yeah, it can be pretty inspirational to see someone else's well organized space(s). LOL I certainly always seem to be struggling with mine! And I do use cardboard underneath any saws that would otherwise be sitting on concrete primarily to keep oil off the floor, but also as a corrosion inhibitor. Mag rot requires a fair degree of humidity (or direct moisture contact) for the corrosion process to occur, but can happen rapidly under the right (wrong?) conditions. Better safe than sorry using some cardboard and a lot easier than media blasting a case to treat/stop the white death once it has already developed.
 
Not sure what’s going on. Pressure test shows a leak on the clutch side of my 360. Interesting,y it’s not at the seal, I don’t believe, but between the oil worm gear and crankshaft. Not sure what my options are; replace worm gear. which I imagine requires fully disassembling the saw? Pic is attached
 

Attachments

  • 2227F84B-1CE6-43BC-BF70-BEC51B241705.jpeg
    2227F84B-1CE6-43BC-BF70-BEC51B241705.jpeg
    2.5 MB
  • C80BEEBF-0D99-47F0-A5F4-52A48E65DBAF.jpeg
    C80BEEBF-0D99-47F0-A5F4-52A48E65DBAF.jpeg
    2.5 MB
Loctite green may be your friend here. If you're not familiar with it, it's a super low viscosity wicking formula sleeve retainer and thread sealant. There are a couple different versions of it. You would want the 492144 Threadlocker 290 Penetrating Liquid for starters.

Try to get some brake cleaner down along the crank to clean out any residual oil, but obviously do it carefully so as to not get any on the seals. Give it overnight to creep along the shaft and maybe do a second treatment for good measure. Apply the Loctite carefully, too -- just a little at a time all the way around the crank. Let it seep along the shaft and then re-apply, obviously taking into consideration there's a bearing underneath the worm that you don't want to contaminate by using too much. Using a little vacuum to draw both the brake cleaner and then the Loctite between the surfaces is also an option to ensure adequate penetration of both and speed up the wicking -- especially for the brake cleaner.

Let it cure for 48 hours regardless of the claims that it fully cures in 24. Be patient and don't push your luck. You should have a good seal between the crank and worm when all is said and done. If you still have a leak, (which I doubt you will), you can step up to the Loctite 640 sleeve retainer which is a higher viscosity formula for larger spaces between surfaces. I've used both successfully for very similar situations to yours -- one actually being a crank with a deformity right under the inner bearing race.

Good luck with it.


Not sure what’s going on. Pressure test shows a leak on the clutch side of my 360. Interesting,y it’s not at the seal, I don’t believe, but between the oil worm gear and crankshaft. Not sure what my options are; replace worm gear. which I imagine requires fully disassembling the saw? Pic is attached


Hi Bob,

Did you try it with the race, washer and clutch assembled and tightened up?
I can't see the gear or crankshaft wearing beyond normal spec as it's clamped down hard with the clutch.
 
Hi Bob,

Did you try it with the race, washer and clutch assembled and tightened up?
I can't see the gear or crankshaft wearing beyond normal spec as it's clamped down hard with the clutch.
No. I had everything off as I thought the seal was leaking. I'll retry today with everything in place and tightened.
of curiosity what seals did you use?
Havent replaced the seals. They don't seem to leak. Just the leak between the crank and oiler gear. Ordered some Green loctite 492144 and will follow Pogo's recomendations. I've been discussing this issue with Leon's Chainsaw repair. He doesn't believe that the small leak should effect tuning. Says it the "nature of the beast." I enjoy his videos on Homelites and figured he might have some input.
 
Picked up this clean 360 a few weeks ago as a non runner. It would pop off on prime and rev out so I knew it needed an intake boot. Went through it today and replaced the broken intake boot, all new fuel and oil lines, fuel filter and added the NOS Suhihara 24" bar I had lying around. Think she cleaned up well and is a good runner.

GOPR0442.JPGGOPR0444.JPG
 
Homelite EZ (serial number reflects it is a 1981 vintage):

Went ahead and purchased this saw ($60). Looks in decent shape, but the guy said it is difficult to start and could use a Carburetor Cleaning. I took off the cowling and it looked pretty simple to remove....

But looks can be deceiving....So, before I tear something up...best just to ask for any tips or advice!

For starters, I removed the cotter key and choke (just unplugged it and moved out of the way). I also noticed that there are (2) screws attached that attaches to the carburetor (inside the airbox compartment)...and, although they are in a oddball place (needed small wrench to unscrew them), I unthreaded them...although there is no way to remove them until the carburetor is out.

Ok, I can deal with that....

Next up? Well I pretty much thought that after removing the (2) Carb screws that it should've loosened right up and wiggled out...

Apparently NOT...

So, my guess is that I need to remove the (3) Reed Block Screws (or whatever they are called)? Or do I need to remove the (2) Screws that are threaded in (One screw is inside the carburetor airbox and the other is outside the box). Do these (2 screws need to be removed first? Then remove the (3) Reed Block Screws? It almost looks like there is a gasket in between?

My guess is that I only need to remove the (3) Reed Block Screws and it will come out...although they are in a difficult place to say the least...

Like I say...I could easily grab a wrench and start unbolting everything...but best ask questions first...rather than having to order replacement parts later...

Thank you in advanced for advice and tips!!
 
False Alarm!

I discovered the issue was that the gasket in between the Carburetor and Reed Block was stuck pretty darn good. I pried up with just a pinch more leverage and it gave up (and most importantly, I didn't break anything...other than a torn gasket that I can make).

We are off to the races now!
 
Leon is a good guy and been around a long time. Has a ton of helpful YouTube videos and just happens to have added a recent EZ teardown and rebuild. I'm sure you'll find it helpful -- or should if you're patient enough. He also has a stash of parts at reasonable prices and is always worth checking if you're in need of something.

 
Leon is a good guy and been around a long time. Has a ton of helpful YouTube videos and just happens to have added a recent EZ teardown and rebuild. I'm sure you'll find it helpful -- or should if you're patient enough. He also has a stash of parts at reasonable prices and is always worth checking if you're in need of something.


I like Leon but hate his oil philosophy.
 
Back
Top