transfer work

Arborist Forum

Help Support Arborist Forum:

This site may earn a commission from merchant affiliate links, including eBay, Amazon, and others.
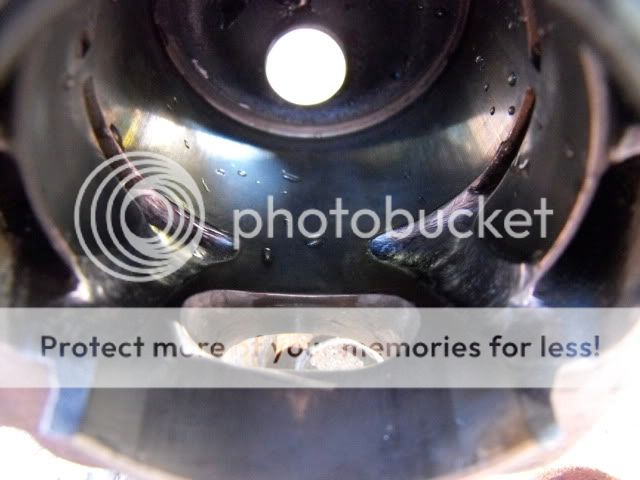
here is a side beside of an 026 transfer. of course one is new 260 and the other is old mahle, but you can see how much i've hogged out, but can only get so far w/ a straight grinder...
attachment.php

Yep, I know what your saying.
 
i think in that pic hes only worked on the lower
 
Al, I used it to shape these transfers. They have awesome curvature capabilities once you get the path going. The edges were done with this tool.

DSCF1020.jpg


On bare aluminum, they cut crazy. I wouldn't use it to hog through the hard coating. They dull fast on hard stuff.
 
Is this thread set in a different language? Cause I have no idea whats goin on :dizzy: Really hate being a hands on learner.

Kudos to yall that do porting work. I guess I just need to dedicate a day to reading all the threads.

What is the blue line for on Bondens tape?
And Chevytown, what is the deal with the transfers shaped like that? Does that not affect the compression?

I think that maybe I am overthinking all of these procedures. Just need to get out there and do it.
 
This is an invaluable thread.

Transfers are the bread & butter of a 2 stroke! They really play a big part..

EX. Ride a stock 250r, then ride a ported one, you will be :0:0;)

it makes all the difference.

I vote for this thread to become a sticky..
 
Is this thread set in a different language? Cause I have no idea whats goin on :dizzy: Really hate being a hands on learner.

Kudos to yall that do porting work. I guess I just need to dedicate a day to reading all the threads.

What is the blue line for on Bondens tape?
And Chevytown, what is the deal with the transfers shaped like that? Does that not affect the compression?

I think that maybe I am overthinking all of these procedures. Just need to get out there and do it.

You are right, don't over think it.
Rick (Chevytown) has added finger ports. You won't have do these for a basic woods port.
The blue lines with Bonden's pics are where he will grind too..
There is plenty of info in AS for porting.
Anyway Little Pos. people would help you along the way.
 
Thanks, yet again Al. I have printed off 3 pages of porting threads already. I think if I just sit down and read them on paper it will make more sense. I am probably goin to use this junked out 288 cylinder:( since I can not make it any worse. :clap: lol
 
Don't forget the sharp chain

LP, Al is right. You don't have to go wild with the porting for a work saw. Port the intake and exhaust and widen the transfers just a little bit towards the intake and you're good to go. What will affect compression is squish and exhaust roof height. Too high of a roof and you start to loose compression.

I wanted to challenge myself and my porting skills. So I tried a mild finger port, (which I thought was a finger port) and was told it would not work because it was going to affect the scavenging. Well, it sure didn't. So then I decided to really go for it and try a finger porting. In the picture, the finger porting and transfer should not be united. That would be a true finger port. It does look like two index fingers wrapping around the intake. That equates to more flow. However, I believe I found something in the newest porting. Aside from feeling it in the cut, in my past videos, I don't ever remember my 5100 sounding as fast and as gnarly as it does now. And the best part, it does not hog as much fuel as I thought it would.

Above all else, take pride in your porting. And take your time.
 
Is this thread set in a different language? Cause I have no idea whats goin on :dizzy: Really hate being a hands on learner.

Kudos to yall that do porting work. I guess I just need to dedicate a day to reading all the threads.

What is the blue line for on Bondens tape?
And Chevytown, what is the deal with the transfers shaped like that? Does that not affect the compression?

I think that maybe I am overthinking all of these procedures. Just need to get out there and do it.


The blue line on the tape is where the pistonring-gap is riding in the cylinder wall,the shank diameter on mine tools is just 2.5 milli meter ,not more than 1/10 inch .
 
Here's the lower transfers completed.

DSCF2476.jpg


DSCF2477.jpg


Inside the transfer at top of the pic is where I had to open up quite a fair bit to what needs doing on an OEM cyl.
This now matches the other side.

DSCF2478.jpg


This is what I've done to the 371 in my video's.

This is the vid I took a few months ago with similar work done to the cyl. My firewood chain in hardwood.
This vid is a bit lengthy, sorry.

<object width="560" height="340"><param name="movie" value="http://www.youtube.com/v/e3uS4dmRG5s&hl=en_US&fs=1&color1=0x006699&color2=0x54abd6"></param><param name="allowFullScreen" value="true"></param><param name="allowscriptaccess" value="always"></param><embed src="http://www.youtube.com/v/e3uS4dmRG5s&hl=en_US&fs=1&color1=0x006699&color2=0x54abd6" type="application/x-shockwave-flash" allowscriptaccess="always" allowfullscreen="true" width="560" height="340"></embed></object>
 
Last edited:
This is an invaluable thread.

You're absolutely right about that.I think we all owe Assuie1 a big thanks for taking the time to walk us thru this!!! A sticky would great.

THANKS AL
 

Latest posts

Back
Top