Urban logging. Anyone do it?

Arborist Forum

Help Support Arborist Forum:

This site may earn a commission from merchant affiliate links, including eBay, Amazon, and others.
That Ironwood thimble-vase is off his buddy's site, not my work.

All my pic's are too big, and i lack the software to resize.

As I said, I was not trying to bust on his work, then he clarified that he does know how to do fine work to...

Uploading your pictures to a free photobucket.com account will re-size them all to a usable size. Then you just copy and paste the line from photobucket to your thread.

Quick and easy and then you can use them anywhere on the net.
 
Last edited:
D'oh, I got one on Facebook...
21834_104927546195900_100000359659841_125795_1586480_n.jpg


21834_104927556195899_100000359659841_125798_199808_s.jpg


21834_104927552862566_100000359659841_125797_8063038_s.jpg


21834_104927559529232_100000359659841_125799_7600939_s.jpg

This is my little buddy
 
TM, JPS,

I hope you guys are taking in the young guys (and girls) and teaching them what you know. You both know too much to not be utilizing apprentices and passing it on!
 
Last edited:
Tree Machine, As for surfacing quickly in the field, have you tried a large hand held power planer? Also what about a large grinder? working with wet wood is always very difficult on tools.

My carpentry skills are lacking but that is easy to make up for with beautiful wood, a lot of sandpaper, and some linseed oil/mineral spirits.
 
TM, JPS,

I hope you guys are taking in the young guys (and girls) and teaching them what you know. You both know too much to not be utilizing apprentices and passing it on!

I'm happy to share, I just think its really important to know what you're getting into. But then again, maybe that's not so important.

If you're a 60-70 hour a week arborist, there's the intense climbing schedule, the time needed to retrieve messages, call people back, set up and show up for estimates, there's purchasing of new gear, maintenance of existing gear, communication with helpers, and on and on. Something gets ignored or compromised if there's no spare time in your schedule.


Here's what makes it possible for me to juggle all this and still knock out a piece now and then..... passion. It's certainly not profit motive, though profit is certainly possible. If you're out for profit, you need to factor in a higher degree of finish, communication with the (potential) buyer(s) which is more like a relationship, connecting them with the piece which is called 'delivery', getting it to its final place and then answering all the questions they might have, both in the moment and in the future.


That's why it pays for me to whip out something rough and rustic and walk away. I like doing this stuff, from the 'passion' standpoint, but the practical arborist side of me just can't stand there and chit-chat woodworking with a stranger for the better part of an hour during daylight hours. People just assume if you produce a piece of woodworking, that you're a woodworker. Woodworking (craftsmanship) is a rather leisure, patient, time-absorbing activity. Those who do this sort of thing don't tend to be efficiency-driven, production oriented type A personalities, like myself. It just seems whenever I begin working on a piece it's like an unconscious yet deliberate decision to grind my business to a halt, or at the very least, shot it in the foot. Not just for the actual building of the piece, but the pulling together and putting away of the non-arborist tools, the cleanup, the delivery, the communication, and then paying whoever might have been helping you.


Just some food for thought.
 
I'll keep pumping you out pictures, though. It is pretty cool stuff.
Here's the build of the bench from the previous photo above:

attachment.php


I attach duct tape as a 'line' and to keep the cut edge from splintering.

attachment.php


A belt sander was used to smooth out the saw marks.

attachment.php


Cutting off the end of the dovetail gives you an exact pattern to trace.

attachment.php
 
Last edited:
attachment.php


Plunge-cutting is often a requirement. Use care.


attachment.php


Note the veggie oil splatter. I use vegetable oil exclusively in all my chainsaws. Petroleum-based bar oil has its problems, like the petroleum smell, people will sit on it, sanding it out creates fine oil-coated dust particles. Be aware of these things.
 
Here's some images I came across, these were my very first benches ever, the result of my very first Woodmizer session.

attachment.php

SImple, plop a beam on a couple crosscut sections. Fancy it up by taking advantage of that you just hit a nail, took out only the right-side teeth on your chain and your saw is cutting curves.

attachment.php

Here's one even simpler. Just a beam on a couple crosscut sections.


attachment.php

Here's the opposite end of the first bench.

attachment.php


Making use of the features at hand. Dado a stump, insert the board.
 
Here's an interesting design. This one is made of sandstone, but I know this could be made from 4 pieces of wood, three if you can pull off the running plunge rip-cuts.

I like this one. It lends itself well to thick-cut stock. Simple, rustic, and like Eden says
Eden said:
it is quick, rough and ready...... it has it's own rustic appeal and a utilitarian focus

attachment.php
 
This fallen tree was downed by a creek. The owner asked if I could make a seat out of the log. I said "Sure!"

The stump acted as a very sturdy mount.

attachment.php


attachment.php
 
As advice to everyone, just know that doing this level of woodworking (large pieces) means your materials are heavy. They are, after all, logs.
Heavy wood needs heavy lifting, or being suspending by some sort of hoist, or lifted by some device. This is hard work, and it seems to get exponentially harder after a certain diameter/weight.

The advice is, be careful. Expect this aspect, plan for it and proceed with care. You're shifting heavy wood and slinging a chainsaw. Physical activity really doesn't get a whole lot more raw than that. Use any advantage that you can.


Here's a picture of a medium-size log arch, called the fetching arch. This arch had both tongs AND a winch system and man, it was versatile, you could maneuver it easily just alone, it did amazing and quick lifting tasks and it spurred me to try an large number of projects like what we're talking about in this thread. You could tow it down the street. I'm so sorry I sold it as it (looking back) was a key tool for whisking 800 pound logs around and doing this stuff, especially mulch pits (more on that in a moment).

If you're gonna do this stuff, you have to move the log from place A to place B, and then shift and position and fit it, which means moving the log. If you have two people, one will spend 95% of the time standing and watching you, staying clear of the chainsaw. I rarely want another person around, this is a creative process.

The point of this post is, wood heavy - arch lift - arch good.

attachment.php


Or SOMETHING to help you move heavy wood around, a dolly at minimum. ball cart or bale cart more preferable.


I created a heavy-duty cart to haul big chunks, or support the far end of a really long log in teaming up with the arch. Mostly to move piles of brush, multiple smaller logs, firewood or all my gear. Here in this picture, I fell in love with this log. In cutting it up there was a deep, chocolate brown, mmmmm, It was Russian Olive. Even though the log is short and contorted, I really wanted to mill this log. I could feel it with this piece, and it was a brute to get out of the sloping back yard, and then getting home with it.

You really have to think about logistics, or a single step in the project can eat your day.


attachment.php
 
I love turning bowls out of R. olive, especially when there are a lot of sucker-knots that express throughout the wood. I have a huge "salad" bowl I gave to my mom for mothers day a decade ago that has the coolest figure to it. Where is that pic? :laugh:
 
Well I made my first bench from the coconut stumps and a section of the trunk, it has a nice bow in it...borrowing a computer, can't get the pictures up yet...
It was fun to do!
 
Yeah, this stuff isn't as easy as these guys make it look!

Well I did my first bench a couple of weeks ago and finally have the pictures for it. It is Acmena smithii. Looking at the pictures now it's so rough. Hope I don't get too flamed for it. Thanks TM for the inspiration. I will be doing more of this from now on. The HO was wrapped that I made her a keepsake of her tree. It's functional, doesn't wobble and will sit in some secluded spot in her garden for many years I hope.
attachment.php


One problem, is that it has cracked a bit at the ends as it has dried. Should you age it, or seal it to prevent this happening?
 
That's awesome, Eden! You did it! Homeowners love this stuff, a little remembrance of their tree.

It will crack. You can seal the ends, but it will crack. It's just a thing about wet wood building, shrinking, etc. The amish had it down to where their mortises would shrink around the tenons and their barns would tighten up over time.

I'd accept the cracking as part of the personality.


What do you have going on, Bermie? Kick us down some pictures of your coco bench.

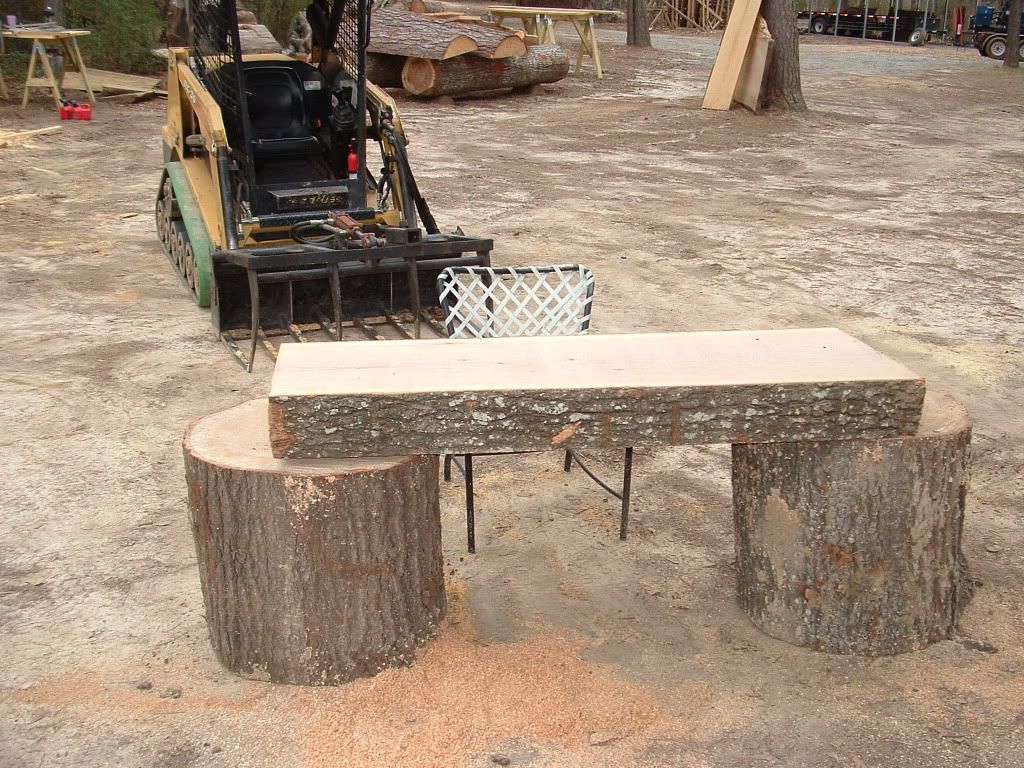
Well, you inspired me too. I have a home show coming up in which I am displaying my skid steer and stump grinder and going to be there signing people up for free estimates on tree work. Instead of just using the plain table that they provide, I made my own out of some red oak logs.

2010-03-09017.jpg
 
Great scott gr8scott, that's great....Scott!

Your work looks a little advanced for newbie at carving 101 though? What did you do it with?
 
Back
Top