Federal Airtight 264CCL Questions

Arborist Forum

Help Support Arborist Forum:

This site may earn a commission from merchant affiliate links, including eBay, Amazon, and others.
Pretty sure I use the nickel never seize here.. You can buy S/S hardware online at places like this: Nuts and Bolts and Screws - Metric Bolts and Fasteners - Stainless Steel Fasteners ...

Ray

I found a place that has all kinds of stainless hardware near my work. I almost got it all right the first try.

I'm wondering if allen head bolts would make more sense for the damper hinge parts?

I'm in the middle of regasketing the front doors. For all the doors the manual says to use 1/2" gasket. The kit I bought only seems to have 7/16th" I'm guessing it would be fine to use since it is so close. Now for the doors, in the center where the right door overlaps the left when closed, which side do I attach the gasket material on? I'm assuming the gasket material goes around the grove behind the door, and then wraps around and down the groove on the front of the door? The door was missing all the material so I have no idea how it used to be. It's either that or it goes on the right hand side, but there isn't really a grove on the right side.

The baffle that goes under the airtubes has smaller holes drilled into it on one side than the other. I'm not sure which direction the side with the smaller holes should face, can someone take a quick peak at theres and let me know? Does the orientation of the combustor chamer matter?

The same store (Marshals in San Diego) had the nickel anti seize too but only in a large container and it was almost about $40 after tax, so I picked up a smaller bottle of the copper stuff instead for $9. It's rated to 1800 degrees so hopefully that will be good enough.

Its pretty wet outside today so I'm going top prep some more pieces for paint, but I'll have to hold off on the painting for a warmer dryer weekend. The paint says I should be using their primer, which I did not do. I have been using one of those paint stripper wheels for my drill press hand drill and or wire crush wheels to scuff up and clean the surfaces before applying paint. I don't have any experience with stove paint so I',m just wondering if I should hold on painting the remaining pieces and order the primer too? or just go ahead and spray them and be done with it.

Also, I got the inner grate mounted. The mounting holes did not line up so I had to bore out one of the oval slots a bit larger with my largest cobalt drill bit. (was about an 1/8th of an inch off. Seems to have done the trick.
 
Last edited:
I found a place that has all kinds of stainless hardware near my work. I almost got it all right the first try.

I'm wondering if allen head bolts would make more sense for the damper hinge parts?

I'm in the middle of regasketing the front doors. For all the doors the manual says to use 1/2" gasket. The kit I bought only seems to have 7/16th" I'm guessing it would be fine to use since it is so close. Now for the doors, in the center where the right door overlaps the left when closed, which side do I attach the gasket material on? I'm assuming the gasket material goes around the grove behind the door, and then wraps around and down the groove on the front of the door? The door was missing all the material so I have no idea how it used to be. It's either that or it goes on the right hand side, but there isn't really a grove on the right side.

The baffle that goes under the airtubes has smaller holes drilled into it on one side than the other. I'm not sure which direction the side with the smaller holes should face, can someone take a quick peak at theres and let me know? Does the orientation of the combustor chamer matter?

The same store (Marshals in San Diego) had the nickel anti seize too but only in a large container and it was almost about $40 after tax, so I picked up a smaller bottle of the copper stuff instead for $9. It's rated to 1800 degrees so hopefully that will be good enough.

Its pretty wet outside today so I'm going top prep some more pieces for paint, but I'll have to hold off on the painting for a warmer dryer weekend. The paint says I should be using their primer, which I did not do. I have been using one of those paint stripper wheels for my drill press hand drill and or wire crush wheels to scuff up and clean the surfaces before applying paint. I don't have any experience with stove paint so I',m just wondering if I should hold on painting the remaining pieces and order the primer too? or just go ahead and spray them and be done with it.

Also, I got the inner grate mounted. The mounting holes did not line up so I had to bore out one of the oval slots a bit larger with my largest cobalt drill bit. (was about an 1/8th of an inch off. Seems to have done the trick.

The copper stuff will probably be OK.. I think I used allen cap bolts to secure the clamps for the catalytic bypass damper pivot (hinge) point.. I am assuming you're referring to the bolts that broke on the inner top when removing the damper? I really don't like the phillips flat head bolts they used there.. I am pretty sure I used washers but there isn't alot of room there so you might have to grind down the washers so they don't interfere with the damper.. I don't know what paint you're using but I just cleaned up the stove and wire brushed by hand they painted over it with no primer and the paint held on fine.. Maybe if you had bare metal you would need the primer but there was already paint there..

Ray

Gotcha, I'm probably over thinking this, but it would suck if all the paint peeled. Some area I did take down to bare metal in order to remove the rust. I probably should have used primer in these areas. Hopefully the rest of the stove will have enough percentage left painted that the primer will not be needed.

It stopped raining so I will finish painting the removable parts today. Maybe I will even get to the main stove area itself, but it's going to be a cold night so I'm not sure I want to leave all the windows open (Cold for us San Dieagans, not cold by most of your standards for sure, maybe in the 30's).

My Stove did not have phillips head screws holding down the damper it had the standard hex head screws, I might use allens because it seems like they might be easier to remove without removing the top (I'm not sure though). I finally got through the bolt on the other side with the extended drill bit so Now I just need to borrow my buddies #7 bit and drill it slightly larger fro underneath.

Way to go JI! BTW I am pretty sure you can substitute a 13/64" drill bit for a #7...
Waiting for the pics here!! Oh I looked at your pics at Flicker(?) and I think the orange bird at your hummingbird feeder is an Oriole.. They love fruit such as oranges.. Beautiful birds to look at along with the hummers!

Ray
Ahh that was at a friends house, I need to get some feeders setup though, because I have seen quite a few interesting birds in the area. My Gril would love it.

I didn't have enough light to take great pics last night, but I ended up getting ALL of the painting done. Everything is re-gasketed except the damper and I even shot some cement into a few places inside the stove area. Just need to figure out the gaskets for the bypass damper now. I built up the warped area channel with some furnace cement. so it's much closer to level now. I'm hoping it holds and seals once the gasket is in.

Judging by the amount of gasket specified in the manual for the bypass damper I believe I do need to gasket the back side of it. There isn't really a channel though since I wire brushed the area down to metal. I could just use a ton of cement to hold the gasket I suppose.

I think I remember someone saying that their damper locked into place better once re-gasketed? Mine does not seem to lock into place in either direction, it just lifts up or lays down. Does that sound correct? If so then I just need to make sure the damper lays against the fiberglass gasket on all sides?

With a new gasket it takes a bit of force to lock the damper down.. Whether the furnace cement will do the job remains to be seen.. I would advise that you clean/inspect your chimney regularly to avoid problems such as a chimney fire.. As long as you stay on top of things you should be OK.. I suggest you have a csia certified chimney sweep inspect your chimney to ensure it is safe or the consequences will be dire.. I had to have a SS chimney liner installed as I had a chimney fire I was unaware of.. I had several clay chimney tiles that had vertical cracks caused by a chimney fire.. Not trying to scare you just keep you safe.. That damper should lock firmly into place and yes you need gasketing around all 4 sides of the bypass damper... You're doing a good job and I am impressed how much attention you pay to the details..

Ray

Thanks for the advise, maybe that would be a good idea, I was just planning to run a brush down it since it's a pretty short run.

I don't understand what locks the damper into place? It's seems to me it is just a hook attached to crack that lifts it open, or drops it closed? or maybe it's just working this way because there is no gasket.

It's a very simple crank mechanism that goes past the 90 degree point and must lock into position.. A visual check should reveal what's going on.. Adding the gasket will definitely make you use extra force to overcome the resistance or something is wrong...

Ray
 
What are the directions to cement on the top? it looks as though the top would use fiberglass gasket or something. I also want to make sure the inner left and right sides seal up properly.

:( This project has taken a crappy turn. I was using my new Irwin alignment taps. I tapped one of the holes in the top for the damper but the tap was starting to bing hard so I removed it check the threads with a 1" stainless screw, and came up about 1/16th of an inch short. Decided I could probably get another turn or two in with the tap. Well I was wrong. I went another turn with the tap and then started to remove it and it froze. I could not move the tap in either direction. So I decided that I should force it in reverse (unthread it), when I heard a creek. I stopped and looked at my friend who was watching. It was an "Oh ####" moment. So I did what I had to do and turned the tap in reverse again and SNAP!. Tap snapped off completely threaded into the new hole :(

I'm not sure there is a way to fix this.

On another note. I laid the 3/4th inch gasket in the groves and close the damper. The damper does not "lock" closed. I don't even see how it could ever have locked closed...The little arm on the crank on the right hand side hit s a stopper before the damper could ever 'lock' into position from pushing against the gasket. At best it would lay on top of the gasket.

Well it was looking nice too. But at this point it was probably all for nothing.

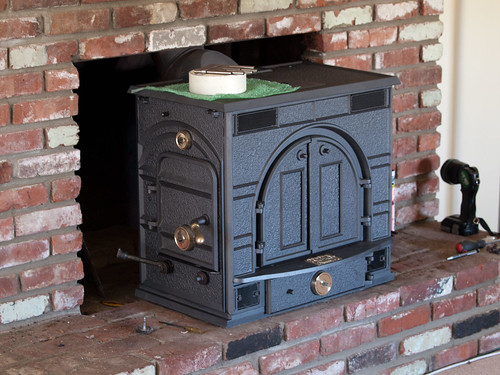
stove by Glamisduner, on Flickr
I think I just wasted many Weekends and about $700 for nothing.
Kinda depressing when you invest so much and it just does not work out. Maybe I should start saving for a pellet stove or something. I have parts if anyone needs them...
 
Last edited:
What are the directions to cement on the top? it looks as though the top would use fiberglass gasket or something. I also want to make sure the inner left and right sides seal up properly.

:( This project has taken a crappy turn. I was using my new Irwin alignment taps. I tapped one of the holes in the top for the damper but the tap was starting to bing hard so I removed it check the threads with a 1" stainless screw, and came up about 1/16th of an inch short. Decided I could probably get another turn or two in with the tap. Well I was wrong. I went another turn with the tap and then started to remove it and it froze. I could not move the tap in either direction. So I decided that I should force it in reverse (unthread it), when I heard a creek. I stopped and looked at my friend who was watching. It was an "Oh ####" moment. So I did what I had to do and turned the tap in reverse again and SNAP!. Tap snapped off completely threaded into the new hole :(

I'm not sure there is a way to fix this.

On another note. I laid the 3/4th inch gasket in the groves and close the damper. The damper does not "lock" closed. I don't even see how it could ever have locked closed...The little arm on the crank on the right hand side hit s a stopper before the damper could ever 'lock' into position from pushing against the gasket. At best it would lay on top of the gasket.

Well it was looking nice too. But at this point it was probably all for nothing.

stove by Glamisduner, on Flickr
I think I just wasted many Weekends and about $700 for nothing.
Kinda depressing when you invest so much and it just does not work out. Maybe I should start saving for a pellet stove or something. I have parts if anyone needs them...

OK 1st the stove looks great!!! 2nd the gasket for the bypass damper is 3/8" not 3/4".. If you are using 3/4" that would not allow the damper to close properly or lock into place or if you just typed 3/4" by mistake I bet you have the bypass damper link from the rod to the damper in wrong.. As for the top clean out all the old hard furnace cement then fill those channels with furnace cement.. If you have some wide gaps which I did right in the middle where those uprights on the inner top intersect the front and rear of the stove add some rope gasket to fill the voids.. Hope this helps.. OK you can remove the broken tap but it won't be easy.. Try tapping on it with an old screwdriver (wear safety glasses) and it may turn or chipping it out.. It's a pain but you may be able to salvage it.. I suggest using something like cutting oil or TapFree when tapping to prevent tap breakage (2 flute taps hold up better than 2 flute taps).. Taps are very hard and brittle, make sure you thread in a fraction of a turn then back a little (keep repeating this method until done) to clear the chips from threading or you will break the taps.. Hard to explain it in written words.. Any questions feel free to ask..

You're almost there don't give up now!

Ray

Right I was testing using the 3/8th in gasket. I was tired last night when I posted (about 3 am!). I tried the tapping method but the edges of the tap that were barley sticking out to begin with just broke off. So the tap is recessed in the hole. It's crazy though, I had all the threads cut and was backing out the tap when it broke.. Yea it was a 4 flute tap, (Irwin / hanson). I was only cutting like 1/16th of a turn at a time, then reversing to break chips. I spent EXTRA time on this whole over an hour, due to it's location being hard to top. Still the tap broke off. I soaked the hole in cutting fluid and after every 1/2 turn I would remove the tap and clean it off. not sure how much more careful I could have been.

If I look at the bottom the tap was through the bottom so I tried to grab it with vise grips and turn it from inside the stove. Of course the end of the tap once gain just broke off. I can clearly see clean threads in the bottom of the hole so I'm really surprised that that tap broke when reversing it out of the hole after so much care was given to breaking and even cleaning out the whole and tap as I worked. I dunno what to do now though, I'm pretty sure those tap extractors are not going to work. It's in there damn good.

I did not touch the damper link so it's still in it's original position. I have my doubts at being able to unscrew the nut from it without having to cut it off and buy a new one. If I take a picture can you verify that it was installed correctly so i don't screw it up for no reason?

Yes take a pic and I will see if I think it's correct.. Don't give up now you're almost there! Others please feel free to chime in on this.. Ed I know you're a mechanical guy what's your advice?

Ray

Ray
 
JI,

I don't really have any advice to offer, but there has got to be a way to make it work. I can't believe how your stove looks. I thought it was a picture from an ad, not your stove.
 
JI,

I don't really have any advice to offer, but there has got to be a way to make it work. I can't believe how your stove looks. I thought it was a picture from an ad, not your stove.

I agree Brandon!! I don't want JI to throw in the towel when he is so close to success!! BTW how ya been Brandon? Your stove still purring along there?

Ray
 
Ray:
Doing good. I haven't needed to run the stove much in the past few weeks. The temps have been up in the 50's and 60's off and on. Granted the house has been cooler recently than when if was in the teens during January. All in all I'd say my season is about done.

I do think I will be upgrading my stove for next year. Awhile back a guy posted (cralph) to this thread how literally live right down the road from me. He has a 264ccl(r). Well he contacted me and asked if I'd like to buy it from him. I'm almost positive I will because from the pics it seemed like it was gently used. I think it will make a big difference for my heating over my 224. It is also a later model than my stove so it has the cat air control, which I think can be helpful for secondary burns. Best of all I'll still be able to keep my Federal Airtight member card :msp_laugh:.

How bout you? Still burning steady up there I take it.

Cheers Ray,
Brandon

Hey Brandon!
That stove(264cclr) is a mirror image of this one except it is right door loading.. It'll keep you plenty warm for sure.. Just make sure the inner top is in one piece as they seem to be unavailable now.. Personally I'd look for a 2461 which replaces these stoves and parts are available but that's just me.. I have been keeping an eye on Craigslist in hope of finding the 2461 for a good price for just this reason.. As for the weather it has moderated quite a bit here and today was around 64 which is warm for this time of year but winter isn't over yet so I will have to wait and see.. I am having more firewood delivered next week for the year after next as I like to give it time to season properly and this stove runs great with good wood.. That really is the secret to good wood burning.. Cat air control is not gonna be a big deal Brandon as I give my cat very little air if any.. These stoves work best on low to medium fires has been my experience.. Keep me posted about that stove you mentioned and post pics if you have any..

Ray
 
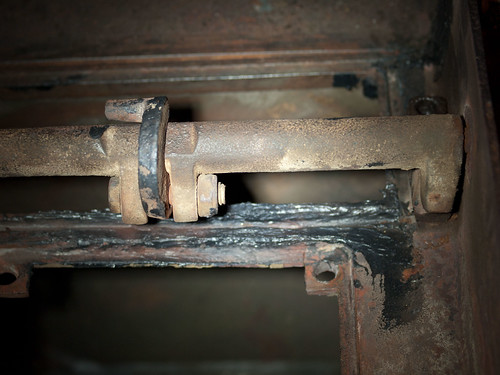
Here is the damper crank assembly


damperCrankAssembly by Glamisduner, on Flickr

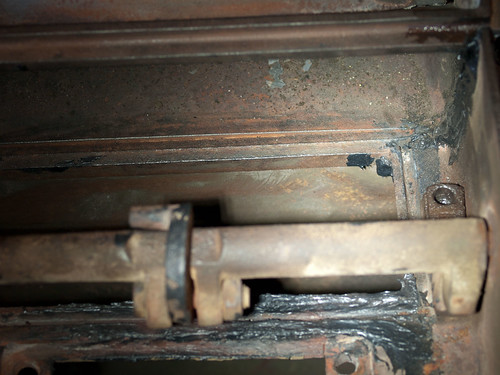
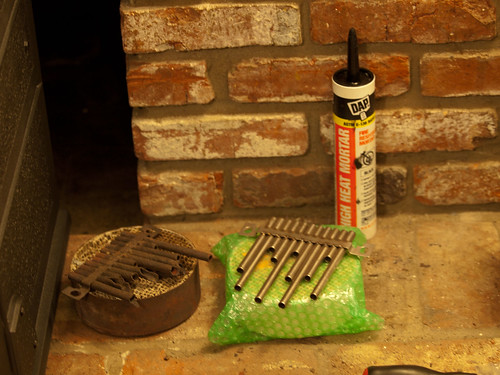
Here is my repair to the gasket grove area. I built it up with high heat mortar so it's pretty level now (although not perfectly smooth) and the gasket seems it will seal it up nicely.

gasketGroveRepair&RearGasketGroveOrLackThereOf by Glamisduner, on Flickr


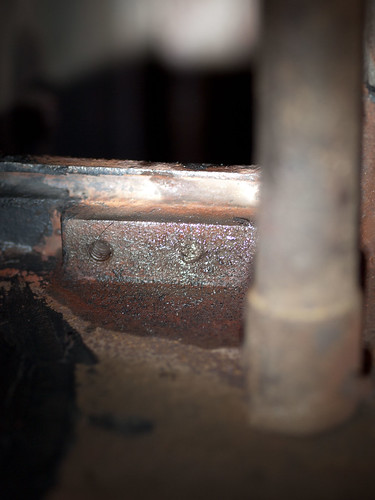
Here is the broken tap.

BrokenTap by Glamisduner, on Flickr
I guess the picture does not really help, it has cutting fluid in the hole and I tried to break it by smacking it with a punch and a hammer but it didn't work.


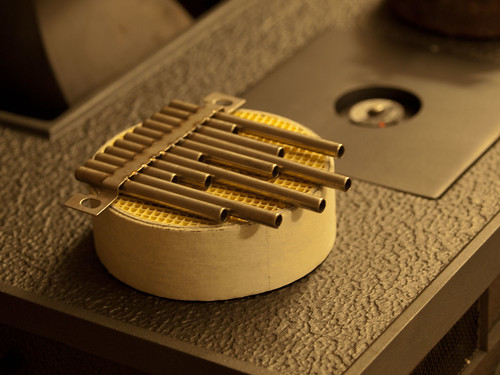
Here is a couple other Pictures I snapped the other day.

oldNewAirTubes by Glamisduner, on Flickr


StoveTop by Glamisduner, on Flickr

I do have one idea if I cannot extract or break apart the tap, and that is to just go back to the idea of using one bolt :p Or, drill a second smaller bolt in front of the hole with the tap in it. Then drill a new hole through the stove.
 
Last edited:
Here is the damper crank assembly


damperCrankAssembly by Glamisduner, on Flickr

Here is my repair to the gasket grove area. I built it up with high heat mortar so it's pretty level now (although not perfectly smooth) and the gasket seems it will seal it up nicely.

gasketGroveRepair&RearGasketGroveOrLackThereOf by Glamisduner, on Flickr


Here is the broken tap.

BrokenTap by Glamisduner, on Flickr
I guess the picture does not really help, it has cutting fluid in the hole and I tried to break it by smacking it with a punch and a hammer but it didn't work.


Here is a couple other Pictures I snapped the other day.

oldNewAirTubes by Glamisduner, on Flickr


StoveTop by Glamisduner, on Flickr

I do have one idea if I cannot extract or break apart the tap, and that is to just go back to the idea of using one bolt :p Or, drill a second smaller bolt in front of the hole with the tap in it. Then drill a new hole through the stove.

Good pics JI! OK it looks like your crank rod is correctly mounted to the crankshaft that pin on the small casting attached to the crankshaft goes into the damper door hole that is cast into it and should work.. I may need a pic of the top of the damper door to be sure your door is not missing that important detail.. If you try a heavy duty bolt to secure the damper pivot clamp you may be OK in spite of the broken tap in the inner top casting..

Ray
 
Last edited:
Will the tap not work as a bolt? Not ideal, but should secure the hinge if that is your main concern. I don't think those pieces typically go bad, so unless you are doing a complete teardown, you should never have to mess with it again.

In any event, I still think one bolt on that side is plenty to secure the damper hinge. There is not a lot of force or resistance on that piece. I could see if when you went to close the damper you simply let it fall unasisted, you could eventually break something, but I know when I close my damper I do it very gently. I control it until it is all the way closed, but more out of fear of breaking a cast piece.

Unless I'm really missing something, I think you are good JI. Put that sucker together and light a fire, and bask in the warm heat of all that hard work :blob2:.

Now its time to start on the wood for next year and the year after.
 
Ray,

Check out post #81 in this thread. The guy who has the stove posted pics. Even the cat still looks like it has alot of life in it!

I plan on going over that stove very carefully. I don't want to get anything that I have to put alot of work into since my stove works great. I just want to get the larger version for the extended burn time.

I hear you about the 2461, but I'm not going to pass this one up if everything looks good. The door on the right is going to take some getting used to and I'll have to rearrange a chair in my living room so I can feed it, but small price to pay for longer burns.
 
Back
Top