McCulloch Chain Saws

Arborist Forum

Help Support Arborist Forum:

This site may earn a commission from merchant affiliate links, including eBay, Amazon, and others.
Mark, I ended up buying the banana handle power mac from Ken on Sunday, it was just too darn cute with the little McCulloch scabbard too.
Scott
 
I once had a NOS late model Power Mac 6 that I decided I would never use so I sold it to a member of this site, I don't remember who is was.

DSC00604.JPG

But when I saw this one in Baraboo last weekend I knew I had to have it.

IMG_1182 (640x480).jpg

Not exactly NOS but in pretty good condition. I tore it down last night for a good cleaning and inspection, crankcase passed a pressure test O.K. so I am now in the process of putting it back together.

IMG_1187 (640x480).jpg

IMG_1191 (640x480).jpg

The Power Mac has an interesting fuel filter/fuel line arrangement, large felt filter/wick in the tank and unique fuel line that presses through the filter and through the side of the tank leaving just the tip protruding through. When you assemble the flywheel cover/fuel tank to the saw the tip mates with the fitting on the carburetor to create the seal.

IMG_1188 (640x480).jpg

IMG_1189 (640x480).jpg

I should have this one together and running soon.

Mark
 
Some while back in ended up with two McCulloch kits that can be used with the Mini Mac and Power Mac saws including the block off for the muffler and intake, the kits also have a rubber stopper to fit in the oil tank and fuel tank to allow you to test those. The muffler block has a rubber gasket, the intake uses and intake gasket or you can make your own from a piece of inner tube. I will point out that the drawer doesn't look anything like this now with bags of extra fittings, bits of tubing, large syringes that can also be used for pressure/vacuum testing, etc. The kits (93900) are in the bags.

Vacuum pressure drawer.JPG

I also picked up along the way a vintage McCulloch pressure bulb, the hose and check valve in the original unit were no good due to age but the bulb and gauge have remained viable.

DSCN5927.JPG

I don't have any photos of the Power Mac or Mini Mac set up but the photos below show the pressure and vacuum testing being carried out on a 10 Series carcass (PM8200 I believe) with home made test bits made from steel and inner tube. It's yellow because I used it once when painting a short block.

DSC04986.JPG

DSC04984.JPG

It has been pointed out before but I will make the point again here, there is no real vacuum present in a reed valve engine so you can test and feel good about pressure and vacuum in a "reeder" but the vacuum is really superfluous in those models.

I will also note on the PM8200 photos that those engines are equipped with the "Q" port so the port for the compression release above the muffler is not drilled through, thus you can have pressure and vacuum with that "port" open, it is only used to fasten the muffler at the top.

Mark
 
Still fiddling with my pro-Mac 10-10. Trying to get a new sprocket rim for it. Showing my inexperience here...evidently all 3/8-7 rims are not created since the one I got off eBay won't fit (too small). I went to ereplacement parts and got the part number (86951) that is calls for, but I think that is too small.

Can somebody tell me that part number or what the trick is on how to order? Do all the 10-10's take the same rim? My saw is the electronic ignition type later model if that matters. Thanks guys!
 
Rooster - There are two basic spline sizes for the rim type sprockets generally referred to as "Small" and "Large". The "Small" is 3/4" diameter (root or small diameter) and the "Large" is 7/8" diameter. McCulloch made the drums for the 10 Series in both Large and Small, all of the drums for the 600 Series saws (same drum dimensions as the 10 Series) with the small spline. You simply need to determine which drum you have (sounds like you have the Large spline) and buy the correct rim sprocket to go with it. Have a look at the attached document.

Super - Some will tell you to pump it up to 5 or 6 PSI and let it hold for 5 minutes, etc....I rarely find I can seal all of the openings well enough to make that work so I resort to a spray bottle with soapy water and check the seals and joints to make sure they are not leaking. Vacuum only needs to be done on the piston ported saws but I don't recommend soapy water or immersion with vacuum, you will just have to come with a better seal. Most pop up compression release devices are either 3/8-24 or 10 mm so it is easy enough to plug them with a short bolt and an o-ring. Get an old inner tube and start making solid gaskets to fit the intake and exhaust on the stuff you work on most, you can usually use a muffler or carburetor with the inner tube and get a very positive seal.

Mark

P.S. Some Stihl models use a "Mini" spline that is smaller than the Small noted above but I have not bothered to measure it. I don't have anything other than an 036 that uses the Mini.
 

Attachments

  • Sprockets and Rims.pdf
    385.2 KB
Some while back in ended up with two McCulloch kits that can be used with the Mini Mac and Power Mac saws including the block off for the muffler and intake, the kits also have a rubber stopper to fit in the oil tank and fuel tank to allow you to test those. The muffler block has a rubber gasket, the intake uses and intake gasket or you can make your own from a piece of inner tube. I will point out that the drawer doesn't look anything like this now with bags of extra fittings, bits of tubing, large syringes that can also be used for pressure/vacuum testing, etc. The kits (93900) are in the bags.

View attachment 443726

I also picked up along the way a vintage McCulloch pressure bulb, the hose and check valve in the original unit were no good due to age but the bulb and gauge have remained viable.

View attachment 443728

I don't have any photos of the Power Mac or Mini Mac set up but the photos below show the pressure and vacuum testing being carried out on a 10 Series carcass (PM8200 I believe) with home made test bits made from steel and inner tube. It's yellow because I used it once when painting a short block.

View attachment 443729

View attachment 443730

It has been pointed out before but I will make the point again here, there is no real vacuum present in a reed valve engine so you can test and feel good about pressure and vacuum in a "reeder" but the vacuum is really superfluous in those models.

I will also note on the PM8200 photos that those engines are equipped with the "Q" port so the port for the compression release above the muffler is not drilled through, thus you can have pressure and vacuum with that "port" open, it is only used to fasten the muffler at the top.

Mark

Mark, Thank You for the info. Do you need to block off the Auto Oiler too?

Thanks

Jeff
 
What kinda mess is it to change rings
On an old 10 10 man oil saw? I know they are clamshells. What other part's do I need ?
 
You would be well advised to replace the seals while you have it apart, PTO side seal is readily available by most seal manufacturers, I don't know about the large diameter flywheel side seal since I have a few in a drawer. If you need the number for the small one let me know and I will confirm it when I am in the shop. I think it is 6119 for the double lip seal or 6120 for the single but it has been a while since I looked at them.

I don't think taking those apart and putting them back togethe is a bad job myself but then I have been through a few of those saws before.

Mark
 
I did put the drill together today, actually working on the 33/35 saws is really not too bad, just very different from most you see.

I still don't know how the front handle is supposed to mount but I rigged something so I could at least have a look at the "completed" project.

IMG_1235.JPG

IMG_1236.JPG

IMG_1239.JPG

Mark
 
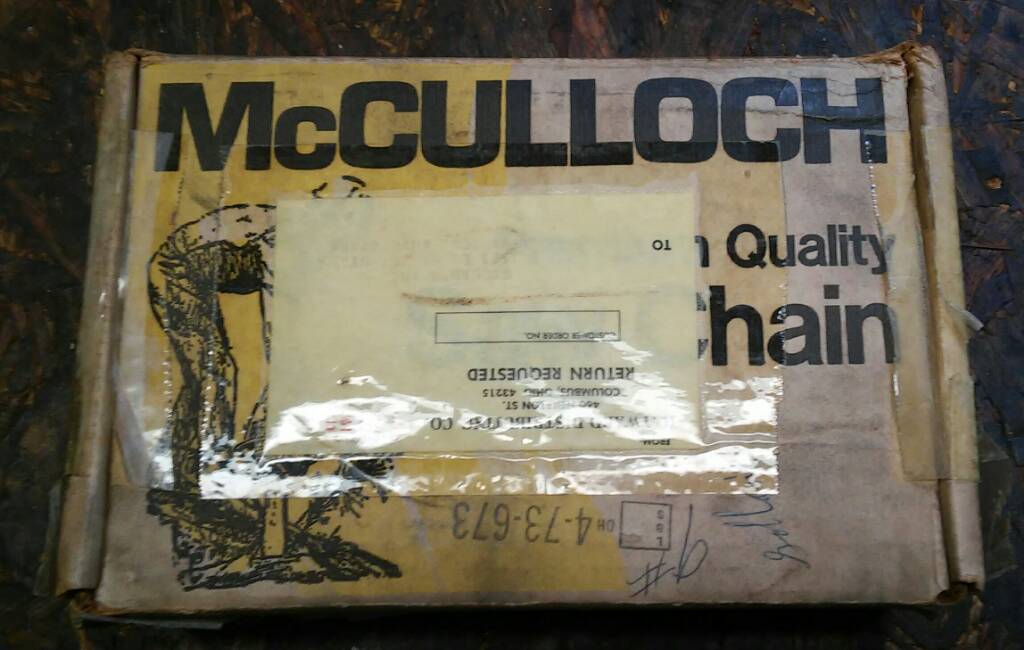
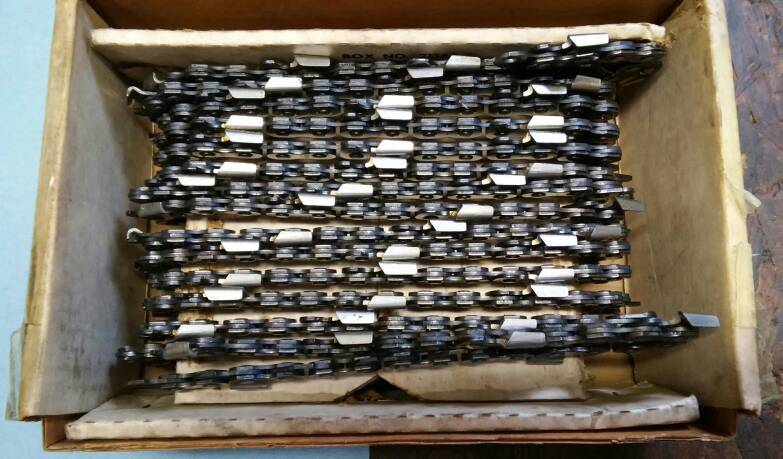
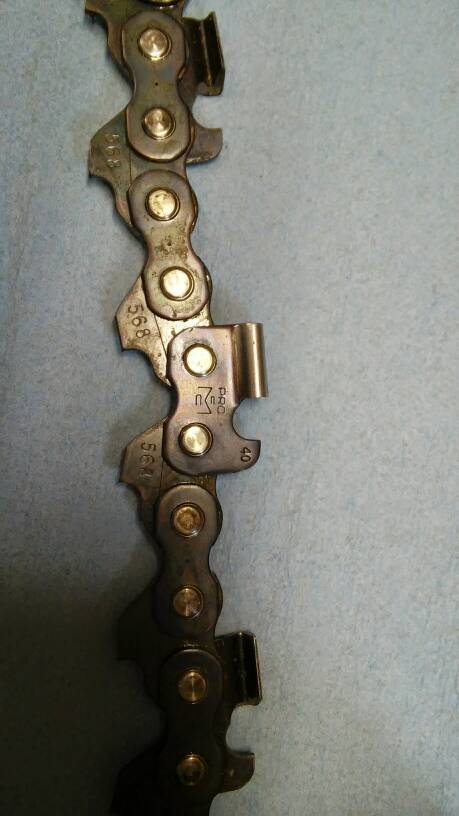
Been looking for some of this size chain for awhile... luckily it finally came around and in nice shape in the box... 9/16" just doesn't come around often it seems like 1/2" chain does.


a901cf9533159e73708191407dc30f14.jpg


2767472f558dff85a83a967090fb5435.jpg


2fcaedd0f788b99c7f9d9d3081ca8df1.jpg
 

Latest posts

Back
Top