Speaking of Mark's garden, how are my potatoes and radishes coming?
You are using an out of date browser. It may not display this or other websites correctly.
You should upgrade or use an alternative browser.
You should upgrade or use an alternative browser.
McCulloch Chain Saws
- Thread starter Bruce Hopf
- Start date

Help Support Arborist Forum:
This site may earn a commission from merchant affiliate
links, including eBay, Amazon, and others.
promac850
formerly promac610
Speaking of Mark's garden, how are my potatoes and radishes coming?
They look mighty fine to me...
Just harvested some radishes yesterday, they were perfect.
Some of the beans are ready also... lots of them... lots... The damn freezer will probably be full of them again... :bang:
Raspberries are showing up, however, the birds usually end up eating most of them... so not much left on the bushes... gotta build a PVC frame and drape the bird netting over that to keep them out.
Corn's coming up good here.
Mark, what did you use to till the garden? A ported Mantis? A Troy-Bilt Horse? A tractor with a PTO tiller? Slave labor and a hoe?
8433jeff
Aftermarket connoisseur
Slave labor and a hoe?
Wendell fits both job descriptions very well.
watsonr
Addicted to ArboristSite
- Joined
- Jan 3, 2010
- Messages
- 7,088
- Reaction score
- 2,132
Cleaning day, handy dandy parts washer, tooth brush and couple other tools, most important...Purple Power!!
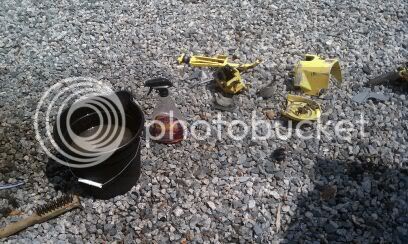
Extremely ugly in here
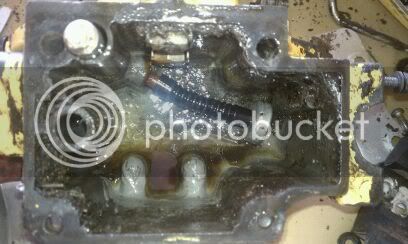
Difference between a CP and an SP cylinder, bridged exhaust. The DSP is not screwed in, it slides right in the hole, the lever holds it open or seated, never knew until now. Came out easy. The muffler has a compression hole in the side of the exhaust as does the upper cylinder during the last part of the stroke, pretty smart. The one near the exhaust is pretty big, the one at the top pretty small, DSP holds both.
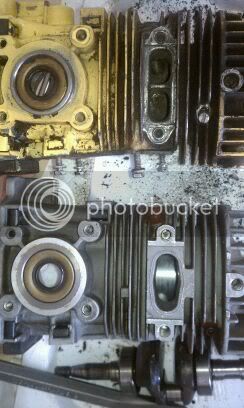
figured I post a couple before it goes back together and hopefully running today!! Eat a bite for lunch and back at it. Cylinder looks good as does the piston, cleaned up with a pad and rings were free in the groove. Had 140psi before disassemble. It came apart because I didn't want to take a chance with the broken pieces of the muffler that maybe fell in and give it a good cleaning. Can't wait, she's kind of sparkly now. Cover has some battle damage, not bad but enough to see a couple cracks, they will stay on the cylinder cover as is. Like saws that show there history!

Extremely ugly in here

Difference between a CP and an SP cylinder, bridged exhaust. The DSP is not screwed in, it slides right in the hole, the lever holds it open or seated, never knew until now. Came out easy. The muffler has a compression hole in the side of the exhaust as does the upper cylinder during the last part of the stroke, pretty smart. The one near the exhaust is pretty big, the one at the top pretty small, DSP holds both.

figured I post a couple before it goes back together and hopefully running today!! Eat a bite for lunch and back at it. Cylinder looks good as does the piston, cleaned up with a pad and rings were free in the groove. Had 140psi before disassemble. It came apart because I didn't want to take a chance with the broken pieces of the muffler that maybe fell in and give it a good cleaning. Can't wait, she's kind of sparkly now. Cover has some battle damage, not bad but enough to see a couple cracks, they will stay on the cylinder cover as is. Like saws that show there history!
Last edited:
I used some purple cleaner on a really gummy varnished fuel tank last week, to say I was shocked at how well it worked would be an undestatement. I had been known in the past to resort to sand blasting to clean up a tank but I will definitely try the purple cleaner first in the future.
Nice project Randy, I have a CP55 and a CP70, still looking for a CP125 to finish up that series. Even with 140 PSI that saw will drag you into a log.
Mark
Nice project Randy, I have a CP55 and a CP70, still looking for a CP125 to finish up that series. Even with 140 PSI that saw will drag you into a log.
Mark
watsonr
Addicted to ArboristSite
- Joined
- Jan 3, 2010
- Messages
- 7,088
- Reaction score
- 2,132
Well the saw is pretty much together. Was really pretty easy, most bolts are the exact same, just length changes for different holes. Here it is about half way.
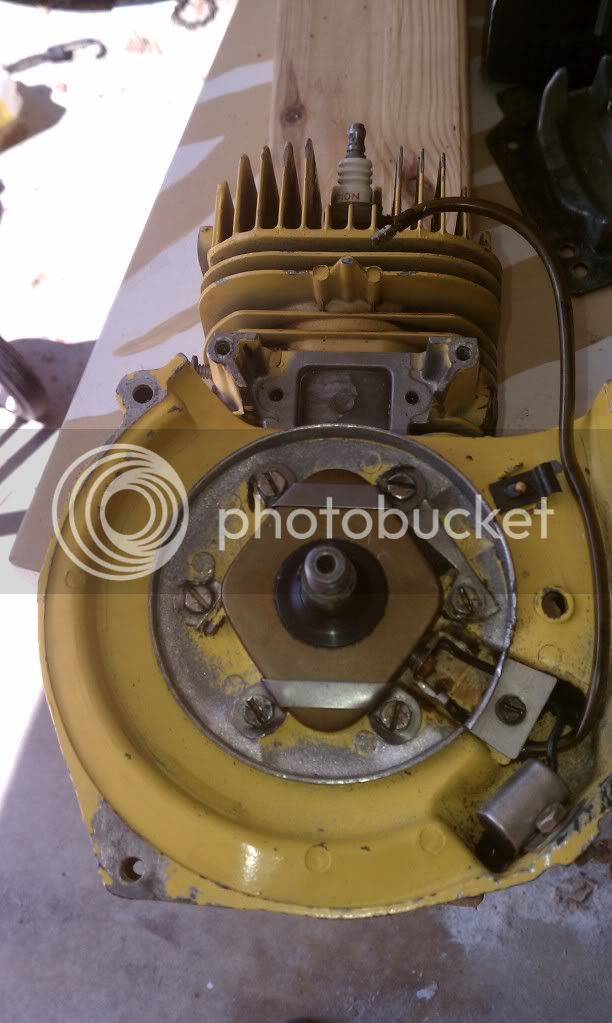
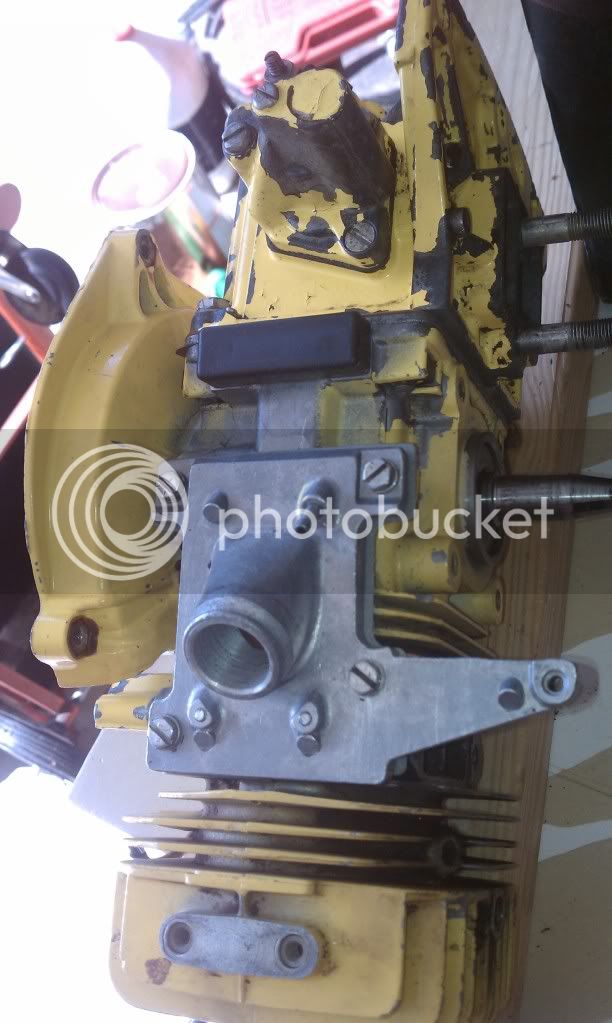
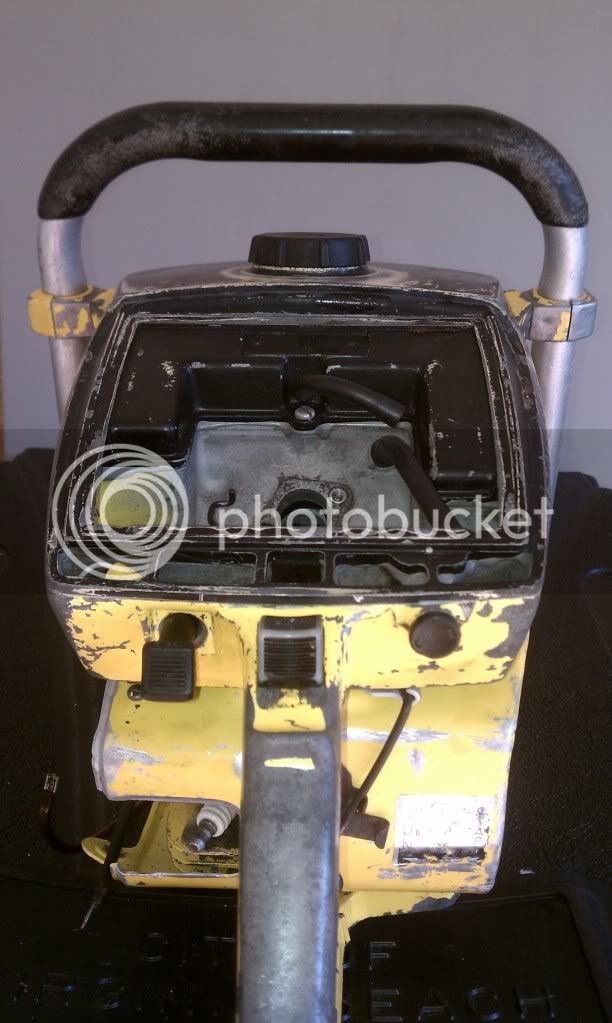
Tank was clean, new fuel and impulse line. Carb boot was in really good shape , all that oil and saw dust kept it protected. You can see there is no damage to the piston at all, it's near TDC in the picture but looks like your looking right through the saw. Used front brace and a new rear tank mount in place. Handle next and start buttoning it up.
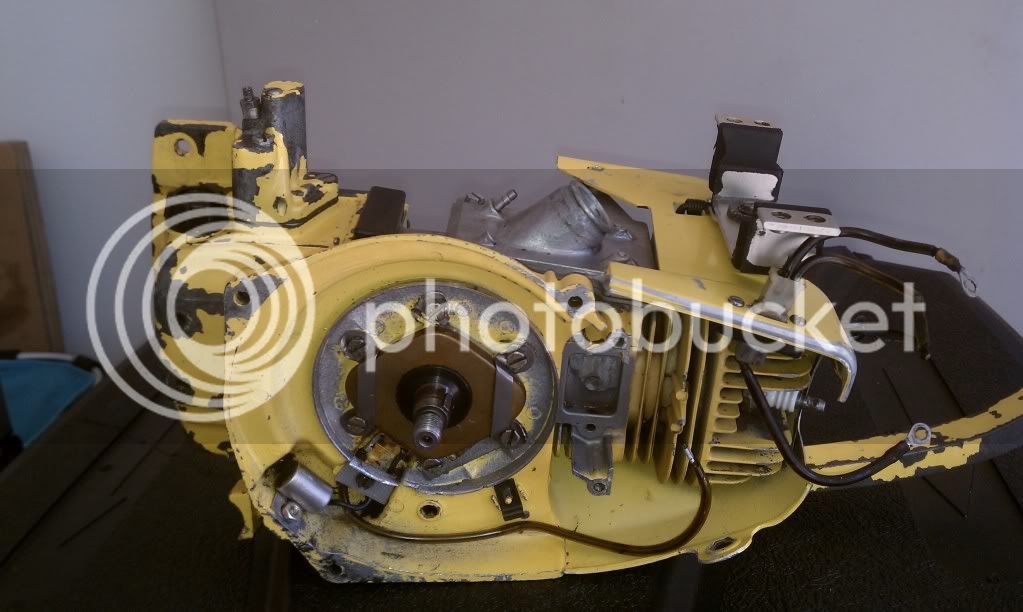
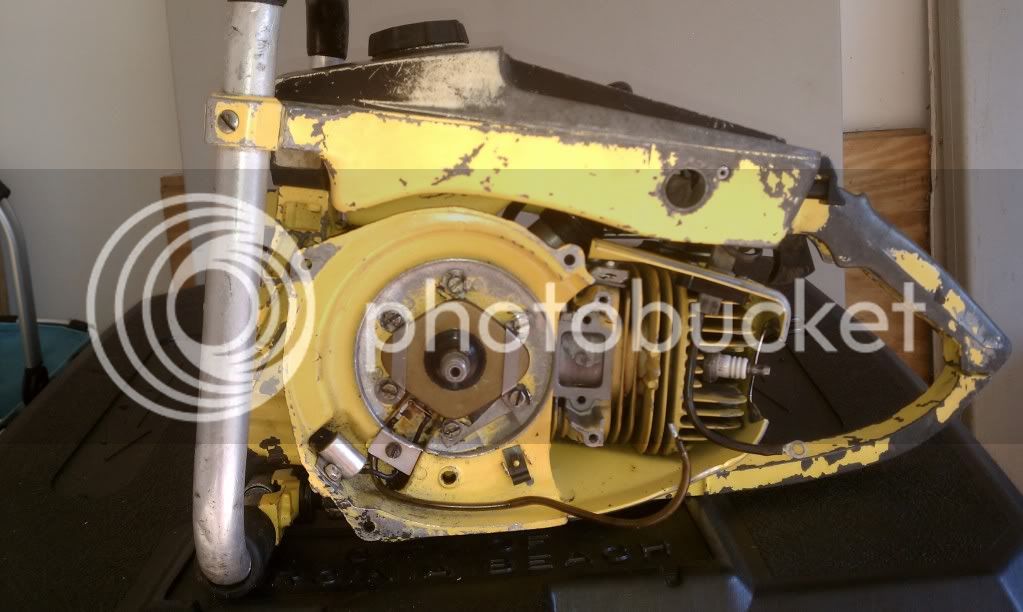
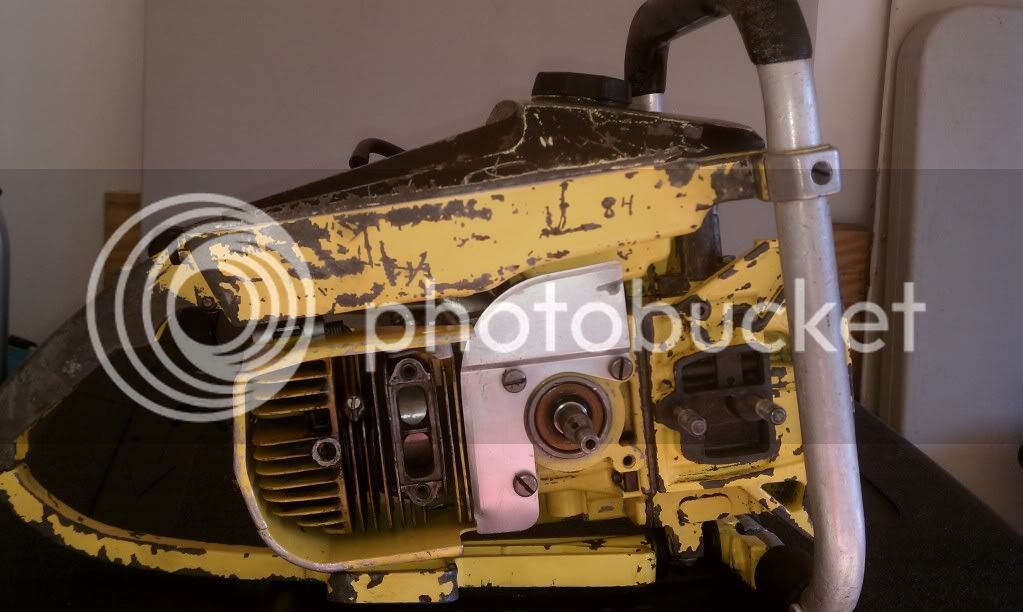
Came out pretty good, couple things need to be done like putting the flywheel on and starter, clutch and a couple other things and she should run.
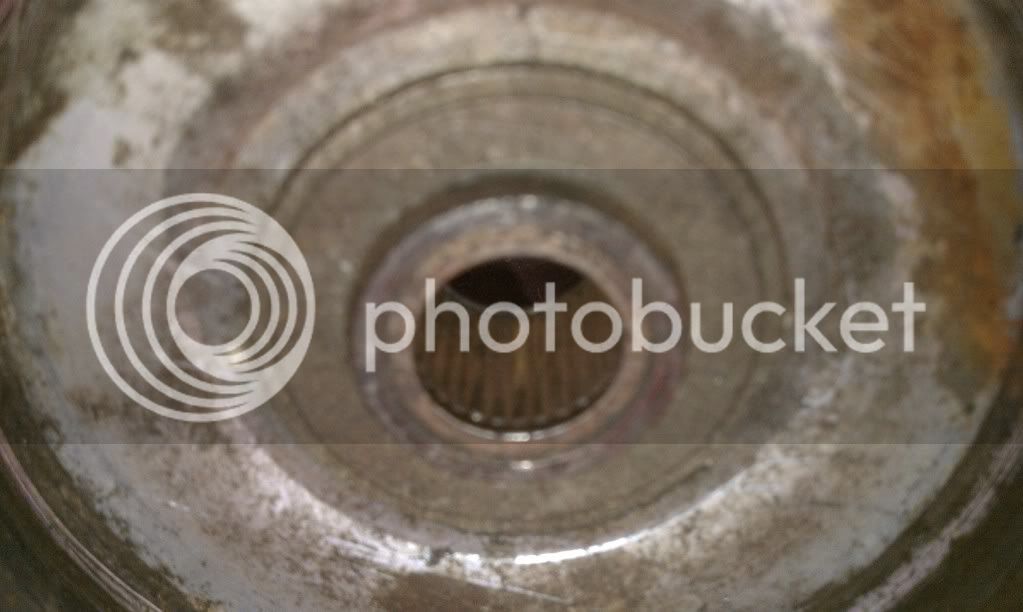
I do have a question, here's the clutch, it's not bad at all but the bearings are froze up. Looks like the carrier should come out, I gave it a decent tap to see if it would move but it didn't. I've never seen them for sale, does the bearing carrier come out?
I can take a clutch from one of the SPs and use that but this one is a little different looking and I want it to remain in original condition. The clutch nut is left threaded and on the SP there right threaded if I remember when I took it off. Tried an SP clutch nut and it wont work, so I'm pretty sure they changed crank direction when going to the SP model. That seems unusual, why would they change rotation direction?
Tomorrow I may be able to fire the saw. If you look close at the previous post of the two cylinders side by side you can see the the CP has more fin area for cooling. It at least appears that way as the muffler on an SP is flush with the fins and the CP has a recessed spot for the muffler to attach. The square muffler will not fit a CP.....I need a couple parts to finish it....like a muffler, I have a NOS starter and the clutch cover is skirted with rubber all the way around the outside for chip deflection. This was a logger trick so you weren't covered in dust by the end of the day. All my fathers saws had them installed. It will look really good when done, can't wait to run it in some wood.
No wonder this is Randy Mac's favorite saw, it's this Randy's favorite too, extremely easy to work on!:msp_biggrin:
Thanks,


Tank was clean, new fuel and impulse line. Carb boot was in really good shape , all that oil and saw dust kept it protected. You can see there is no damage to the piston at all, it's near TDC in the picture but looks like your looking right through the saw. Used front brace and a new rear tank mount in place. Handle next and start buttoning it up.


Came out pretty good, couple things need to be done like putting the flywheel on and starter, clutch and a couple other things and she should run.

I do have a question, here's the clutch, it's not bad at all but the bearings are froze up. Looks like the carrier should come out, I gave it a decent tap to see if it would move but it didn't. I've never seen them for sale, does the bearing carrier come out?

I can take a clutch from one of the SPs and use that but this one is a little different looking and I want it to remain in original condition. The clutch nut is left threaded and on the SP there right threaded if I remember when I took it off. Tried an SP clutch nut and it wont work, so I'm pretty sure they changed crank direction when going to the SP model. That seems unusual, why would they change rotation direction?
Tomorrow I may be able to fire the saw. If you look close at the previous post of the two cylinders side by side you can see the the CP has more fin area for cooling. It at least appears that way as the muffler on an SP is flush with the fins and the CP has a recessed spot for the muffler to attach. The square muffler will not fit a CP.....I need a couple parts to finish it....like a muffler, I have a NOS starter and the clutch cover is skirted with rubber all the way around the outside for chip deflection. This was a logger trick so you weren't covered in dust by the end of the day. All my fathers saws had them installed. It will look really good when done, can't wait to run it in some wood.
No wonder this is Randy Mac's favorite saw, it's this Randy's favorite too, extremely easy to work on!:msp_biggrin:
Thanks,
Last edited:

$202.29
Oregon Yukon Chainsaw Safety Protective Bib & Braces Trousers - Type A Protection, Dark Grey, Large
Express Shipping ⭐⭐⭐⭐⭐

$19.99 ($3.33 / Count)
Firewood Log Splitter 45mm+32mm + 4 Handles (Square + Round + Hex Shank + Small Hex) Wood Log Splitter Easy Splitter Detachable Drill Bit Heavy Duty Electric Drills Screw Cone Driver Removable
JianShiMoQinDianZiShangWuYouXianGongSi

$15.25
$30.50
FORESTER Professional Arborist Throw Line Kit | Tree Felling Equipment with Arborist Throw Bag | Throw Rope, Throw Weight, Yellow and Red, PP35016
Mac Wholesalers of Missouri LLC

$63.99
ZELARMAN Chainsaw Chaps Apron Wrap 8-layer for Men/Women Loggers Forest Workers Protective Chain Saw Pants Adjustable
QUALITY GARDEN & HAND TOOLS

$225.16
OREGON 295397 Type C (All Round Yukon Chainsaw Protective Trouser, Black, Small
Express Shipping ⭐⭐⭐⭐⭐

$79.99
ZELARMAN Chainsaw Chaps 8-layer Protective Apron Wrap Adjustable Chainsaw Pants/Chap for Loggers Forest Workers Class A
QUALITY GARDEN & HAND TOOLS

$337.83
$369.99
WEN Electric Log Splitter, 6.5-Ton Capacity with Portable Stand (56208)
Amazon.com

$26.99 ($0.22 / Foot)
$29.99 ($0.25 / Foot)
VEVOR Double Braided Polyester Rope, 1/2 in x 120 ft, 48 Strands, 8000 LBS Breaking Strength Outdoor Rope, Arborist Rigging Rope for Rock Hiking Camping Swing Rappelling Rescue, Orange/Black
Amazon.com

$215.05
$233.19
Weaver Leather WLC 315 Saddle with 1" Heavy Duty Coated Webbing Leg Straps, Medium, Brown/Red
Amazon.com

$56.99 ($0.38 / Foot)
$69.99 ($0.47 / Foot)
Arborist Rigging Rope Bull Rope Black (1/2 in x 150ft) Polyester Braided Arborist Rope 48 Strands for Tree Work Camping or Swinging…
UIERTIO
Randy - Bob Johnson has NOS mufflers for $60, gasket is an additional $1. Virtually any muffler from the older saws will fit as well, but not all will have the three bolt attachment, most use only two bolts. In a pinch, you can even use the stack type exhaust from one of the old 1-40/50 or 200 type saws.
I think the story with the clutches is units with a key use a right hand thread, units without a key use a left hand thread to keep the nut from coming loose in operation. The change to the non key units was made after too many clutches with keys were broken from hard use with the nuts not adequately tightened.
Mark
Sweet job Randy, This CP125 is looking really nice.
I have one and needs the same, Complete tear down
and reassemble.
The clutch bearing is replacable and can be had at
any bearing suppier for cheap money. If you can't find
one let me know i may have one.
As for the cranks, I have a crank without the clutch key
and has right hand nut threads.
Lee
I have one and needs the same, Complete tear down
and reassemble.
The clutch bearing is replacable and can be had at
any bearing suppier for cheap money. If you can't find
one let me know i may have one.
As for the cranks, I have a crank without the clutch key
and has right hand nut threads.
Lee
watsonr
Addicted to ArboristSite
- Joined
- Jan 3, 2010
- Messages
- 7,088
- Reaction score
- 2,132
This one has a keyed clutch, when you get a chance Mark, can I get the number for Bob, you may have given it before but I can't seem to find it now.
Lee,
It was really easy, hands suffered the most from scrubbing and being wet from the Purple Power and water. You read the part about the DSP valve, it just slides out, no threads. The DSP lever is under some tension for sure, you can see it in the last picture its torqued over good. I'll soak the bearing and give it a good whack tomorrow, thanks!
Well the saw is pretty much together. Was really pretty easy, most bolts are the exact same, just length changes for different holes. Here it is about half way.

Thanks,
Great job! I assume the double wire and plugs were replaced with the grounding strap on the SP125C? The wiring caught my eye as none of my SPs are wired like that. Ron
Duke Thieroff
Fill your hands, you SOB!
Those 125 saws are pretty damn cool.
They are almost a 10 series saw blended with the older top tank models (1-60s, 1-70s, 790 seres and so on.) Of course a bit more modern. I gotta get my hands on one of these one day, as well as a 797. I know a certain guy in Mass. that has a "few", may have to drop him a line one day.
Very, very cool.
Your build looks very nice, friend.
Chris
watsonr
Addicted to ArboristSite
- Joined
- Jan 3, 2010
- Messages
- 7,088
- Reaction score
- 2,132
Great job! I assume the double wire and plugs were replaced with the grounding strap on the SP125C? The wiring caught my eye as none of my SPs are wired like that. Ron
Your correct Ron. The two wires coming out the top are for the kill switch and to ground the tank. It has a nice plug for easy removal. I hope it works still, its a little sloppy. Even if it doesn't, I can put a ground up front. What's hard to see is the kill wire is broken. I repaired it with a piece of 16 gauge under the tank. If that still doesn't work, I can leave the plug in place and punch the wire out and rewire it by using a non-coated wire that will push through the holes in the plug once I remove the old wire. I may have to drill them a little bigger but at least the plug can stay.
This one has a keyed clutch, when you get a chance Mark, can I get the number for Bob, you may have given it before but I can't seem to find it now.
Lee,
It was really easy, hands suffered the most from scrubbing and being wet from the Purple Power and water. You read the part about the DSP valve, it just slides out, no threads. The DSP lever is under some tension for sure, you can see it in the last picture its torqued over good. I'll soak the bearing and give it a good whack tomorrow, thanks!
Ya Randy, I know all about the DSP valve.
It is the same as the 797. Have restored
many of those. I have had a few stuck ones
myself. But with a little patience they come out.
Lee
Is Purple Power actually the name of the product? I went to Menard's today and they have no listing for a product of that name and if they don't have it, I can't imagine who would.
Is Purple Power actually the name of the product? I went to Menard's today and they have no listing for a product of that name and if they don't have it, I can't imagine who would.
Me thinks it can be had at auto parts stores.
Duke Thieroff
Fill your hands, you SOB!
Is Purple Power actually the name of the product? I went to Menard's today and they have no listing for a product of that name and if they don't have it, I can't imagine who would.
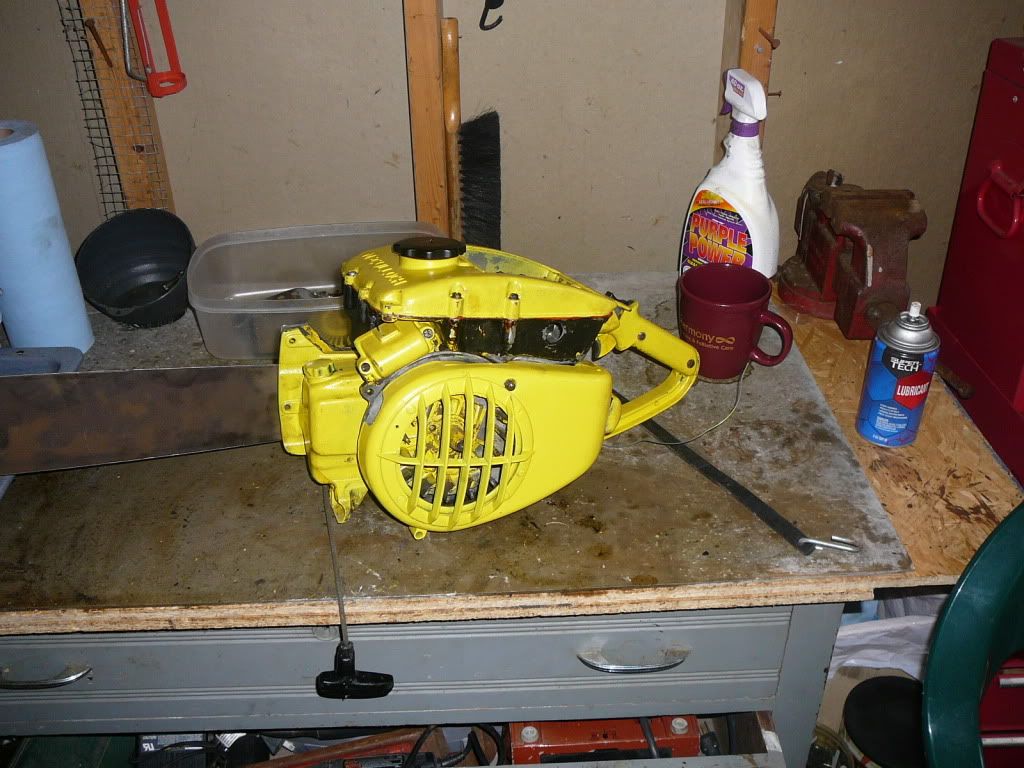
Look in the background...
Wendell, it is called Purple Power, can be had at Wally World, K-Mart and auto parts stores.
Pretty good stuff.
Chris
Wal Mart sells it, it's actually called Purple Power, it comes in gallons and in the spray bottle. I also picked up a gallon at Tractor Supply Company. Not every Wal Mart store would carry this, I'm told it's up to the store manager what they sell.Is Purple Power actually the name of the product? I went to Menard's today and they have no listing for a product of that name and if they don't have it, I can't imagine who would.
I wonder if Purple Power is in the stock market...I think their stock is about to go up!
Brian13
Addicted to ArboristSite
Thats a nice build watsonr. Never seen the insides of a 125 before. If and when I get one, its nice to see it before hand. You should start your own thread for this so it can be saved in the Mac group.
cpr
Addicted to ArboristSite
I do have a question, here's the clutch, it's not bad at all but the bearings are froze up. Looks like the carrier should come out, I gave it a decent tap to see if it would move but it didn't. I've never seen them for sale, does the bearing carrier come out?
Thanks,
I have done this to replace a bushing with a carrier. Spray liberally with PBlaster or your favorite, place a socket with slightly smaller OD than the carrier itself aginst it, then place a BIG socket on the other side of the drum. Tighten it up in a bench vice and press it right out. I used the same process to install a new carrier.
Nice build!
Similar threads
Want to Sell
Vintage Collection Liquidation
- Replies
- 2
- Views
- 1K


