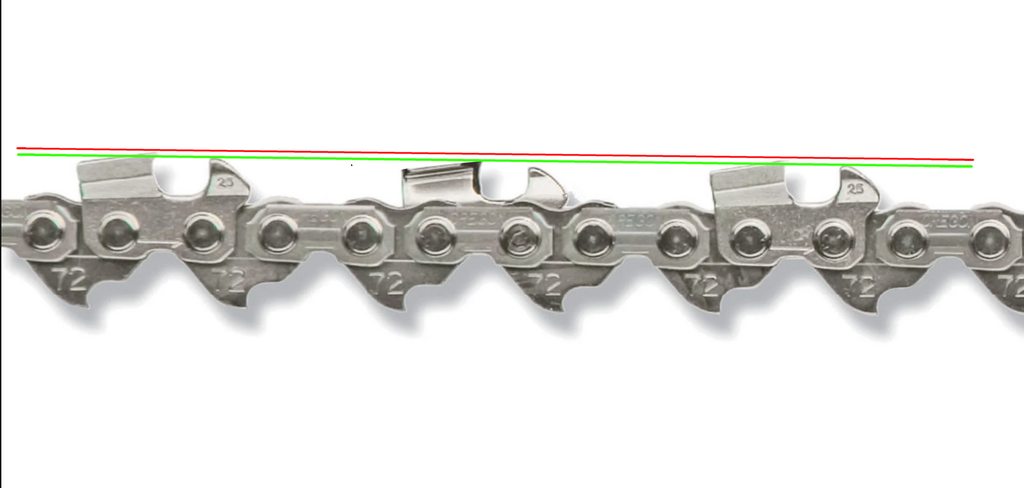
Tutorial: make your own raker depth gauge supported by software tool

Arborist Forum

Help Support Arborist Forum:

This site may earn a commission from merchant affiliate links, including eBay, Amazon, and others.
Progressive filing method update and a question....

I have been using the progressive method for adjusting my depth gauges ever since Hannes69 started this post, and I made my own gauge. I since purchased the Stihl gauges, and have had excellent results, as witnessed by my previous feedback posts. I understand the distinct difference between the constant depth gauge setting and the progressive method, the latter leading to a greater depth gauge setting toward the end of cutter life.

Although I only use Stihl chains, I regularly grind chains for a good customer who only uses Husky (Oregon) chains. As a result, I purchased the Husqvarna file gauge in order to properly set his depth gauges. Here is the question:

Does anyone know whether the Husky gauge is progressive? I ask this because every time I lay my Stihl constant depth gauge across the tops of the cutters, the depth gauges lie exactly flush with the top of the gauge (which BTW is set at 0.65mm (about 25 thou)). How is this possible, unless the Husky gauge is a constant depth gauge? I assumed by its design that it would produce a progressive depth gauge setting.

Has anybody here checked whether the Stihl filing gauges produce similar results? I would love to know! Hannes69? Philbert?

Thanks again for all the interesting info in this post.

Mikehusky_file_gauge.png
 

Attachments

  • stihl_filing_gauge.jpg
    stihl_filing_gauge.jpg
    21 KB
Of course the Husqvarna gauge is progressive. It wouldn't work if it wasn't. One end rests on the cutter and the other end on the chain. As the cutter is filed back it gets lower, so the angle changes, which in turn changes the height of the cutter.
As long as you sharpen correctly to keep all the cutters the same size it doesn't really matter. Both gauges will produce the same results, ie depth gauges that are also all the same size, which is ideally what you want.

Hey Arathol,

That is why it was so strange to me that a progressive gauge would give the same depth gauge height as a constant gauge. The depth gauges set by progressive gauges should be lower that those set with a constant gauge. Right? That's the whole point of progressive filing - to make the depth gauges lower in order to preserve the cutting angle.

Both gauges will produce the same results - This can't be - there should be a difference between constant and progressive gauges...

What am I missing here?

Mike
You are overthinking a bit here...Doing it either way produces the same results, ie a depth gauge that is the correct height for the cutter. If you use a Husky gauge to set the rakers and they are all the correct height, and the cutters have been sharpened correctly so as to be all the same size, when you put the Stihl gauge on the chain it should show the same results, ie the rakers are all the same height and are sized correctly for the cutters. If you are just sharpening without correcting cutter sizes however there will be some differences in raker height. A chain with several different cutter sizes won't work very well though, but thats not the right way to sharpen anyhow....
 
That is why it was so strange to me that a progressive gauge would give the same depth gauge height as a constant gauge. The depth gauges set by progressive gauges should be lower that those set with a constant gauge. Right? That's the whole point of progressive filing - to make the depth gauges lower in order to preserve the cutting angle.
Both gauges will produce the same results - This can't be - there should be a difference between constant and progressive gauges...
Seems to me that if all cutters are filed to the same length, both gauges would give the same results. The advantage of the progressive gauge is that it adjusts for each individual cutter, so that the appropriate depth is set regardless of individual cutter length.
 
Seems to me that if all cutters are filed to the same length, both gauges would give the same results. The advantage of the progressive gauge is that it adjusts for each individual cutter, so that the appropriate depth is set regardless of individual cutter length.
Yes, the Husky gauge adjusts for each cutter so the depth gauge can be set individually. The problem with that is when you have cutters that have been filed to different lengths, they are also different heights. If you have cutters of different heights the shorter ones won't cut well or at all, and the overall performance of the chain will be degraded.
 
A common misconception and a lack of understanding about how saw chain actually works -- which has been covered extensively earlier in the thread as has the differences in cutting angle for varying cutter lengths/heights over the life of a chain that has been maintained with a progressive depth gauge tool.
A chain with several different cutter sizes won't work very well though, but thats not the right way to sharpen anyhow....
That's also a matter of ongoing debate between the micrometer crowd and real world wood cutters and accomplished hand filers. No one in the real world is going to file every cutter down to the same length as the shortest one on a chain..., which is usually the result of some sort of damage that may only affect a few cutters. To sacrifice the perfectly good material left on all of the remaining cutters just to satisfy the "every cutter must be the same length" mentality is nuts and precisely where a progressive depth gauge tool is most valuable and why most folks use them.
 
A common misconception and a lack of understanding about how saw chain actually works -- which has been covered extensively earlier in the thread as has the differences in cutting angle for varying cutter lengths/heights over the life of a chain that has been maintained with a progressive depth gauge tool.

That's also a matter of ongoing debate between the micrometer crowd and real world wood cutters and accomplished hand filers. No one in the real world is going to file every cutter down to the same length as the shortest one on a chain..., which is usually the result of some sort of damage that may only affect a few cutters. To sacrifice the perfectly good material left on all of the remaining cutters just to satisfy the "every cutter must be the same length" mentality is nuts and precisely where a progressive depth gauge tool is most valuable and why most folks use them.
Really? I don't agree. Over 30+ years of cutting and hand filing and maintaining a small fleet of saws at times, I have seen plenty of chains that are filed poorly with cutters of all different sizes. If your chain has a half dozen cutters that are too low, those cutters can have a real effect on the overall performance.

kjUXfrNh.png


The low cutter won't be able to cut as deeply if at all, and the different size cutters will make for some vibrations too. If you have a few cutters on one side that are too short the chain won't cut straight either. It doesn't take more than a couple minutes extra to get the chain right, and "sacrificing good material" is what you do to make the chain cut right. This is one reason why there are so many people out there who can't get the saw to cut more than just "OK'.
I have used a Husky gauge for years, not because its progressive but because its small, its easy to use, it works well and makes quick field sharpenings so much faster.
 
There are 26 other pages in this thread with an enormous amount of information and "experience" supporting the various views and theories. Whatever floats your boat is fine with me, but the physics are the physics when it comes to how saw chain works in general and how progressive style depth gauge tools indeed accommodate different length cutters on either side (or both sides) of a chain and still cut straight with shorter cutters still throwing chips when following a longer cutter..., all day long.

I learned a lot during the course of this thread. You could, too.
 
Yup, 26 pages of theory started by somebody who can't even file a chain correctly by hand.....and most of seems based on the erroneous conclusion that each cutter operates on its own with no effect on the other cutters in front and behind.......thats a half hour I'll never get back.....once you learn that the higher cutters can keep the lower cutters out of the work your chains will cut a lot better.....
 
Thanks to the IGNORE feature to remove superfluous conversation, this has been educational. (Had to pull out some big words to keep the spirit of the thread alive--hope I spelled them right.)

Precision matters. Stihl just came out with a fuel injected saw (MS 500i) that's almost as powerful as a 661 around the weight of a 440. All fuel injection does is a more precise squirt. @hannes69 is similarly going for "the engineering thank makes cutters work" or "the numbers behind the experience." Experience does matter, @hannes69 is simply trying to quantify it.

At the same time, once the usefulness of a 6° constant angle is understood, slight imperfections don't matter--those happen quickly during use anyway--a 6° constant angle is "optimal on average" and makes the chain function like a military instead of a mob.

The improved raker gauge is much the same thing old guys do on an old chain by filing to the gauge then removing it and giving 2-3 additional swipes to improve the bite--this simply quantifies it. While the old guys are "good like a 4-barrel carburetor," @hannes69 is going for "fuel injection."

I think the D-I-Y gauges are great for in the woods; in the shop @BobL has a faster, more accurate way of checking angle.

I've "learnt lots" at ArborisSite, Thank You to those who contributed!
 
I came to this thread looking for a solution to poorly cutting Oregon 91PX chain after sharpening by hand filing and using the traditional 0.025” depth gauge tools (sharp chain with the fingernail test, but chain produces dust and cuts slow). The depth gauge I was using was the Husky 3/8 low profile gauge, which is not progressive, even though the Husky gauges for other chain sizes are. I have a Woodland Pro (Carlton) chain I sharpened by hand filing that cut great after measuring each tooth with calipers and filing it to the same length as the others. I’ve since changed to using a rotary sharpener, similar to the Oregon Sure Sharp, which for me is faster and more consistent then hand filing, but did not resolve my cutting issue on Oregon chains. After much reading on AS it became clear to me the depth gauges on the Oregon chain were the culprit.

Unfortunately, no manufacturer makes a commercially available progressive depth gauge tool for low profile chains in the US (other countries have different product lines available). I believe this is because the geometries of low profile chain from different manufacturers differ enough that the gauges would not be interchangeable. Additionally there is some question as to how to handle the anti-kickback bumpers when using a progressive depth gauge; no manufacturer in the wants the liability of this and they would rather just sell more chains.

BobL also has some great information on checking chain angles in the shop. I did obtain a digital angle meter and attempt BobLs method, but I found it to be time intensive compared to using Hannes gauge. I also struggled given the small features of 3/8 LP chain, BobLs method may be easier to use on larger chain sizes.

I did not enjoy reading 27 pages of mostly non-value added text to find the few nuggets of useful information. Only a few folks were willing to pick up a pair of calipers and measure some different chains to share the information with the group. I did exactly that on a NEW Oregon 91PX chain with the following results:

α= 7.2
A= 176
B (type 1)= 155
B (type 2)= 263
C= 18
D= 425 (taken to first rivet, per Hannes note)
E= 169

Oregon 91PX Type 2.jpg

When entering these numbers in the tool it becomes clear that a different thickness material is required to produce a Type 2 gauge for Oregon chains vs Carlton chains to deliver the appropriate cutting angle. I chose a 20 Ga 304 Stainless steel with a nominal thickness of 35 mil and readily available on Amazon ( RMP 304 Stainless Steel Sheet, 2B, 12 Inch x 12 Inch x 0.035 Inch (20 Ga.)). I noticed that for the first bit of cutter wear a traditional 0.025 depth gauge should produce acceptable results, although I'd note it's difficult to round the front of the raker with a file without risking damage to the freshly sharpened cutter; the Hannes gauge eliminates this issue.

I also measured my Carlton 3/8 LP chain and while my measurements were slightly different then Hannes, I generally agree with his measurements and recommended material thickness for his Carlton 3/8 LP Type 2 gauge. The closest material I could find to the required thickness is 18 Ga 304 Stainless Steel with a nominal thickness of 48 mil. This material is not as readily available as 20 Ga, but can be purchased on eBay from steel suppliers or sourced locally.

As discussed in previous posts and based on images of 3/8 low profile chain from Stihl I can tell the product differs from Carlton and Oregon, although I do not have a sample to measure, nor a need to generate a gauge for this chain.

With the above information in hand, I produced a Type 2 gauge for Oregon 91PX chain. The slot in my gauge is 0.142"wide x 0.710" long, width is a critical dimension, because of the design of the Oregon rivets. I cut my initial slot with a dremel more narrow than needed and then filed the slot to fit the chain properly. I used the guage on 3 different chains of varying wear, all three chains produced straight cuts, piles of chips and self-fed through the material with similar efficiency to the new chain I compared them to.

HannesChips.jpg

Because of the anti-kickback bumpers on the Oregon chain, I position the flat file above the front point of the bumper (as shown in image). In the three chains I tested, not altering the front point of the anti-kickback bumper did not seem to negatively affect the chain’s ability to cut. I also do not think anyone has posted an image of a Type 2 gauge on the first rivet after the raker as Hannes mentioned for LP chain.

RakerGuageSideView.jpg
RakerGuageOnChain.jpg
RakerGuage wFile.jpg


There are probably hundreds of ways to sharpen chains and just as many opinions. My main motivation was find an easy and efficient sharpening method, that consistently produces a sharp chain that cuts close to or better than the efficiency of a brand new chain. I think Hannes work has accomplished that for me. Thank You Hannes for this great contribution.

Note: there is a .dxf CAD file attached of Oregon 91PX chain based on a scaled image I took of new Oregon 91PX chain. I used an open source CAD program called LibreCAD to generate this drawing.
 

Attachments

  • Oregon 91PX Type 2.jpg
    Oregon 91PX Type 2.jpg
    58.8 KB
  • HannesChips.jpg
    HannesChips.jpg
    184.9 KB
  • Oregon91PX.zip
    13.5 KB
Progressive filing method update and a question..
Does anyone know whether the Husky gauge is progressive? I ask this because every time I lay my Stihl constant depth gauge across the tops of the cutters, the depth gauges lie exactly flush with the top of the gauge (which BTW is set at 0.65mm (about 25 thou)).
*Concerning 3/8 chain & 3/8 gauges

Carlton said their gauge could only reach a *MAX depth of 47 thou, where as needed was a 63 thou depth to maintain the same performance.That would be at the witness mark or center-back- rivet.

Per as hannes69 number charts shown on this thread do show Hannes's-Stihl-numbers were gauged just a few points of a degree under the 47 thou mark and equal that of the Carlton gauge on the Carton chain at end of chain-life. Assuming they were both softwood settings, Carlton just said "max". (30 To 47= 17 thou progression.)

Stihl hardwood setting maxed out at 42-43 thou on Stihl chain. 58 thou to maintain 6.3 degree. Roughly 15 thou progression. Whereas the husky gauge on the same stihl-chain-hard-setting only could max out at 34 thou and virtually-started at 20 thou, not 25. That's only a difference of 9 thou progression beyond 25 thou in a very full chain life. When I used Stihl chain I would use softwood setting and by rights I should have been taking off 5 thou off the new chain but there is nothing to file off.
The blue-tip Oregon chain that I also used has an aggressive factory hook. Although the Husky gauge does allow you to take some off with the soft setting on a new chain, I don't believe that chain comes preset new with 25 thou rakers??? (I think they are higher ????)

Anyway my thinking is the STIHL gauge 'performed' on it's own chain and just as well on Carlton chain as Carton gauge. May stand to reason that husky gauge had low numbers on Stilh chain because of the lower tooth but Carlton chain is also a taller tooth and the Stihl gauge still matched that of the Carlton gauge on Carton chain. Things kind of point to the Husky gauge being less capable all around.

IF in fact the husky gauge doesn't do better than it did on stihl chain then at best you are looking at 9 thou progression over 25 thou at end of chain-life. Likely only about 4 thou at half-chain-life. May stand to reason why you are not seeing a difference when you drop on the constant style gauge. Other contributing factors can be that the saddle gauge has wear and/or the rakers are not completely flush to gauge which may account for some. I get in the habit on putting the file on edge and quickly sliding the file back and forth to feel a bump. Otherwise it my look good but I still may get two more strokes off it.
What 3/8 husky chain was it, do you recall?
Next husky chain,, run it through Hannes's calculator against the 3/8 husky gauge Id be interested, said the guy that took 54 weeks to respond.
 
Remember this ole thread?

Thought it was time for some feedback, and a new lesson learned!

My son's chainsaw operator was cutting dead, dry Eucalyptus (Bluegum), and started to complain that the freshly-ground chains were not performing properly. He claimed that the saw "heated up" to such an extent, that he had to let it cool down for an hour. Not good for productivity, and we were skeptical...

Anyway, my son and I scratched our heads regarding this, and decided to try something out. We surmised that the depth gauges were not filed down far enough (even though they were at the correct setting for "hard" wood), and that the chain was taking "small bites" and not loading up correctly, thus over-revving the motor, causing it to heat up. We decided to try and file the depth gauges down to the "soft" setting on the Stihl progressive gauge, and give it a try... were we justifiably nervous about this, since Bluegum is a notoriously hard, tough wood, and I had had a nasty experience in the past with a too-low depth gauge setting - that chain with the too-low depth gauges bucked and kicked - it felt like I was wrestling with a bobcat! Very dangerous indeed!

Anyway, we received feedback that the operator was overjoyed at the performance of the chains, and is now a very happy camper. On top of this, the saw no longer overheats!

My son and I pondered over the reasons why this should have solved the problem. We could hardly believe we had nailed it on the first try. The conclusion we came to was that hard, dry wood requires a "full" depth gauge setting, and is not as "reactive" to this setting as is wet wood. This appears to be because the wood fibres are more brittle, and "break" or "tear" off more readily than the fibres of wet, green wood. This makes a low depth gauge setting safer than it would be in wet wood. That's our story, and we're sticking to it!

If anyone has an alternate theory, please share it with us. In the meantime, we hope this will help you with your depth gauge setting. No rocket science here, just good, solid basics. I had never considered the difference between the wet and dry wood before...

Hope this helps someone!

Mike
 
I
So now, I give this knowledge to you, and maybe some of you can contribute to the project by the following things:

+ give feedback about different chain types. When I have a complete data set according to the software´s ‚chain‘ tab, I can integrate the data as preset into the software. Most interesting at this point would be a different chain pitch, I personally only own 3/8 and 3/8 low profile. For them I have measured the data with unprofessional equipment but much time and effort, I trust the numbers (the theoretical numbers show up in practice, at least for me…)
Maybe someone of you has professional equipment to do such measurements and could help me out in this regard.

+ give feedback about the gauges, the usage, the construction and so on, this could help other users

+ maybe the software tool needs some corrections, e.g. language,…, maybe you have suggestions, wishes ...


This all seems a little bit complicated, but in real life it could be as simple like that:

You own a chain listed in the presets of the software e.g. Stihl Rapid Micro 3/8 0.063. You choose design 2 and you like a cutting angle in the region of 6.5°. You buy a 1 inch wide stripe of 1.2mm steel, cut off 4 inches, make a rectangular cutting 172 mil wide and 850 mil deep and optionally bend the steel stripe for better gauge handling. That´s all.

The rest of this post is explaining a lot of things around that ;)

It should be a kind of addition to BobL´s thread and a logical consequence of it.

I hope you can make use out of it; that was my intention.

And sorry for this long post, explaining things in a short manner is NOT my strength ;)

Be proud of your new tool :)

And now it´s time to discuss that stuff hehe…

Hannes.
down loaded the program and am lost with many inputs having 3 digits what can be 3 digits long most measurements would be 2 digits maximum.
 
Why is the software inputs
So now, I give this knowledge to you, and maybe some of you can contribute to the project by the following things:

+ give feedback about different chain types. When I have a complete data set according to the software´s ‚chain‘ tab, I can integrate the data as preset into the software. Most interesting at this point would be a different chain pitch, I personally only own 3/8 and 3/8 low profile. For them I have measured the data with unprofessional equipment but much time and effort, I trust the numbers (the theoretical numbers show up in practice, at least for me…)
Maybe someone of you has professional equipment to do such measurements and could help me out in this regard.

+ give feedback about the gauges, the usage, the construction and so on, this could help other users

+ maybe the software tool needs some corrections, e.g. language,…, maybe you have suggestions, wishes ...


This all seems a little bit complicated, but in real life it could be as simple like that:

You own a chain listed in the presets of the software e.g. Stihl Rapid Micro 3/8 0.063. You choose design 2 and you like a cutting angle in the region of 6.5°. You buy a 1 inch wide stripe of 1.2mm steel, cut off 4 inches, make a rectangular cutting 172 mil wide and 850 mil deep and optionally bend the steel stripe for better gauge handling. That´s all.

The rest of this post is explaining a lot of things around that ;)

It should be a kind of addition to BobL´s thread and a logical consequence of it.

I hope you can make use out of it; that was my intention.

And sorry for this long post, explaining things in a short manner is NOT my strength ;)

Be proud of your new tool :)

And now it´s time to discuss that stuff hehe…

Hannes.
In mils and not mm who uses mils ?
 
Remember this ole thread?

Thought it was time for some feedback, and a new lesson learned!

My son's chainsaw operator was cutting dead, dry Eucalyptus (Bluegum), and started to complain that the freshly-ground chains were not performing properly. He claimed that the saw "heated up" to such an extent, that he had to let it cool down for an hour. Not good for productivity, and we were skeptical...

Anyway, my son and I scratched our heads regarding this, and decided to try something out. We surmised that the depth gauges were not filed down far enough (even though they were at the correct setting for "hard" wood), and that the chain was taking "small bites" and not loading up correctly, thus over-revving the motor, causing it to heat up. We decided to try and file the depth gauges down to the "soft" setting on the Stihl progressive gauge, and give it a try... were we justifiably nervous about this, since Bluegum is a notoriously hard, tough wood, and I had had a nasty experience in the past with a too-low depth gauge setting - that chain with the too-low depth gauges bucked and kicked - it felt like I was wrestling with a bobcat! Very dangerous indeed!

Anyway, we received feedback that the operator was overjoyed at the performance of the chains, and is now a very happy camper. On top of this, the saw no longer overheats!

My son and I pondered over the reasons why this should have solved the problem. We could hardly believe we had nailed it on the first try. The conclusion we came to was that hard, dry wood requires a "full" depth gauge setting, and is not as "reactive" to this setting as is wet wood. This appears to be because the wood fibres are more brittle, and "break" or "tear" off more readily than the fibres of wet, green wood. This makes a low depth gauge setting safer than it would be in wet wood. That's our story, and we're sticking to it!

If anyone has an alternate theory, please share it with us. In the meantime, we hope this will help you with your depth gauge setting. No rocket science here, just good, solid basics. I had never considered the difference between the wet and dry wood before...

Hope this helps someone!

Mike
I find my chains sharpened for very hard Aussie hardwoods are over aggressive in softwood.
Blue Gum isn't what you would call a very hard hardwood probably why the softwood setting worked. What chain is it give the file 10 down if it's full chisel always ya can even do it on semi chisel try it.
I've never been limited and stuck with such little options soft or hard I don't know how guys do it with only one or the other when it comes to rakers lol
 
many inputs having 3 digits what can be 3 digits long most measurements would be 2 digits maximum.

In mils and not mm who uses mils ?
Regarding chainsaws inches are used as units. E.g. you can buy a 16 inch bar. In Germany this is sold as a 40 cm bar, but actually this is a 40.64 cm bar. Or chain pitch is given in inches, e.g. 3/8 inch, you won't go to a shop and say "give me a 9.53 mm chain".
So we're in inch land regarding this matter, so for smaller measurements mil (or thou or one thousandth of an inch) is an appropriate unit.
When a cutter has a height of e.g. 364 mil then that´s a value of 3 digits, you can't change this simply to two digits (maybe you can grind the cutter down hehe).
When you like smaller numbers, you could say 0.364 inch instead, but that doesn't change the digit count. You could ignore the last digit and round, then that would mean 0.36 inches. But that's less precision.

Changing between mil and mm is rather easy, there's a plain conversion factor of 39.37 between them. Divide mil by 39.37 and you get mm, or multiply mm by 39.37 and you get mil, simple as that.
 

Latest posts

Back
Top