050 051 075 076 Info Thread

Arborist Forum

Help Support Arborist Forum:

This site may earn a commission from merchant affiliate links, including eBay, Amazon, and others.
Some TS510 and TS760 machines can be converted, others not. (I think all TS50 machines had the capability?)
Many just had threaded plugs etc. Some you need to drill and tap holes for oiler housing/manual oil button etc. I don't believe any chop saw past 1991 can be converted as they changed the crankcase then so they lack the chain tensioner, automatic oiler and manual oiler capability (and crankcase ears for handguard/chain brake).

Crankcase without tapped hole for manual oil pump button;
chop-saw-1-jpg.391913


chop-saw2-jpg.391915
 

Attachments

  • Chop saw 1.JPG
    Chop saw 1.JPG
    74.8 KB
  • Chop saw2.JPG
    Chop saw2.JPG
    61.2 KB
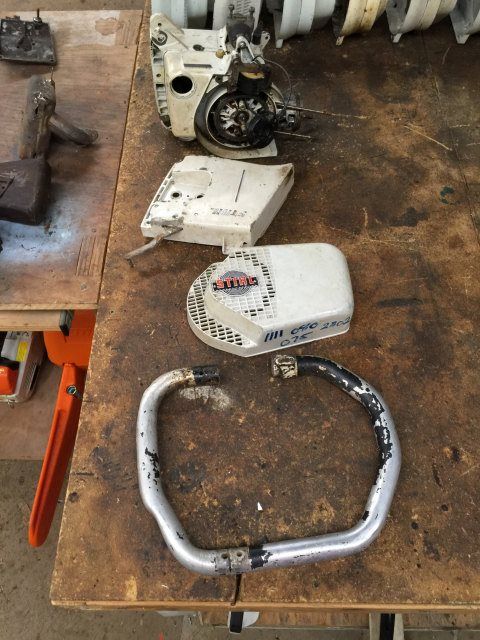
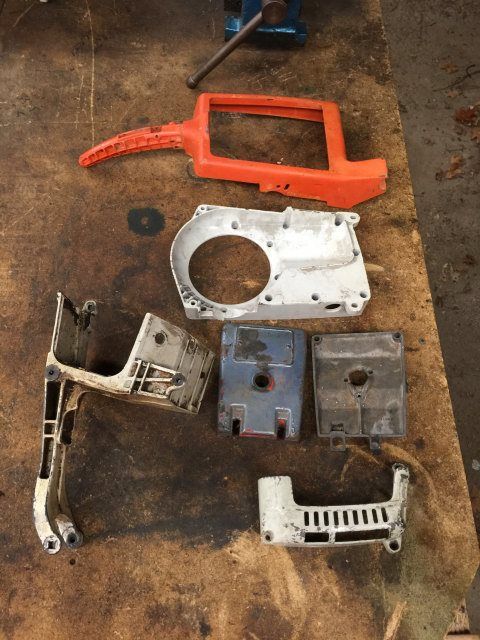
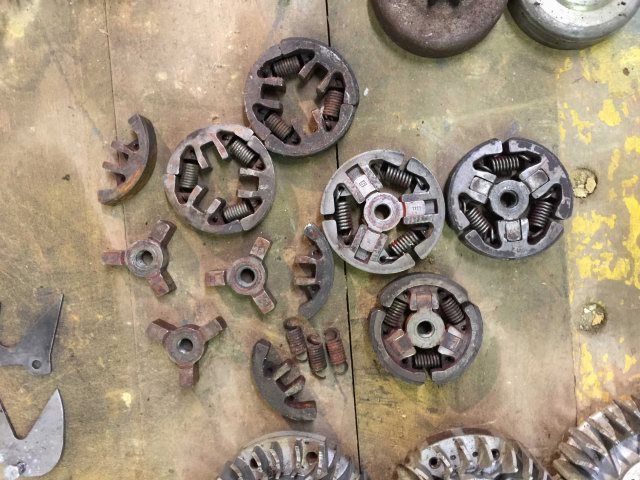
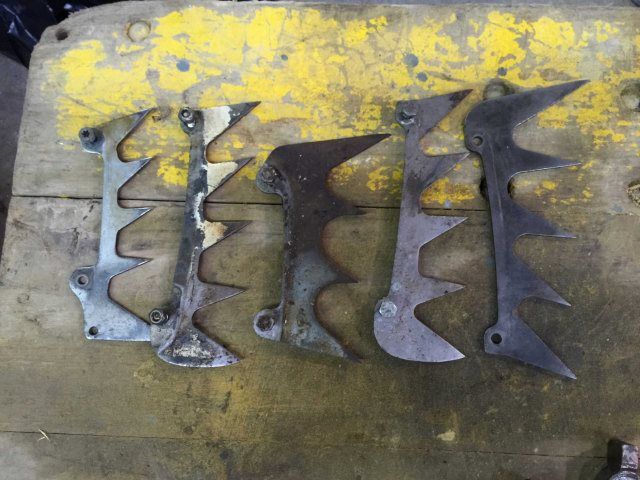
Well I got very little done this week on the 075 of Doom, but I did sort through the parts and figure out which ones are headed to Gock37 to get cleaned up and powder coated.
I am going with a medium grey and candy apple red paint scheme, not original but.....
IMG_5329_zpsb1dfa0e6.jpg

IMG_5328_zpsc1a29a44.jpg


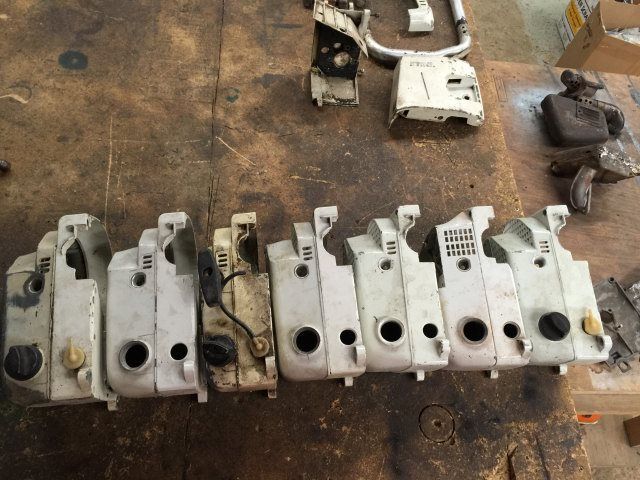
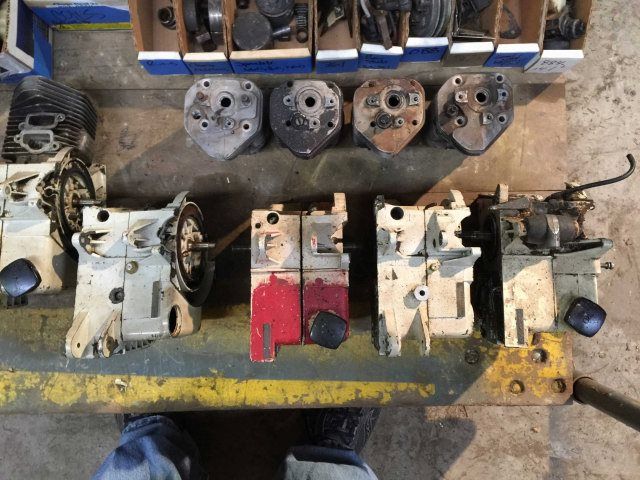
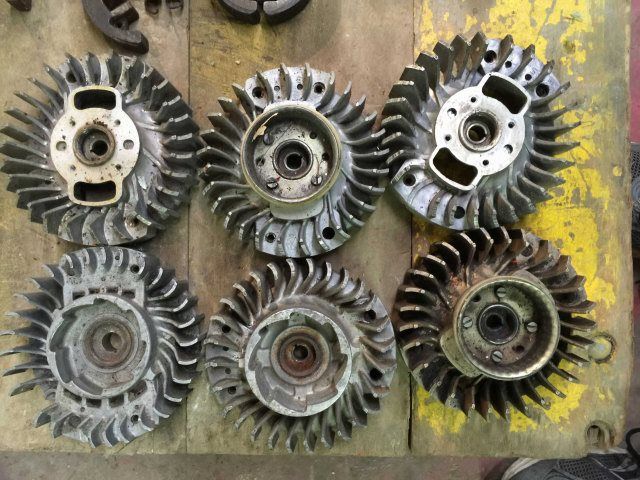
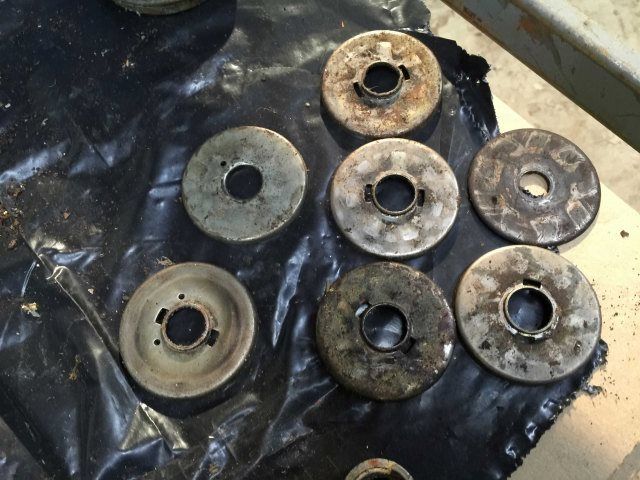
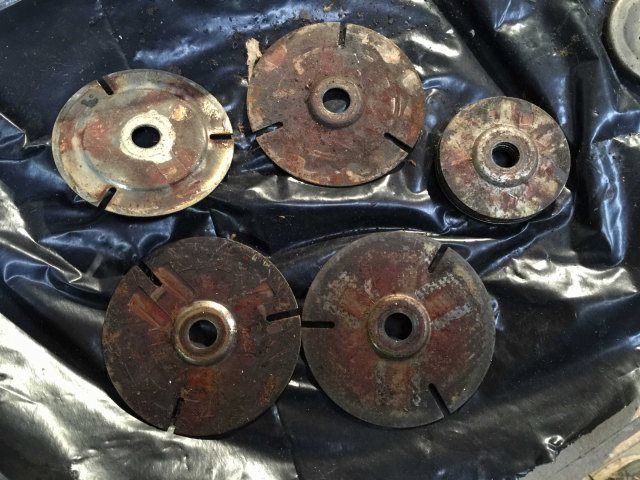
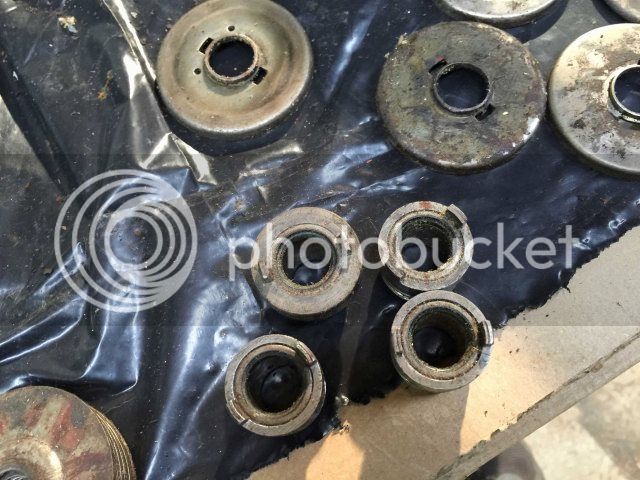
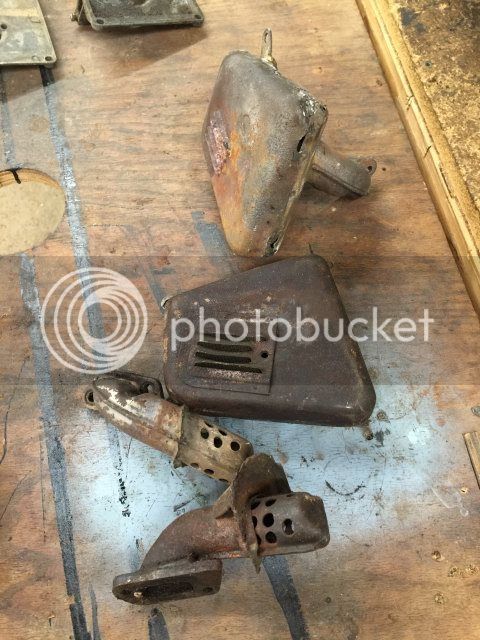
I have a few recoil housings/fuel tanks to choose from, a ton of flywheels, oil pumps and washers, cylinders, crankcases, but my mufflers are a bit.......well not so mufflerish.
Gonna use a chain brake equipped clutch cover and a pair of those medieval looking dawgz. Going with the full wrap handle of course. The nicest crankcase, cylinder, carb box, frame handle and lower frame.
I ordered a new OEM top cover from the dealer as the only one in the boxes has a little crack :(
DDave
IMG_5326_zpsef5f4696.jpg

IMG_5277_zps23a4397c.jpg

IMG_5253_zps4a1abc6d.jpg


IMG_5260_zps4790339a.jpg

IMG_5264_zps295cd74b.jpg

IMG_5261_zps7d44b147.jpg

IMG_5254_zpsd5ae5d72.jpg

IMG_5257_zps2dc157c3.jpg

IMG_5330_zpse79c7138.jpg
 
Dave I see you have one of the newer tank /recoil assemblies and two of the newer flywheels. I'm surprised your not going down that road as it seems you have picked out the older style tank. I just dont like that friction shoe engagement in those little metal starter cups. They never grabbed good on my 051's. The starter pawl grabs and thats it. It also gives you the option of the coil with the external trigger, win, win. Also to make sure your decompression valve is working take the screw out of the cylinder and push/tap a no.0 or no. 1 philips screwdriver or 8p nail through the hole into the cylinder. Alot of time the hole gets filled with carbon and the decomp doesnt work or doesnt work properly. You'll be needing it!! lol Cant wait to see it powder coated!!!
 
Heres a good one. Good deal too. This guy always has fair prices and hes right up the street from me :)

http://www.ebay.com/itm/Stihl-TS-76...013289141?pt=US_Chainsaws&hash=item5b0a354cb5
PayPal'ed & enroute!

I actually picked the one at the bottom of the page. It was $25 more, but really nice & complete w/elasto-start.

The one that's still there is a good deal also. Wish I could afford both of them, as I want to build 051's big brother later on. Oh well, save one for somebody else.

Thanks a bunch, Rocky, for the link!!!
 
Dave I see you have one of the newer tank /recoil assemblies and two of the newer flywheels. I'm surprised your not going down that road as it seems you have picked out the older style tank. I just dont like that friction shoe engagement in those little metal starter cups. They never grabbed good on my 051's. The starter pawl grabs and thats it. It also gives you the option of the coil with the external trigger, win, win. Also to make sure your decompression valve is working take the screw out of the cylinder and push/tap a no.0 or no. 1 philips screwdriver or 8p nail through the hole into the cylinder. Alot of time the hole gets filled with carbon and the decomp doesnt work or doesnt work properly. You'll be needing it!! lol Cant wait to see it powder coated!!!

So is the thinner tank assembly the only one that works with the pawl type recoil? I was thinking I could take the guts from the thin one with the assembled recoil and install them in the new old stock fat case. I think I have all the pieces for a second pawl style recoil guts in the bins. I picked the tank I did because it is NOS and has a nice old style Stihl badge on it. But nothing is set in stone yet. Is the curved lightning centered flywheel the good one?
For the crankcase I picked the newest one with no damage, but I have to strip all the parts off of it before it can go to powdercoating- land. Thanks for your insight
DDave

Dave the newer style tank is the only one you have that has the box shape. It's missing the 3 screw fan cover. That is the pawl style. Do you have MC? If you want it send me a pm. The cover you picked the emblem only in perfect shape is worth 25$ that's why they are always stripped from the parts on flea bay. The flywheel is the one to the right I believe. I'm not at my comp right now but will check part numbers later. The one to the left I have not seen. Obviously we are talking about the only two you have that are pawl style. An external trigger and no more spark worries!! That one thin tank you have I have not seen before but I am no expert at anything except laying bricks, lol! Excellent pics, we all love and can learn so much from them. Great post!
 
I think that flywheel in the middle bottom should be pn 1111 1204 404. Look through your coils and see if you have any with an external trigger. Cheap enough if you dont. 25$ I think. I put one on an 051 last year and the kid I sold it too loved the saw! Pawl conversion and all :) Not saying the old style doesnt work but you cant go nuts pulling away at it or youll smooth out the starter cup and or friction shoes. I do like the 056 cup/shoe much better where the shoe bites into a plastic ring seated inside the fan cover, grabs much better. If you dont have a muffler dont forget to search for a TS760 muffler as they are the same on some of the saws.
 
Dave the fatter tank is for the 075/076. The thinner tank is for the 050/051 saw. Make sure you use the correct coil. There are two styles of coils. Look at tank 6 in your picture. It has a different mount for the coil. I think that tank is for an 051 that used points or the early style coil.
 
At the risk of sounding like an idiot I believe the flywheels and coils can be changed as long as they match. I've done it. Old style to new. In fact I'm going to do it in reverse as well, new style to old seeing as a good freind gave me an older style tank (WB) and I will put it to use, maybe on a demo saw.
 
Yes they can be changed but the tank cutout is different. I know this first hand. The newer coil doesn't fit the older design tank housing. If you have the new design, both style coils fit.

Ahhhh, good to know :) post #348 Dave shows some coils with side coil wire. This I havnt seen before, thanks Sefh, makes sense.
 
Yes the 075 tank has to be modified if you want to use the -1301 coil. I never realised this until reltaively recently, of the few conversions I had done it was virtually always upgrading to the pawl system from the -1305 coil or installing the -1303 module.

This is what happens with the -1301 coil and the "stock" 075 tank(friction shoe);
075-jpg.392339


This is what it should look like, -1301 coil with 076 tank (pawl);
076-tank-jpg.392340


You can take a carbide burr and files etc to the 075 (friction shoe) tank, the area you need to create clearance does not actually form part of the gas tank. It is also far enough away from the seam in my opinion not to cause a weakness should you ever need to split the two halves.

Also, you may choose to chamfer where the tank comes into contact with the HT lead (the 076 tank has this from the factory). It will likely rub if not. Don't go crazy as that is the shoulder of the gas tank! Alternativley, you can just unclip the HT lead and make it follow a slightly different route.

"Modified" 075 tank with -1301 coil;
075-tank-modified-jpg.392341
 

Attachments

  • 075.JPG
    075.JPG
    76.8 KB
  • 076 tank.JPG
    076 tank.JPG
    84.8 KB
  • 075 tank modified.JPG
    075 tank modified.JPG
    69.9 KB
Yes the 075 tank has to be modified if you want to use the -1301 coil. I never realised this until reltaively recently, of the few conversions I had done it was virtually always upgrading to the pawl system from the -1305 coil or installing the -1303 module.

This is what happens with the -1301 coil and the "stock" 075 tank(friction shoe);
075-jpg.392339


This is what it should look like, -1301 coil with 076 tank (pawl);
076-tank-jpg.392340


You can take a carbide burr and files etc to the 075 (friction shoe) tank, the area you need to create clearance does not actually form part of the gas tank. It is also far enough away from the seam in my opinion not to cause a weakness should you ever need to split the two halves.

Also, you may choose to chamfer where the tank comes into contact with the HT lead (the 076 tank has this from the factory). It will likely rub if not. Don't go crazy as that is the shoulder of the gas tank! Alternativley, you can just unclip the HT lead and make it follow a slightly different route.

"Modified" 075 tank with -1301 coil;
075-tank-modified-jpg.392341
 
You can take a carbide burr and files etc to the 075 (friction shoe) tank, the area you need to create clearance does not actually form part of the gas tank. It is also far enough away from the seam in my opinion not to cause a weakness should you ever need to split the two halves.

Also, you may choose to chamfer where the tank comes into contact with the HT lead (the 076 tank has this from the factory). It will likely rub if not. Don't go crazy as that is the shoulder of the gas tank! Alternativley, you can just unclip the HT lead and make it follow a slightly different route.

Just be careful when cutting the tank down. If you go too far into the tank you will create a hole and fuel will leak from there when tipped up. JB Weld works good to fill in the hole if needed.
 
It sure looks like the one I circled is modified already. Am I missing something?

That is a 076 (pawl) tank. They don't need any modification as the -1301 coil was stock on them. The 075 (friction) tank will fit fine over the -1305 coil (which was stock) or the much later -1303 module but has clearance issues with the -1301 coil.
 
Back
Top