McCulloch Chain Saws

Arborist Forum

Help Support Arborist Forum:

This site may earn a commission from merchant affiliate links, including eBay, Amazon, and others.
I have not noticed that post before, that is quite the tree! What was the diameter at the base? An absolutely beautiful piece of wood!

Thanks for posting that great pic!
Brian and Tina

just a back yard sequoia , the butt flare at ground was about 12' dbh about 7'.
 
I too have seeen the picture before in post 13364 and was curious why it was cut that way. Was the heart shaped top part to fit in the notched part when the back cut was made?

Ray

35' stem left . was my take on what i wanted it to do. to stay on the stump and roll off to the right because of limited space. would have done a humboldt but the stump was carved in to a circular bench and grizzly ,. it worked , ugly but i learned some different ways to do what i wanted it to do. by theway that that thing pizzed me off from all the metal that was in it. lots of double bevel useage on that one. i need to go back and see how dave did on the carving.
 
attachment.php
page 890 it is.

that has a higher than average pucker factor for me.
 
just fix the thing.

Alright ostrich, I think this will fix it...

Here are the pics of the block off/flow redirecting plate I made...

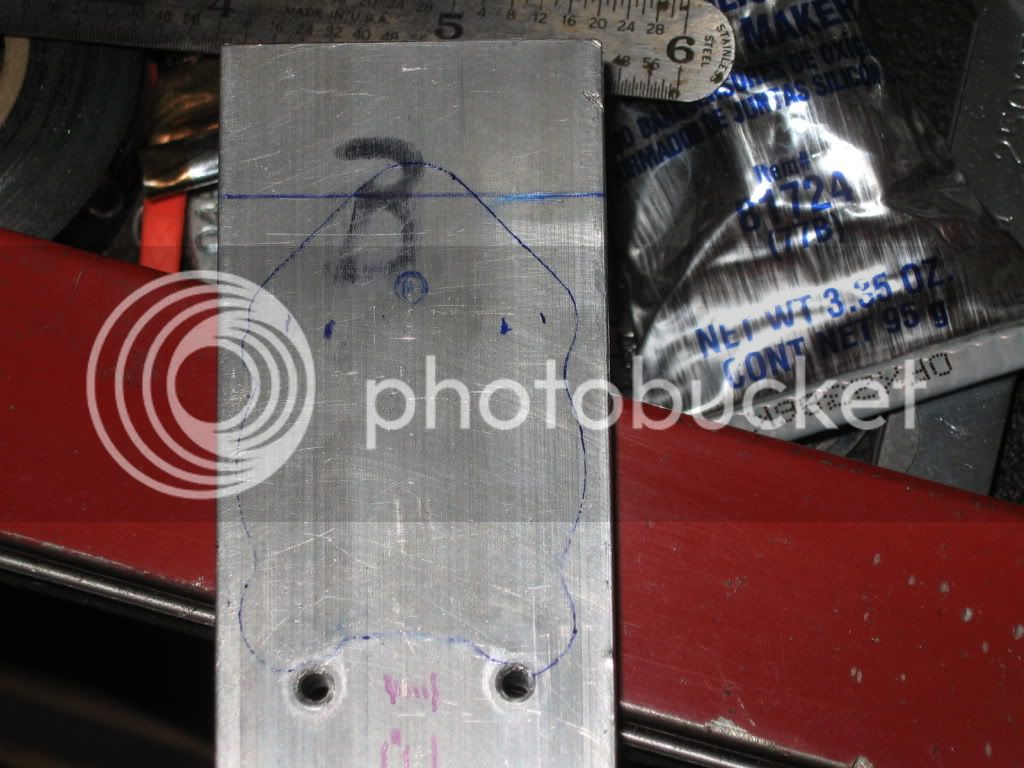
This is the starting point... a rough sketch...

oilerblockoffplateroughsketch.jpg


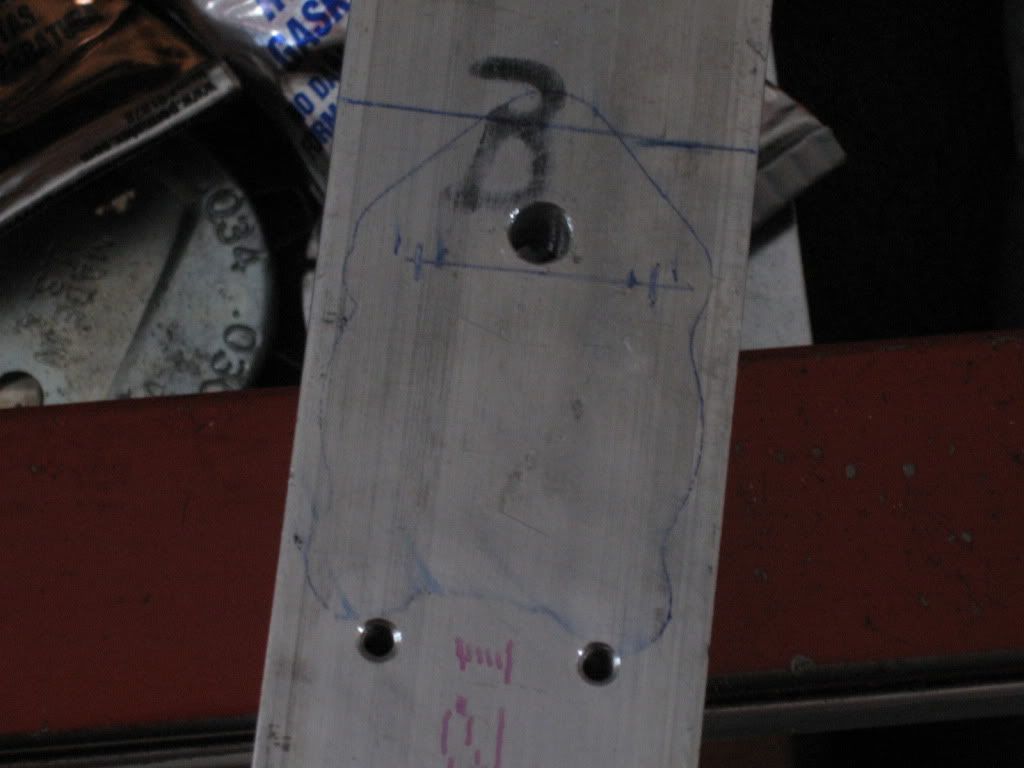
Then we got this... the mounting hole is drilled, and the spots for the oil entry/discharge holes were found...

oilerblockoffmountingpoint.jpg


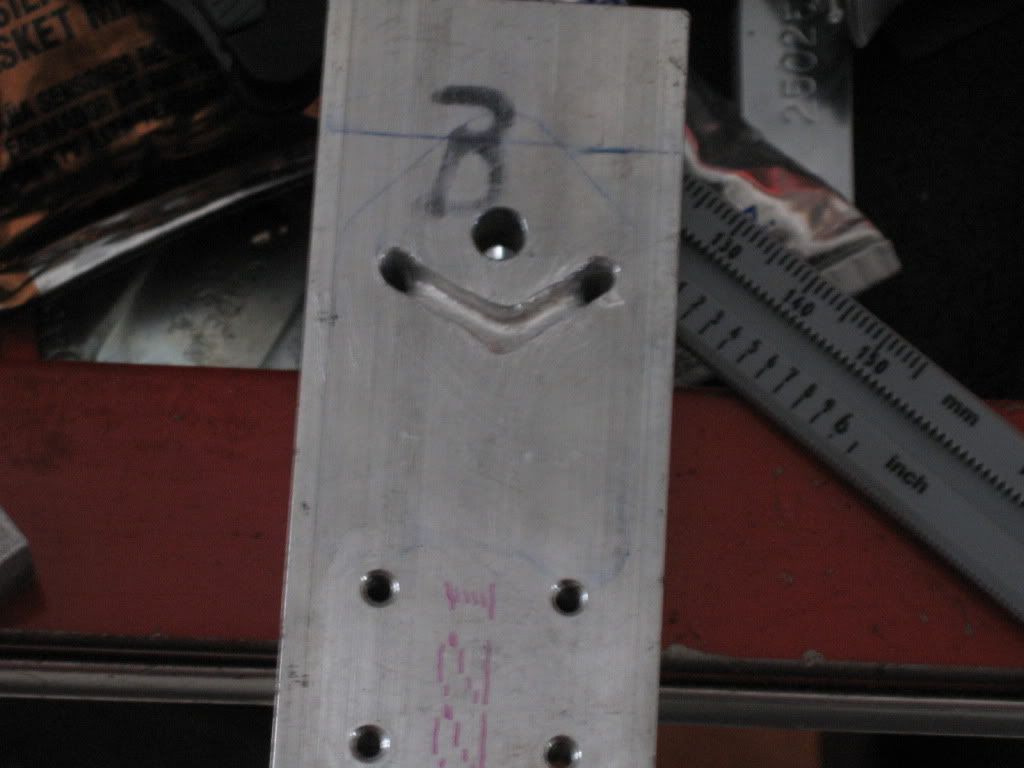
And the channel is cut to connect the two holes... sorry, this one is a tad blurry...

oilerblockoffoilchannel.jpg


Then I made the top cover, and a gasket for said cover... the gasket has the channel cut into it as well.

oilerblockoffplatecomplete1.jpg


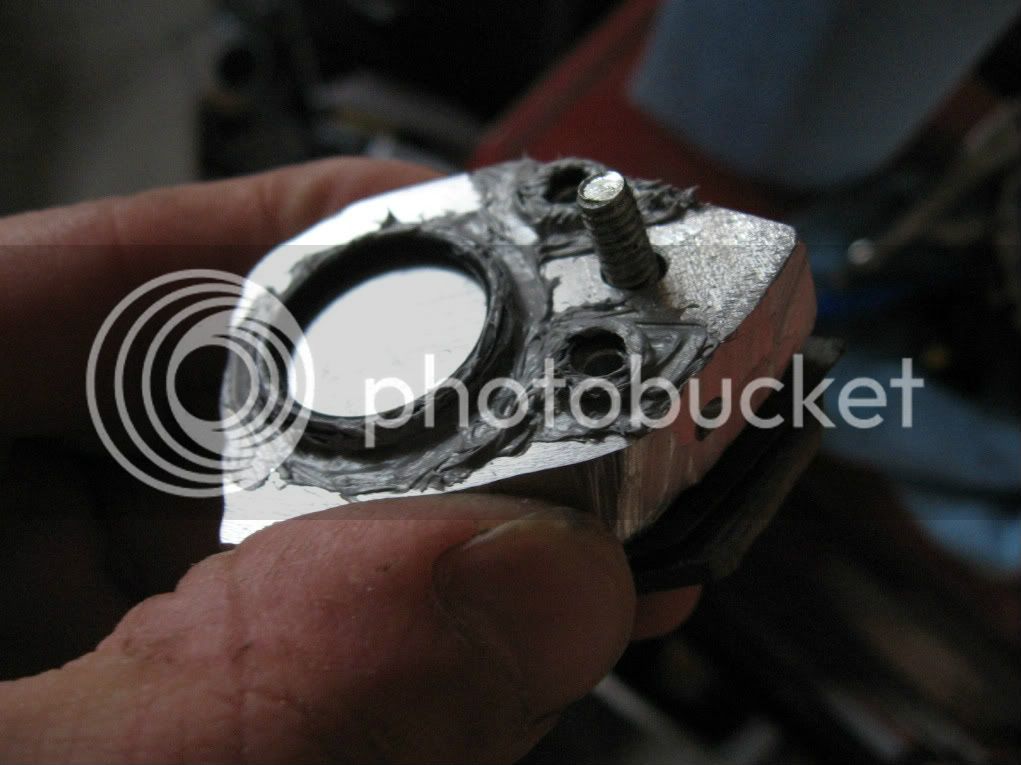
And here I used some RTV to make the o-rings stay put... this is curing as we speak...

oilerblockoffplatecomplete2.jpg


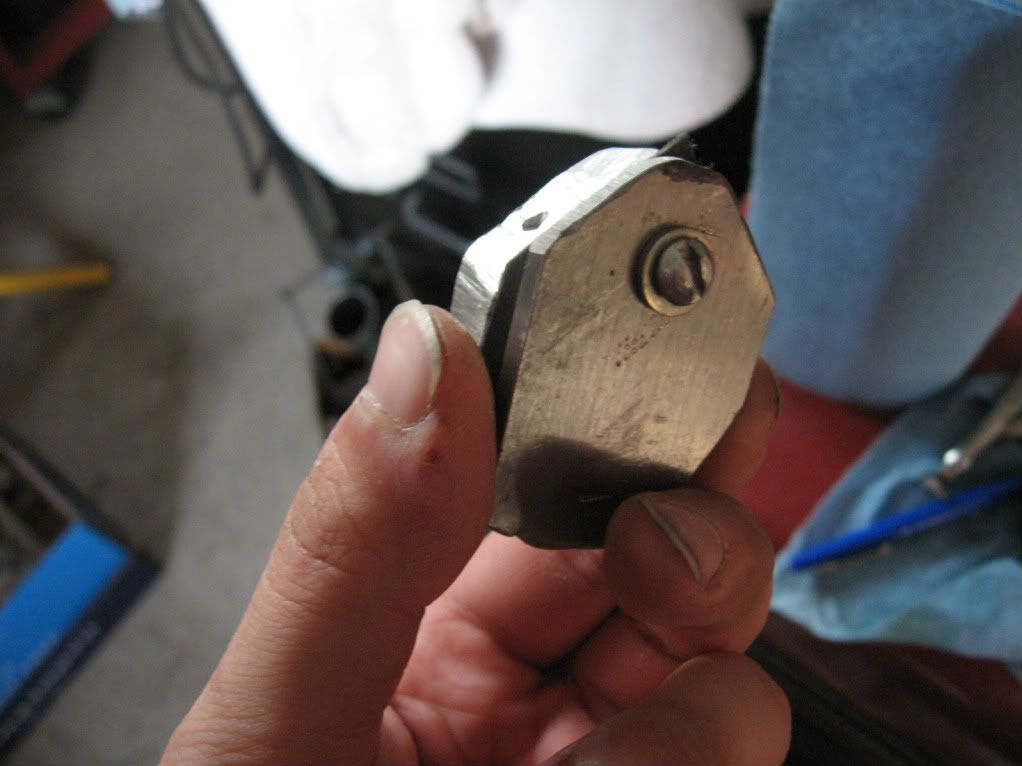
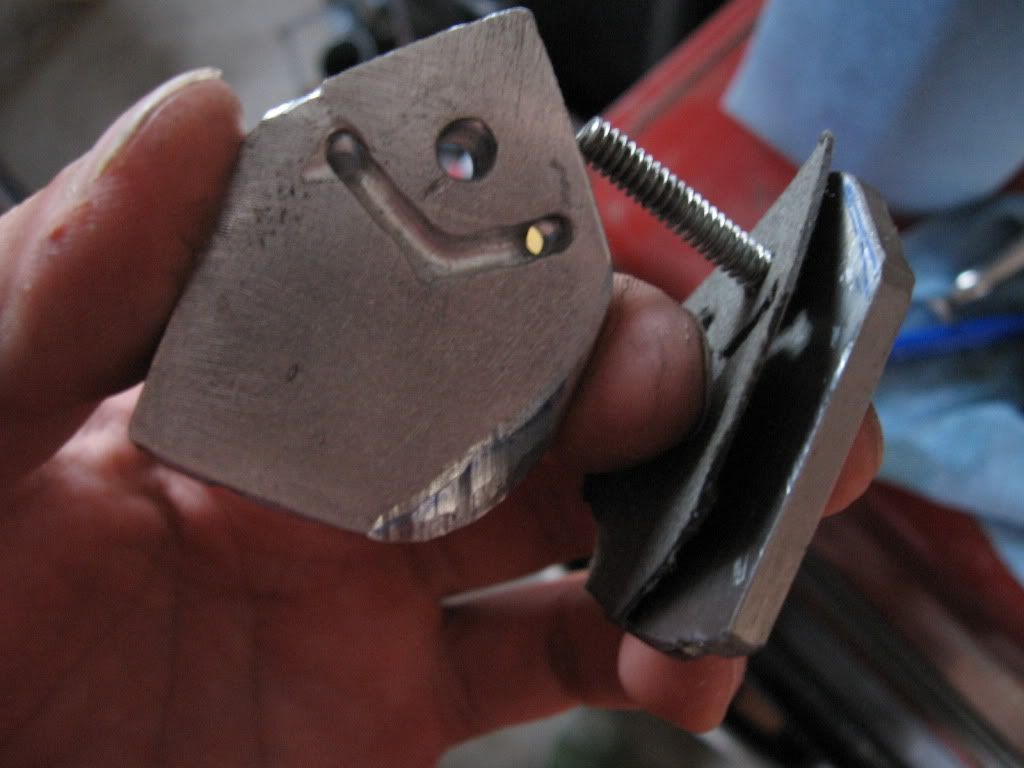
And an inside view...

oilerblockoffplatecomplete3.jpg


Notice the relief cuts on the bottom right corner of the plate... that's to clear the boss that the oil tank cover screw goes into...

I also had to find a slightly longer screw that would actually work... the original screw is about 3/8" too short and will not even grab the mounting threads in the oil tank...


Took me from about 11 to 5 to get this little plate done. Made me wish I had a Bridgeport and a vertical band saw... I used files, the Dremel, my benchtop drill press, and a couple other tools to get this done... and lots of elbow grease.

I'm think I'm gonna go get me some supper... then check on the rtv and if it's cured, I'll slap it all together and test the oiler on the bench... If it passes the bench test, then I'll put her all back together, fill her up, and make some cuts. Worst case is we find out that the o-ring that is supposed to seal off the crankcase from is not working... white smoke in copious quantities will show if that occurs...
 
Alright ostrich, I think this will fix it...

====...
Well, that is an impressive bit of machining on what amounts to hand tools, determination, and good intentions. You earned my sincere compliments. :rock:

That solution isn't exactly a fix, though. Everyone is different and this observation may not apply to you; I notice that lots of folks just go with what they know rather than determining the root cause of a problem - - I caution you that having a good (borderline great) work-around like this will deter most people from finding the real fix; they will just make do with what gets them by.

V/R --- Vic
 
Last edited:
Well, that is an impressive bit of machining on what amounts to hand tools, determination, and good intentions. You earned my sincere compliments. :rock:

That solution isn't exactly a fix, though. Everyone is different and this observation may not apply to you; I notice that lots of folks just go with what they know rather than determining the root cause of a problem - - I caution you that having a good (borderline great) work-around like this will deter most people from finding the real fix; they will just make do with what gets them by.

V/R --- Vic

Well then, I reckon I misunderstood what you were trying to say when you said "Fix it." I've deemed the auto oiler plugged beyond fixing.

Or if someone wants to show me what a 'rebuildable' auto oiler looks like so I can drill the one I have in the same place and fix it, then that would be much appreciated... it'd be much easier to seal up the top of that auto oiler case thing with a plate and a nut like the rebuildables than making this block off plate seal up right. The o-rings didn't do the trick. Leaving the gasket on there might have been part of the problem too...

Those that think they should be making a block off plate... don't do it. It was a PITA. Really. Lots of grinding, cutting, and a bit of swearing. If anything, I learned how much a PITA this kind of work is without a Bridgeport and a couple other handy tools that seem to cost a lot of money.


I'm gonna jump back onto the 790 project tomorrow. I'll be grabbing some more baking soda and some self etching primer as well. Just want to get those parts blasted and primed so that they are ready for paint. I'll also grab some stuff that I need to finish that stupid trimmer that's robbing bench space as well.


I still haven't heard back from that guy that said he was going to dig that parts NU-17 out of his barn... so that Pioneer is in the way of the Super 44A that needs a crank.

And then the compressor whose head I sent off to another guy here is sitting on the floor, and there's crap all over the top of my toolboxes, and the table, and the benches... it's also quite fun to nearly die tripping over the air hose as I'm trying to find something or get somewhere...


Oh, I forgot to mention that I got the carby kits in the mail yesterday, as well as a couple of rim sprocket clutch drums for the Super 44A and maybe the 1-43. Or the 1-76 if I can find a donor saw for the fuel tank, etc. Then that donor saw would need a donor saw, and so on... "They keep spawning... and I don't have a damn thing to do with it." :D
 
A little bit of McCad today

On my way home from a confused road trip, I thought I swing by a shop I'd visited a long while back to see if they'd accumlated any old saws. When I walked in the guy working immediately recognized me (not sure why, I didn't buy anything last time) and asked me a wait a minute while he gave the boss a call as he thought he has something for me to look at.

Long story short, I can home with 13 more saws, 3 of which I think will be rather nice additions to the collection or just to fix up and trade for something even more interesting.

First shots contains most, but not all of them. 10-10, PM10-10, 35, 35, 3214, 310, 610, PM700, 1-71, 4-30, an empty case, and the Remington 660.

attachment.php


attachment.php


The 4-30 is in pretty good shape overall and the PM700 will only need a little cleaning of the fuel tank.

A little more ####ering and he added a Super 33 and another plastic Mac, 2014 or something like that. The Super 33 has a sort of full wrap handle and a guard that I have never seen before.

attachment.php


In addition to the saws they added an Oregon file / guide and a stump vise plus a couple of screnchs, files, and some literature.

attachment.php


No time to play with any of this as I hit the road tomorrow, but should be a great incentive to get home.

Mark
 
Last edited:
Oiler bad - maybe not.

While Kyle has been fiddling with his oiler, and oiler bypass, I picked up a PM800 powerhead off eBay that the Seller said he was selling because he was tired of fooling with the oiler. I looked the saw over real good tonight. I believe, and I'm hoping, that he just neglected to check his bar as the clutch side of the saw is covered in oil, including the lower part of the muffler. You can see where oil has burned and sooted up the lower portion of the muffler guard. You can also see where he snipped pieces out of the inner chain shield to exposed the oil port in his attempts to get oil to the bar. I also spent 20 minutes tonight with a dental pick cleaning the rails of a used 24" bar I bought - not the first one that has taken me this long to clean - so I know bars get neglected. Now that it is cleaned and dressed, I plan to run this bar on the saw. I'll know Saturday whether or not the oiler works and I'll report back with pictures if my wife's camera is available.

I hope the saw runs as good as it looks. Recoil rope has been replaced with a smaller diameter rope so I was only able to get a single pop at a time when I checked the compression. I ran out of steam when it hit 152 psi. You can hang it from the cord, but I haven't convinced myself yet that this is a reliable test of compression. This saw is one of the later ones with the DSP so actual cranking should be no problem.

I also noted that the bar adjustment nut has been replaced with what appears to be a homebuilt model that is much beefier - this is something I have been planning on making for a long time as these 82cc MACs have more grunt than the stock nut and bolt will take. You can only flatten the nut out so many times before the tip breaks rendering it useless. And you can only straighten the stock bolt so much. (HINT to Kyle: Why don't you turn your oiler bypass energies towards making some tough bar adjustment assemblies for your MAC friends? They would make great Presidents' Day gifts.) :cool2: Ron
 
A little more ####ering and he added a Super 33 and another plastic Mac, 2014 or something like that. The Super 33 has a sort of full wrap handle and a guard that I have never seen before.

the super 33 or silmilair i sold a while back had one of those handle bars. it was rusted real bad so i put the half handle on it. you're right though, those seem to be rare. i saw one of feebay a while back for around $40
 
Mark, great haul you made there. Ron

Another Hint for Kyle: Use a grade 8 allen head screw for strength and so you can use a ball end allen wrench to gain some knuckle clearance. :smile2: Ron
 
Alright... some super duty adjustment screws and tabs will be made next... I have to run to ace hardware tomorrow anyhow to get a primer bulb for that trimmer. I'll grab some bolts and stuff there.

Mark, you just are blessed when it comes to McCullochs. Seems like everyone knows who your are and what your hobby is.
 
It cuts fine, learn how to file the depth gauges, and it will serve its purpose. You will need a depth gauge, and the normal one with the gauge on the end does not work nearly as well as the Oregon one made for that chain, with it in the middle. Its not LGX or LPX, and to spend money on it purposely is not recommended. Getting it on a new to you saw is different, or getting it free or close to that price is the best value for your money.
 
While Kyle has been fiddling with his oiler, and oiler bypass, I picked up a PM800 powerhead off eBay that the Seller said he was selling because he was tired of fooling with the oiler. I looked the saw over real good tonight. I believe, and I'm hoping, that he just neglected to check his bar as the clutch side of the saw is covered in oil, including the lower part of the muffler. You can see where oil has burned and sooted up the lower portion of the muffler guard. You can also see where he snipped pieces out of the inner chain shield to exposed the oil port in his attempts to get oil to the bar. I also spent 20 minutes tonight with a dental pick cleaning the rails of a used 24" bar I bought - not the first one that has taken me this long to clean - so I know bars get neglected. Now that it is cleaned and dressed, I plan to run this bar on the saw. I'll know Saturday whether or not the oiler works and I'll report back with pictures if my wife's camera is available.

I hope the saw runs as good as it looks. Recoil rope has been replaced with a smaller diameter rope so I was only able to get a single pop at a time when I checked the compression. I ran out of steam when it hit 152 psi. You can hang it from the cord, but I haven't convinced myself yet that this is a reliable test of compression. This saw is one of the later ones with the DSP so actual cranking should be no problem.

I also noted that the bar adjustment nut has been replaced with what appears to be a homebuilt model that is much beefier - this is something I have been planning on making for a long time as these 82cc MACs have more grunt than the stock nut and bolt will take. You can only flatten the nut out so many times before the tip breaks rendering it useless. And you can only straighten the stock bolt so much. (HINT to Kyle: Why don't you turn your oiler bypass energies towards making some tough bar adjustment assemblies for your MAC friends? They would make great Presidents' Day gifts.) :cool2: Ron

Now I know who outbid me at the last minute.:msp_smile: Great score.

Jeff
 
Alright... some super duty adjustment screws and tabs will be made next... I have to run to ace hardware tomorrow anyhow to get a primer bulb for that trimmer. I'll grab some bolts and stuff there.

Mark, you just are blessed when it comes to McCullochs. Seems like everyone knows who your are and what your hobby is.

The allen bolt ace hardware had won't work... they don't thread the bolts all the way to the shoulder. :bang: So I didn't buy any of those. They didn't have the primer bulb, nor the fuel line that I needed. I'll be off to another power equipment place after lunch.

I'll keep looking for the right bolt... as for the little adjustment tabs, I'm still trying to figure out the best way to make those...
 

Latest posts

Back
Top