Stihl "log" side cover tags - PUT YOUR NAME DOWN!

Arborist Forum

Help Support Arborist Forum:

This site may earn a commission from merchant affiliate links, including eBay, Amazon, and others.
Red's fine with me as I only have older saws!

The angle is also no problem here!

On another question: How do people remove the old rivets from an old faded scratched logo and how do you re rivet the new tags?

...Carl


A fine screwdriver under the end of the tag, lever up and the badge will pop out with the rivets still in it - push them out of the badge, push them into the new badge, and just press them into the case. They aren't proper rivets with a spread head at the other side, they just push into a blind hole and hold by friction.
 
A fine screwdriver under the end of the tag, lever up and the badge will pop out with the rivets still in it - push them out of the badge, push them into the new badge, and just press them into the case. They aren't proper rivets with a spread head at the other side, they just push into a blind hole and hold by friction.

:yourock:

Great response Patrick...I tried to rep you but I've already repped you too often according to the site police...Carl
 
Sounds good so far, I can't see it being a problem. Still, would like all the feedback possible so keep it coming!
 
Ok, I'll speak to him again tomorrow and see if he will just send me a blank - I presume it will be fast to do as it just needs to be cut and drilled. Or punched, or whatever way they do it.
I'll report back and show the blank against my NOS side cover, and see if anything needs altered. He knows how awkward I am being with regards to quality, so one thing I need to make sure of is that he knows the holes in the covers are pre-drilled, and blank - i.e. you're not going to be drilling new holes in your saw if his badges are drilled wrongly.
Nice guy, easy to deal with, and I appreciate him telling me what may be problems rather than just banging out 400 wrong badges and sticking them in the post...
 
UPDATE -there is no update yet. I'm still waiting on him to phone me back. If he hasn't called by Friday, I'll ring and give him some verbal abuse to hurry things along. Presume he is a bit backed up on orders due to being off sick, but this is unacceptable...
 
UPDATE -there is no update yet. I'm still waiting on him to phone me back. If he hasn't called by Friday, I'll ring and give him some verbal abuse to hurry things along. Presume he is a bit backed up on orders due to being off sick, but this is unacceptable...

I'm in no rush. Thanks for taking this on Patrick.
:cheers::cheers::cheers:
 
Update - he's sticking an unprinted bare ally logo in the post today, so I can make sure it fits right in the recess on the side cover - if it was a mm wider all round I doubt it would fit! And also to check the rivet hole placement...
 
UPDATE UPDATE, PROPER REAL UPDATED UPDATE!

The blank, unprinted and undrilled badge arrived today.
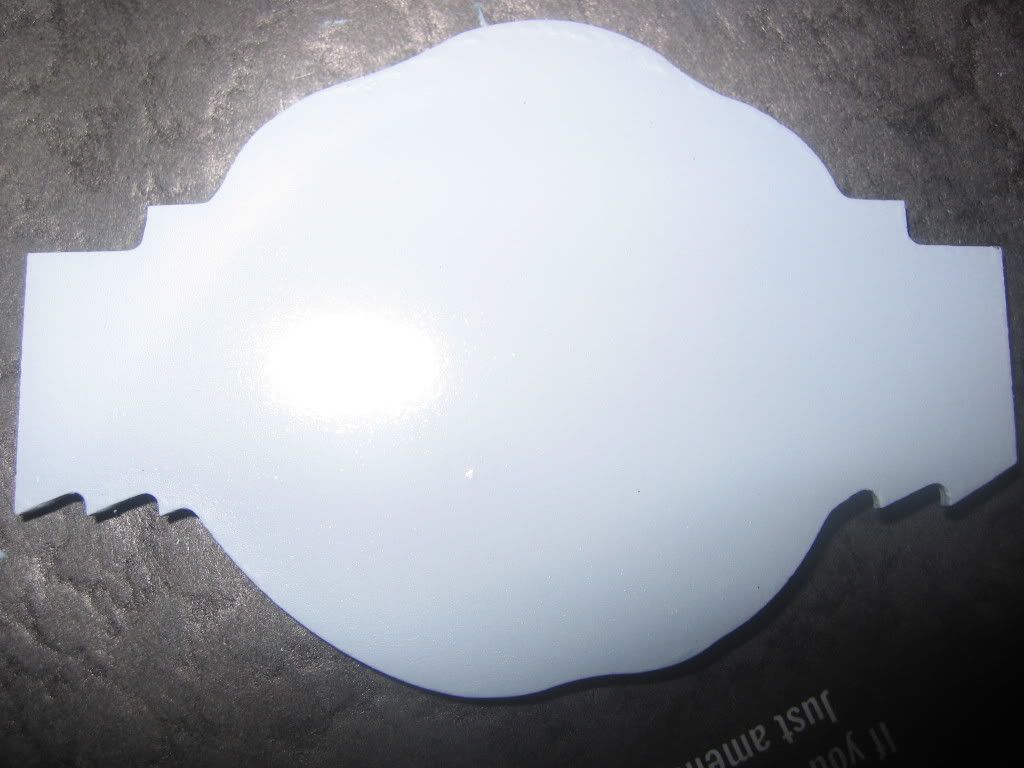
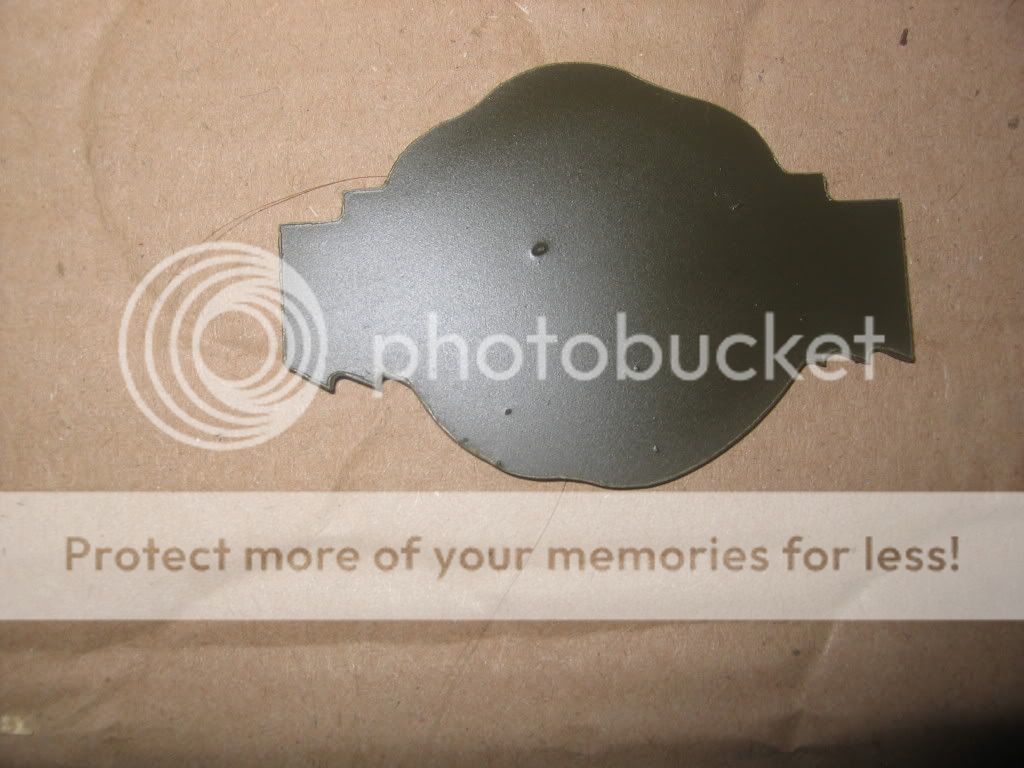
He's got the profile absolutely bang on, EXACTLY as the original badge except for the inner saw tooth radius as mentioned a few posts back. The thickness is also perfect. My camera is at work, so I'll bring the badge and a NOS casing in tomorrow to take a few pictures and post them up for approval.
The inner radius won't be a problem, but I'm not going to touch it up with a file, so that people can see exactly what they will be getting, and how much of a non-issue it will be to stroke them with a file a couple of times.
I am extremely satisfied with the quality, and I am extremely picky!
Once the pictures are up (about 18 hours time, max), perhaps as many people as possible could comment to say it's fine (or that they no longer want any for any reason, it's not an issue at this point if you have changed your mind as no money has changed hands and no final order made) - I don't want to be stuck with a load of badges and be out of pocket.
After a couple of days have passed so that everyone who has indicated an interest can see the picture and say "Yay" or "Nay", I'll get on the phone and order the finished items, pronto.
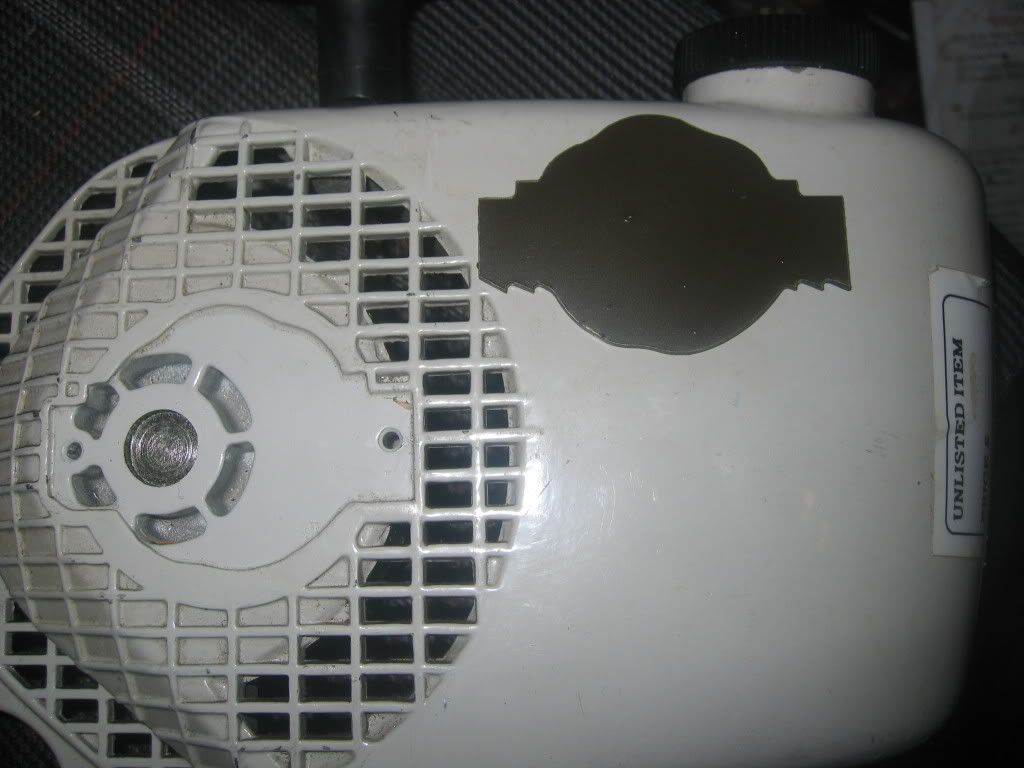
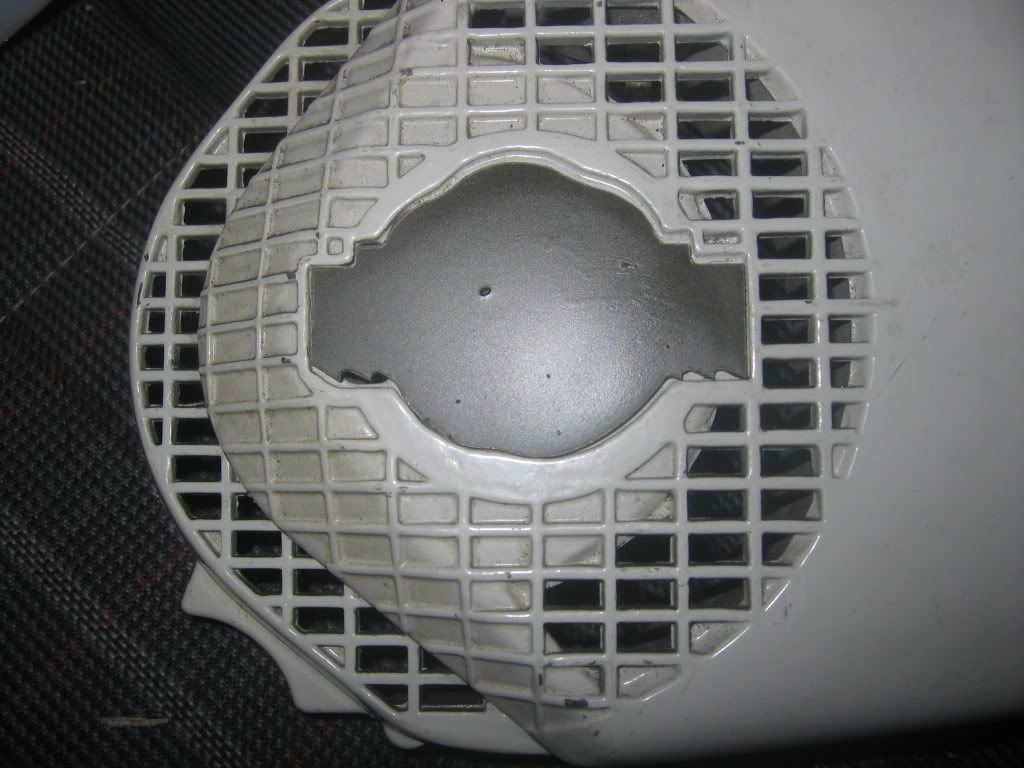
Have to say, I'm delighted with the results so far - a perfect fit in the cover recess!:clap::clap:
 
Just found my old digicam, so may be able to have pictures up in an hour or so - having trouble finding somewhere sufficiently bright in my squalid hovel of a home to take pictures, and have also had to give the bare ally badge a coat of etch primer to minimise reflections from the flash!
 
Oops, putting a freshly primed badge under the broiler at full heat does not dry the paint faster - it just bubbles it. :censored:
Fresh coat of primer applied, I suppose it'll have to dry naturally... :D
 
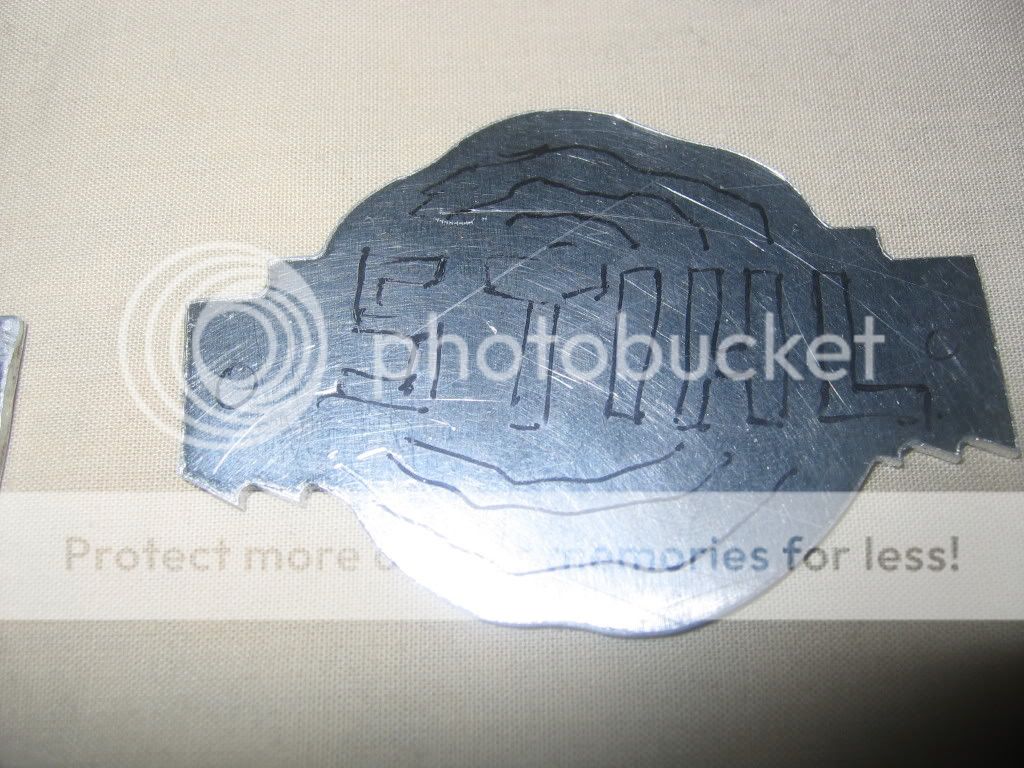
Right, a few pics to show the sample. Had to paint it with primer on the back to kill reflections, and NATO matt green on the front for contrast! It looks great, the pictures really do not do it justice - and of course, the scribbled logo on the shiny badge is just for reference, not the actual artwork!

IMG_4849.jpg


IMG_4855.jpg


IMG_4856.jpg


IMG_4857.jpg


IMG_4858.jpg


Please excuse the dodgy old rattle-can finish, it's the only matt paint I have lying around!
 
The pictures don't really do it justice - particularly the one where it is on the side cover, it looks "gappy". But the two original badges I have are actually just the same - I'd never noticed until I compared them!
 
Back
Top